Building a Roll-Off Roof Observatory on my Terrace
One of my hobbies is Astrophotography, and one of my long-term dreams was to build a permanent observatory on my terrace. In this article, I document the building of a roll-off roof observatory on my terrace and the installation of two piers to hold the astrophotography equipment. This project was completed in October 2024.
My Previous Setup
Earlier, I had installed a single pier on the terrace with an enclosure that had wheels, which I would slide over the telescope during the daytime. Below are a few pictures of this setup.

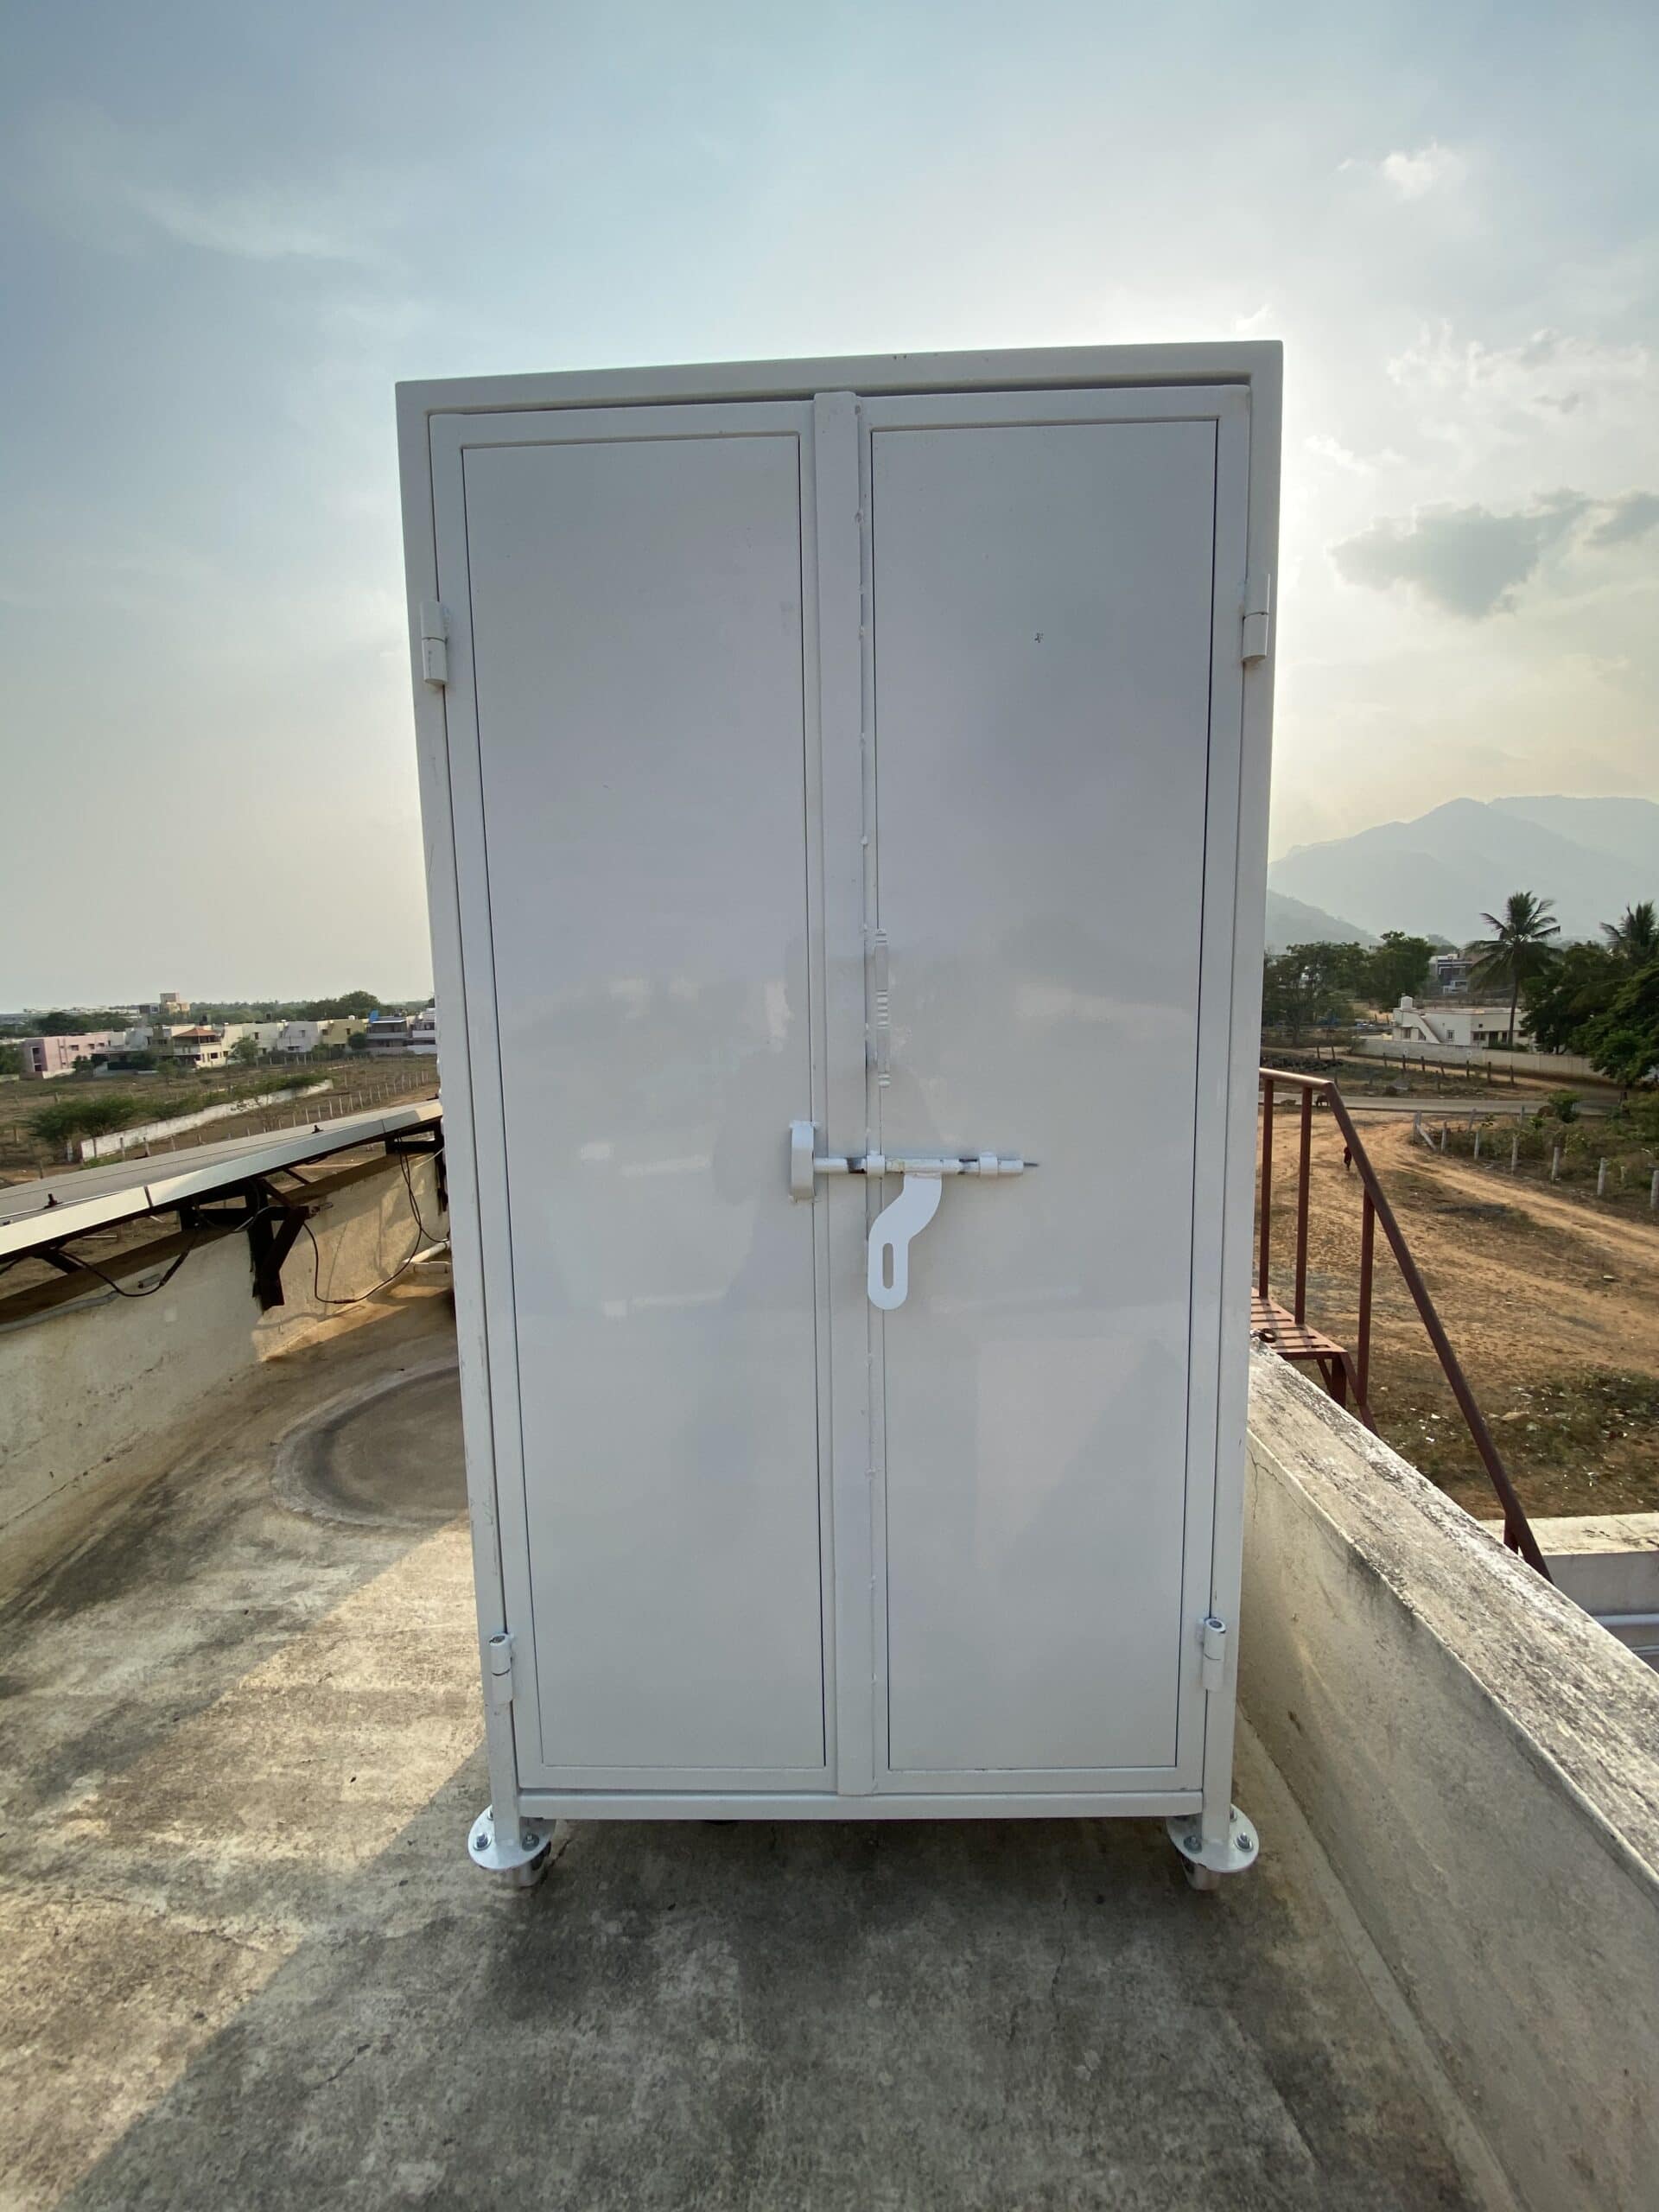
This setup served me well for a few years. However, this became inadequate for several reasons.
- The enclosure was not big enough to cover the 8″ RC telescope that I purchased to photograph deep space objects like galaxies and planetary nebulae. So, whenever I used the 8″ RC telescope, I could only cover the setup with a car cover, and not the rolling enclosure.
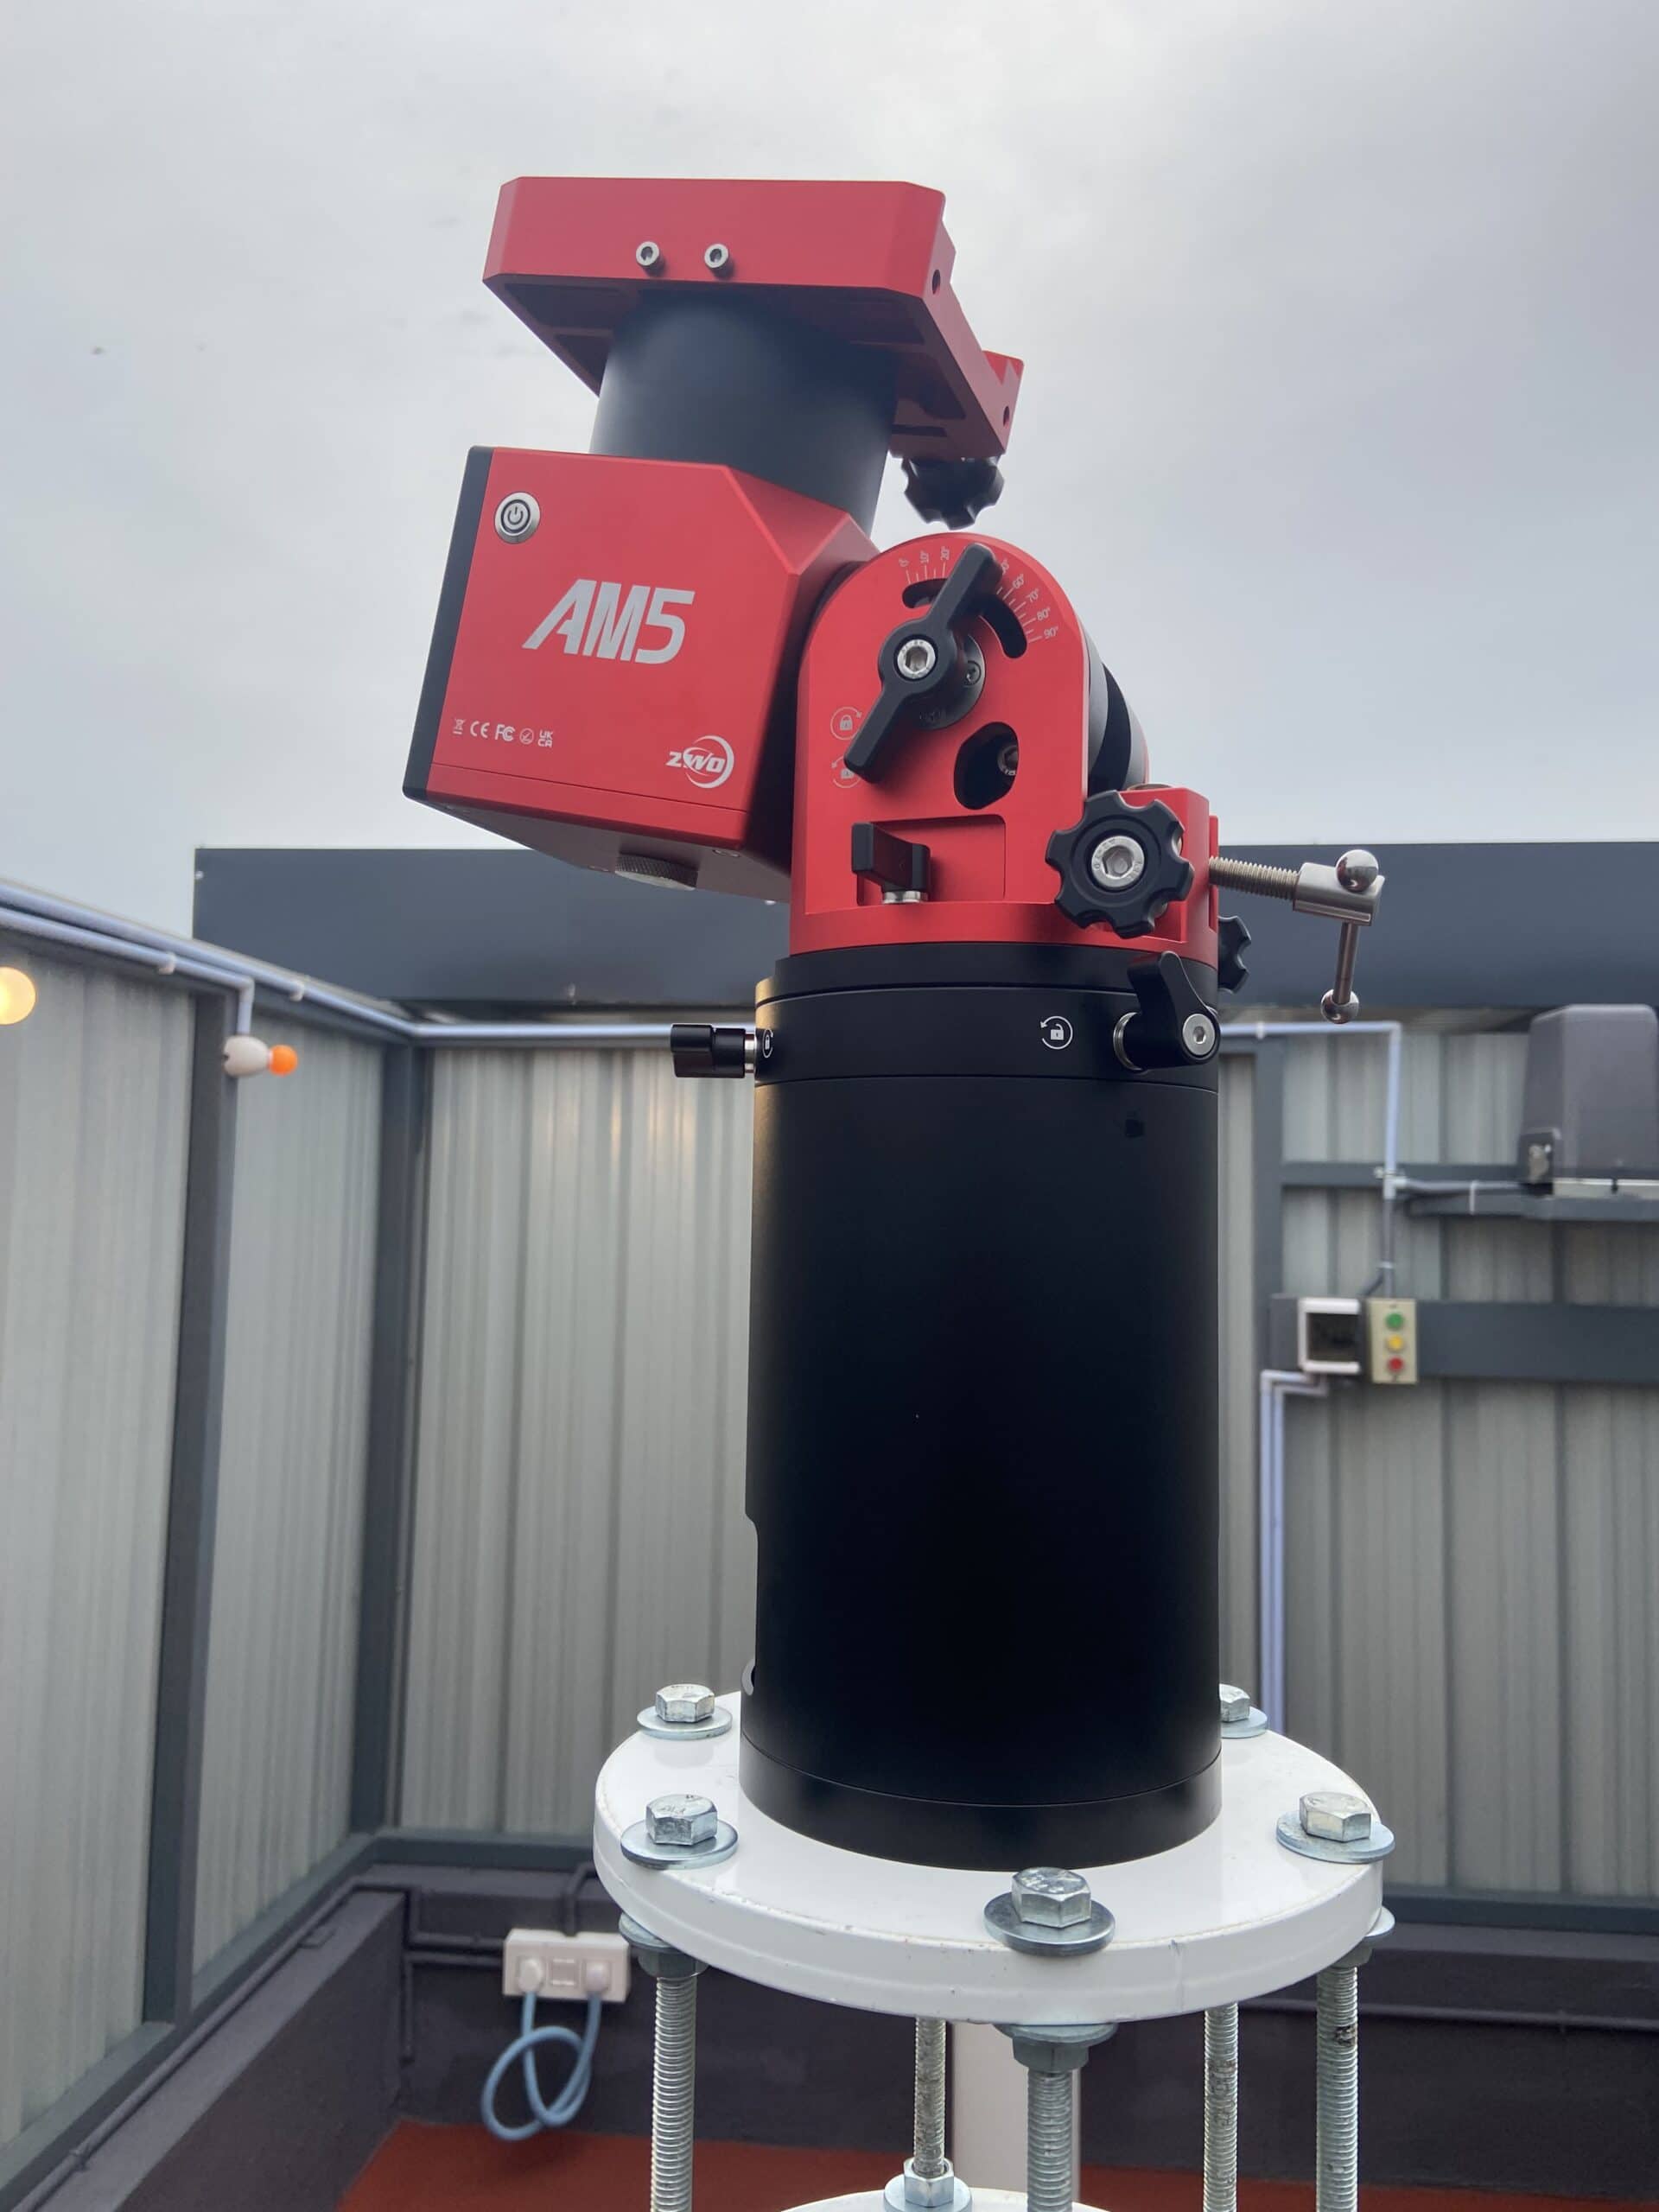
- In 2023, during my road trip to Hanle for Astrophotography, I bought a ZWO AM5 harmonic mount, which was easy to carry on a road trip. I could not set up both the mounts at the same time, as there was only one pier
So, in 2024, during the off-season (8 months happen to be off-season for me here in Coimbatore), I decided to finally go ahead and build the roll-off roof observatory.
Choosing the type of observatory
There are two types of observatories to choose from.
The Dome Type Observatory:
The dome-type observatory is the ideal one, featuring a spherical dome with a window on the roof. The roof rotates to align this window with wherever the telescope points. All professional observatories are built in this model. A picture of such an observatory is shown below.
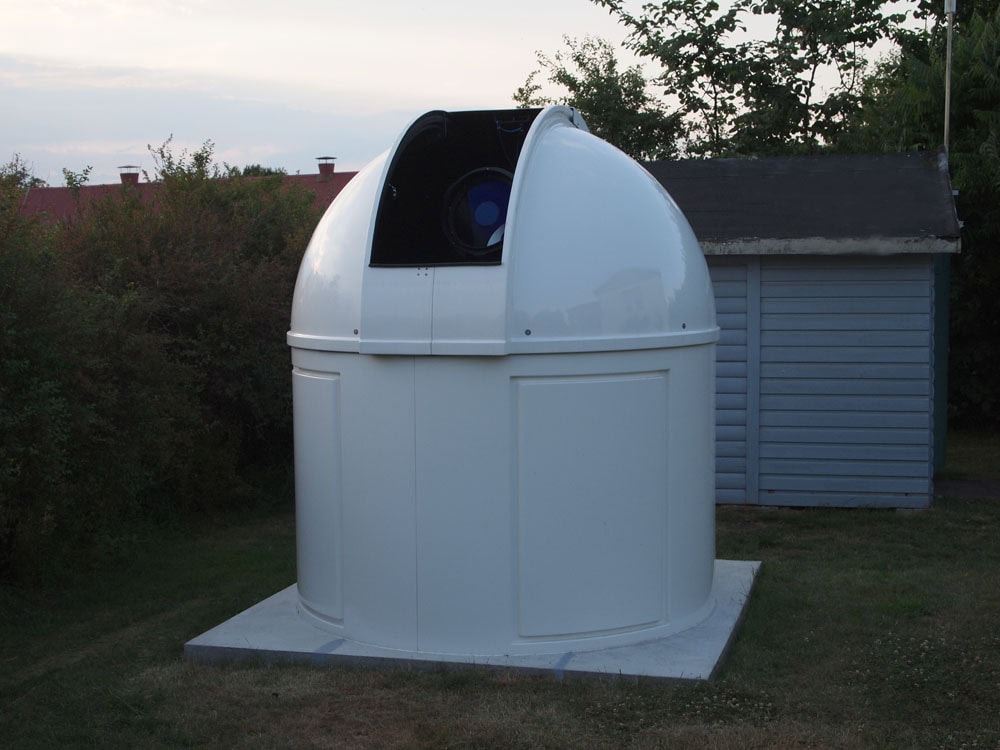
Image credit and source: https://osterlenobservatory.com/observatory/
The advantage of a dome-type observatory is that it can withstand high winds due to its spherical construction and the narrow window opens only a part of the dome through which the telescope points. The disadvantage is that this type of observatory requires more space and can only hold one telescope.
Roll-off Roof Observatory:
The second type is the roll-off-roof observatory. In this design, the observatory is a rectangular room housing the telescopes. The roof slides out on rails, exposing the sky. The advantage of this type of observatory is that it can be constructed where there is a space restriction and it can house multiple telescopes. The pictures below show the design of a roll-off-roof observatory.
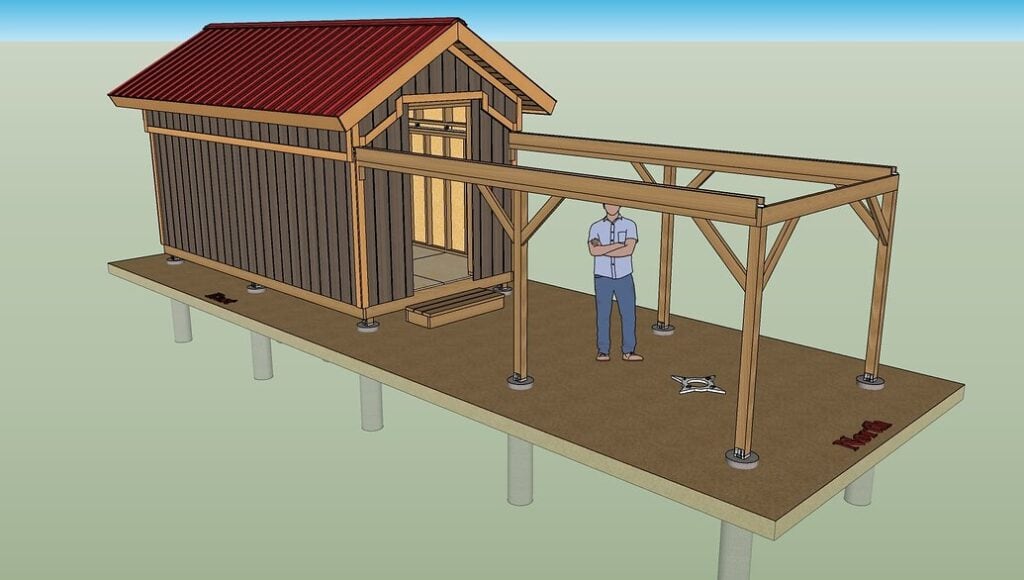
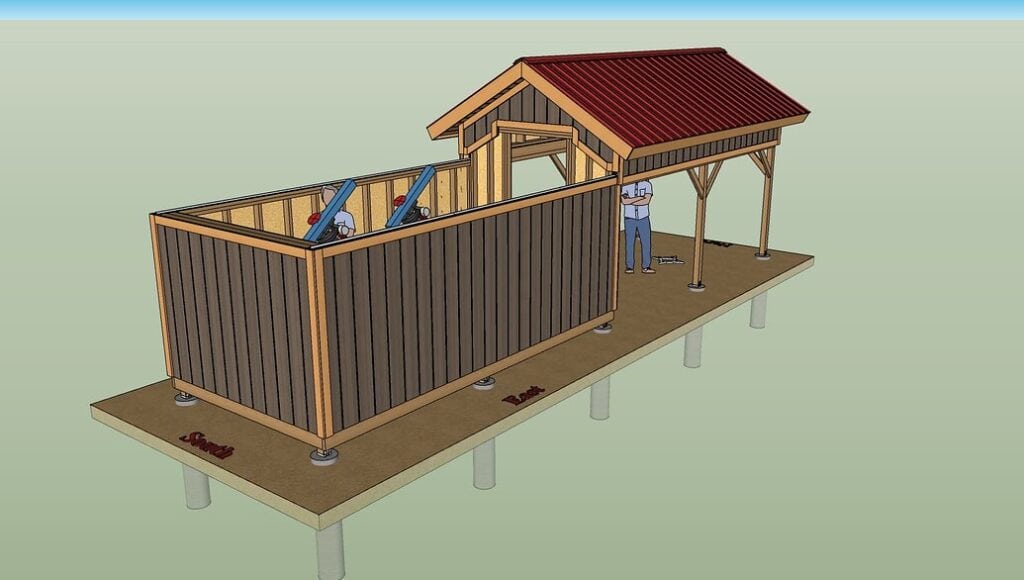
Image source and credit: https://forums.sketchup.com/t/personal-astronomy-observatory-shed-with-roll-off-roof/222985
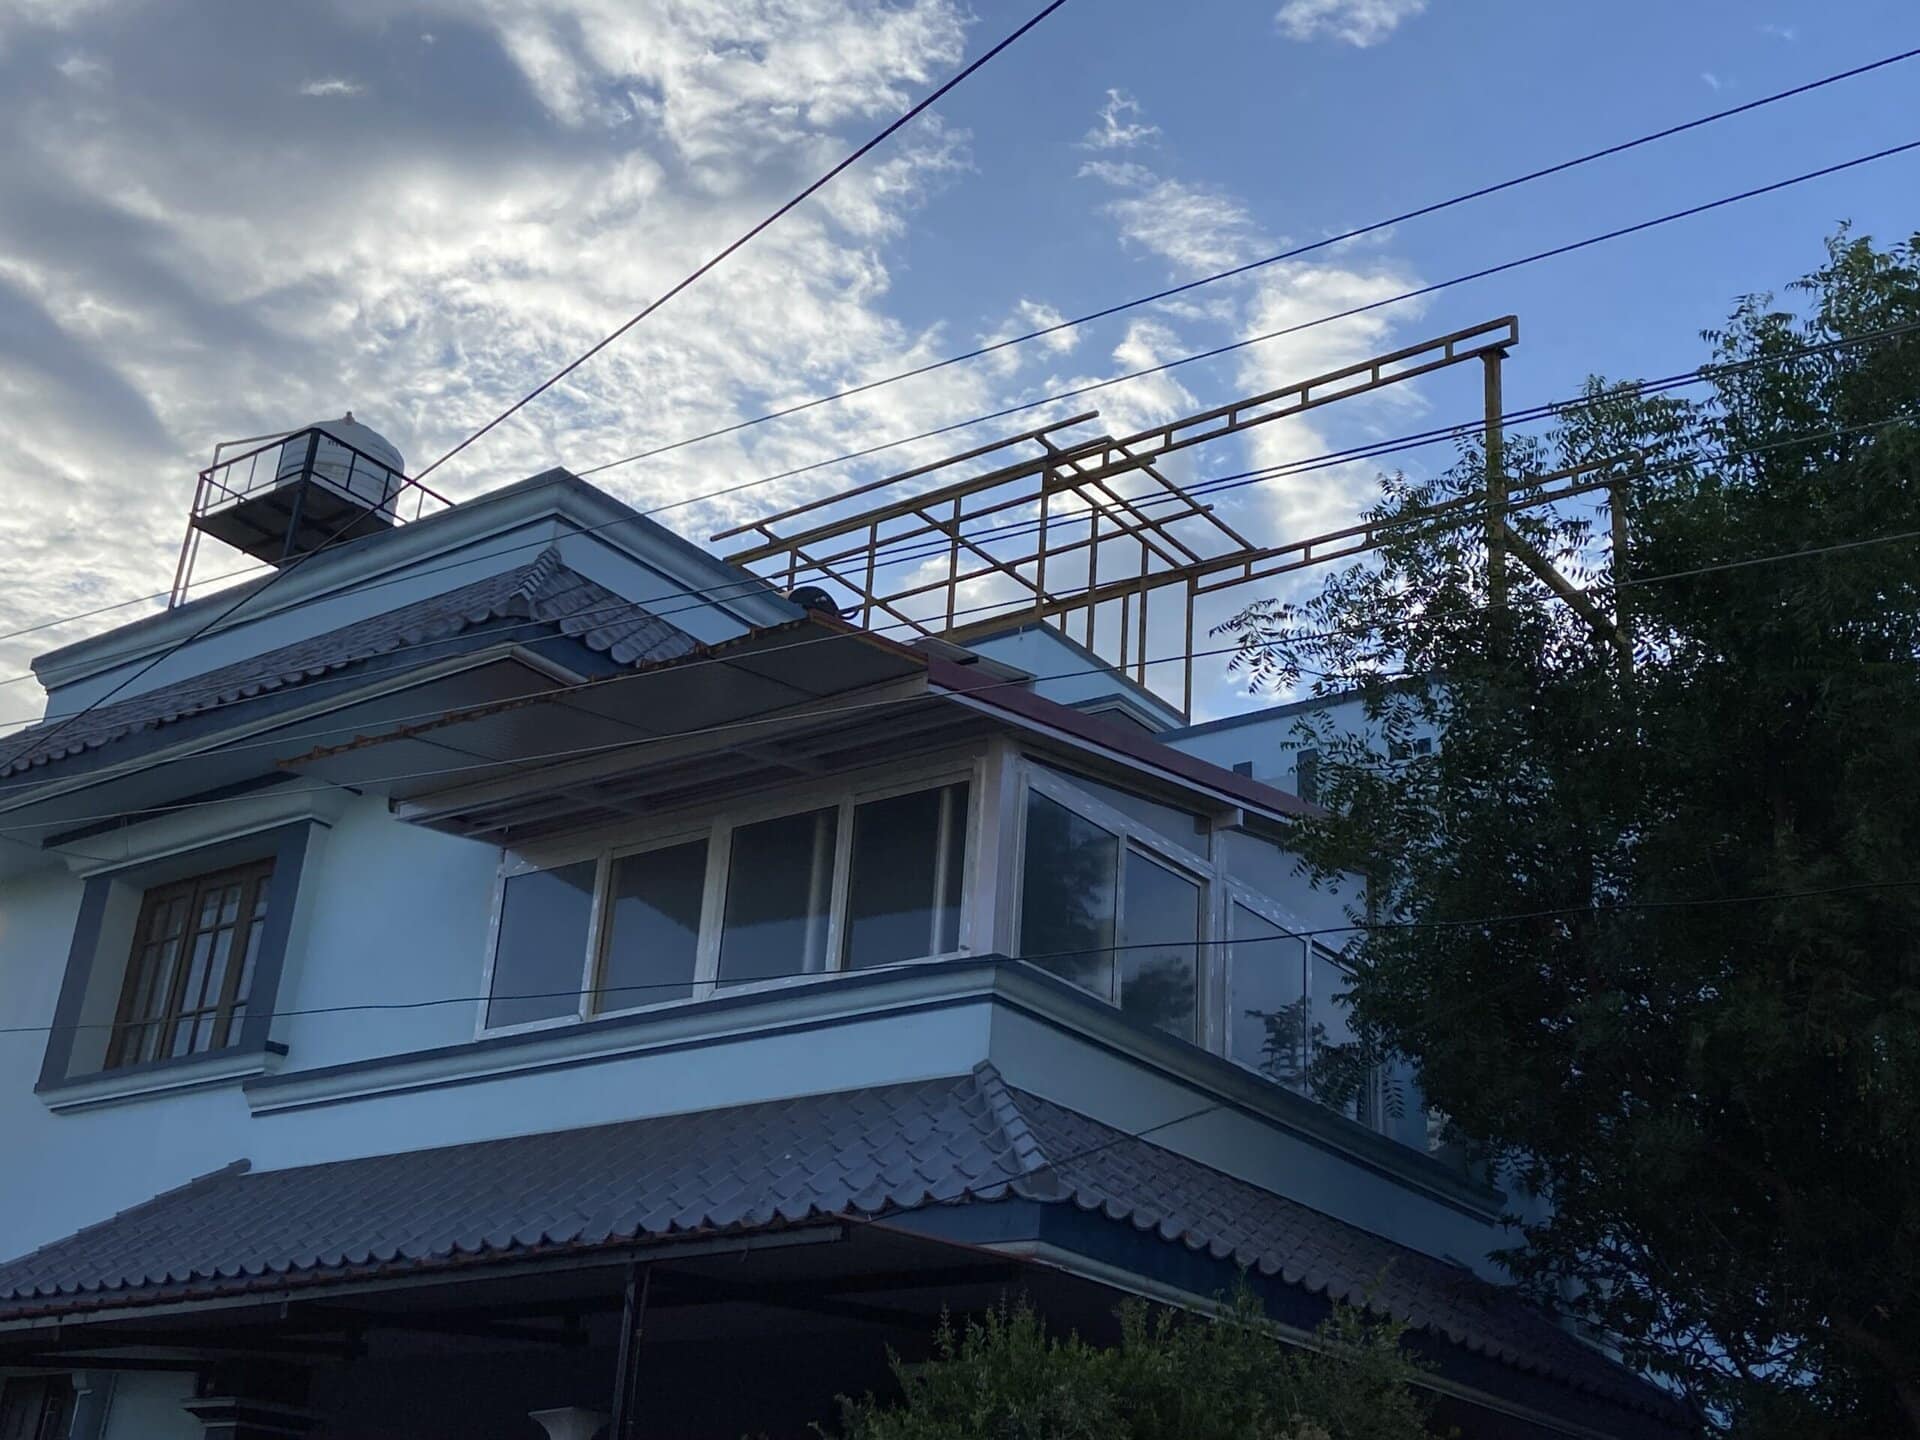
As I had to set up my observatory over my stairwell on the terrace, the total area I had was just 6’x10′ and I had to install two telescopes. So I went with the roll-off roof design. I started the project in late April 2024 and finished it in the first week of October 2024. The following were the various steps involved.
- Preparation: Moving the water tank to a new location, relocating the solar panels, and relocating the lightning arrestor. I will not cover these works here.
- Installing the framework, including the room, rolling roof, rails for the roof, pillars to support the rails, frame to install the motor, and the geared rail that drives the roof.
- Painting the structure
- Covering the structure with corrugated sheets.
- Installing the motor to open and close the roof
- Electrical wiring
- Installing the piers
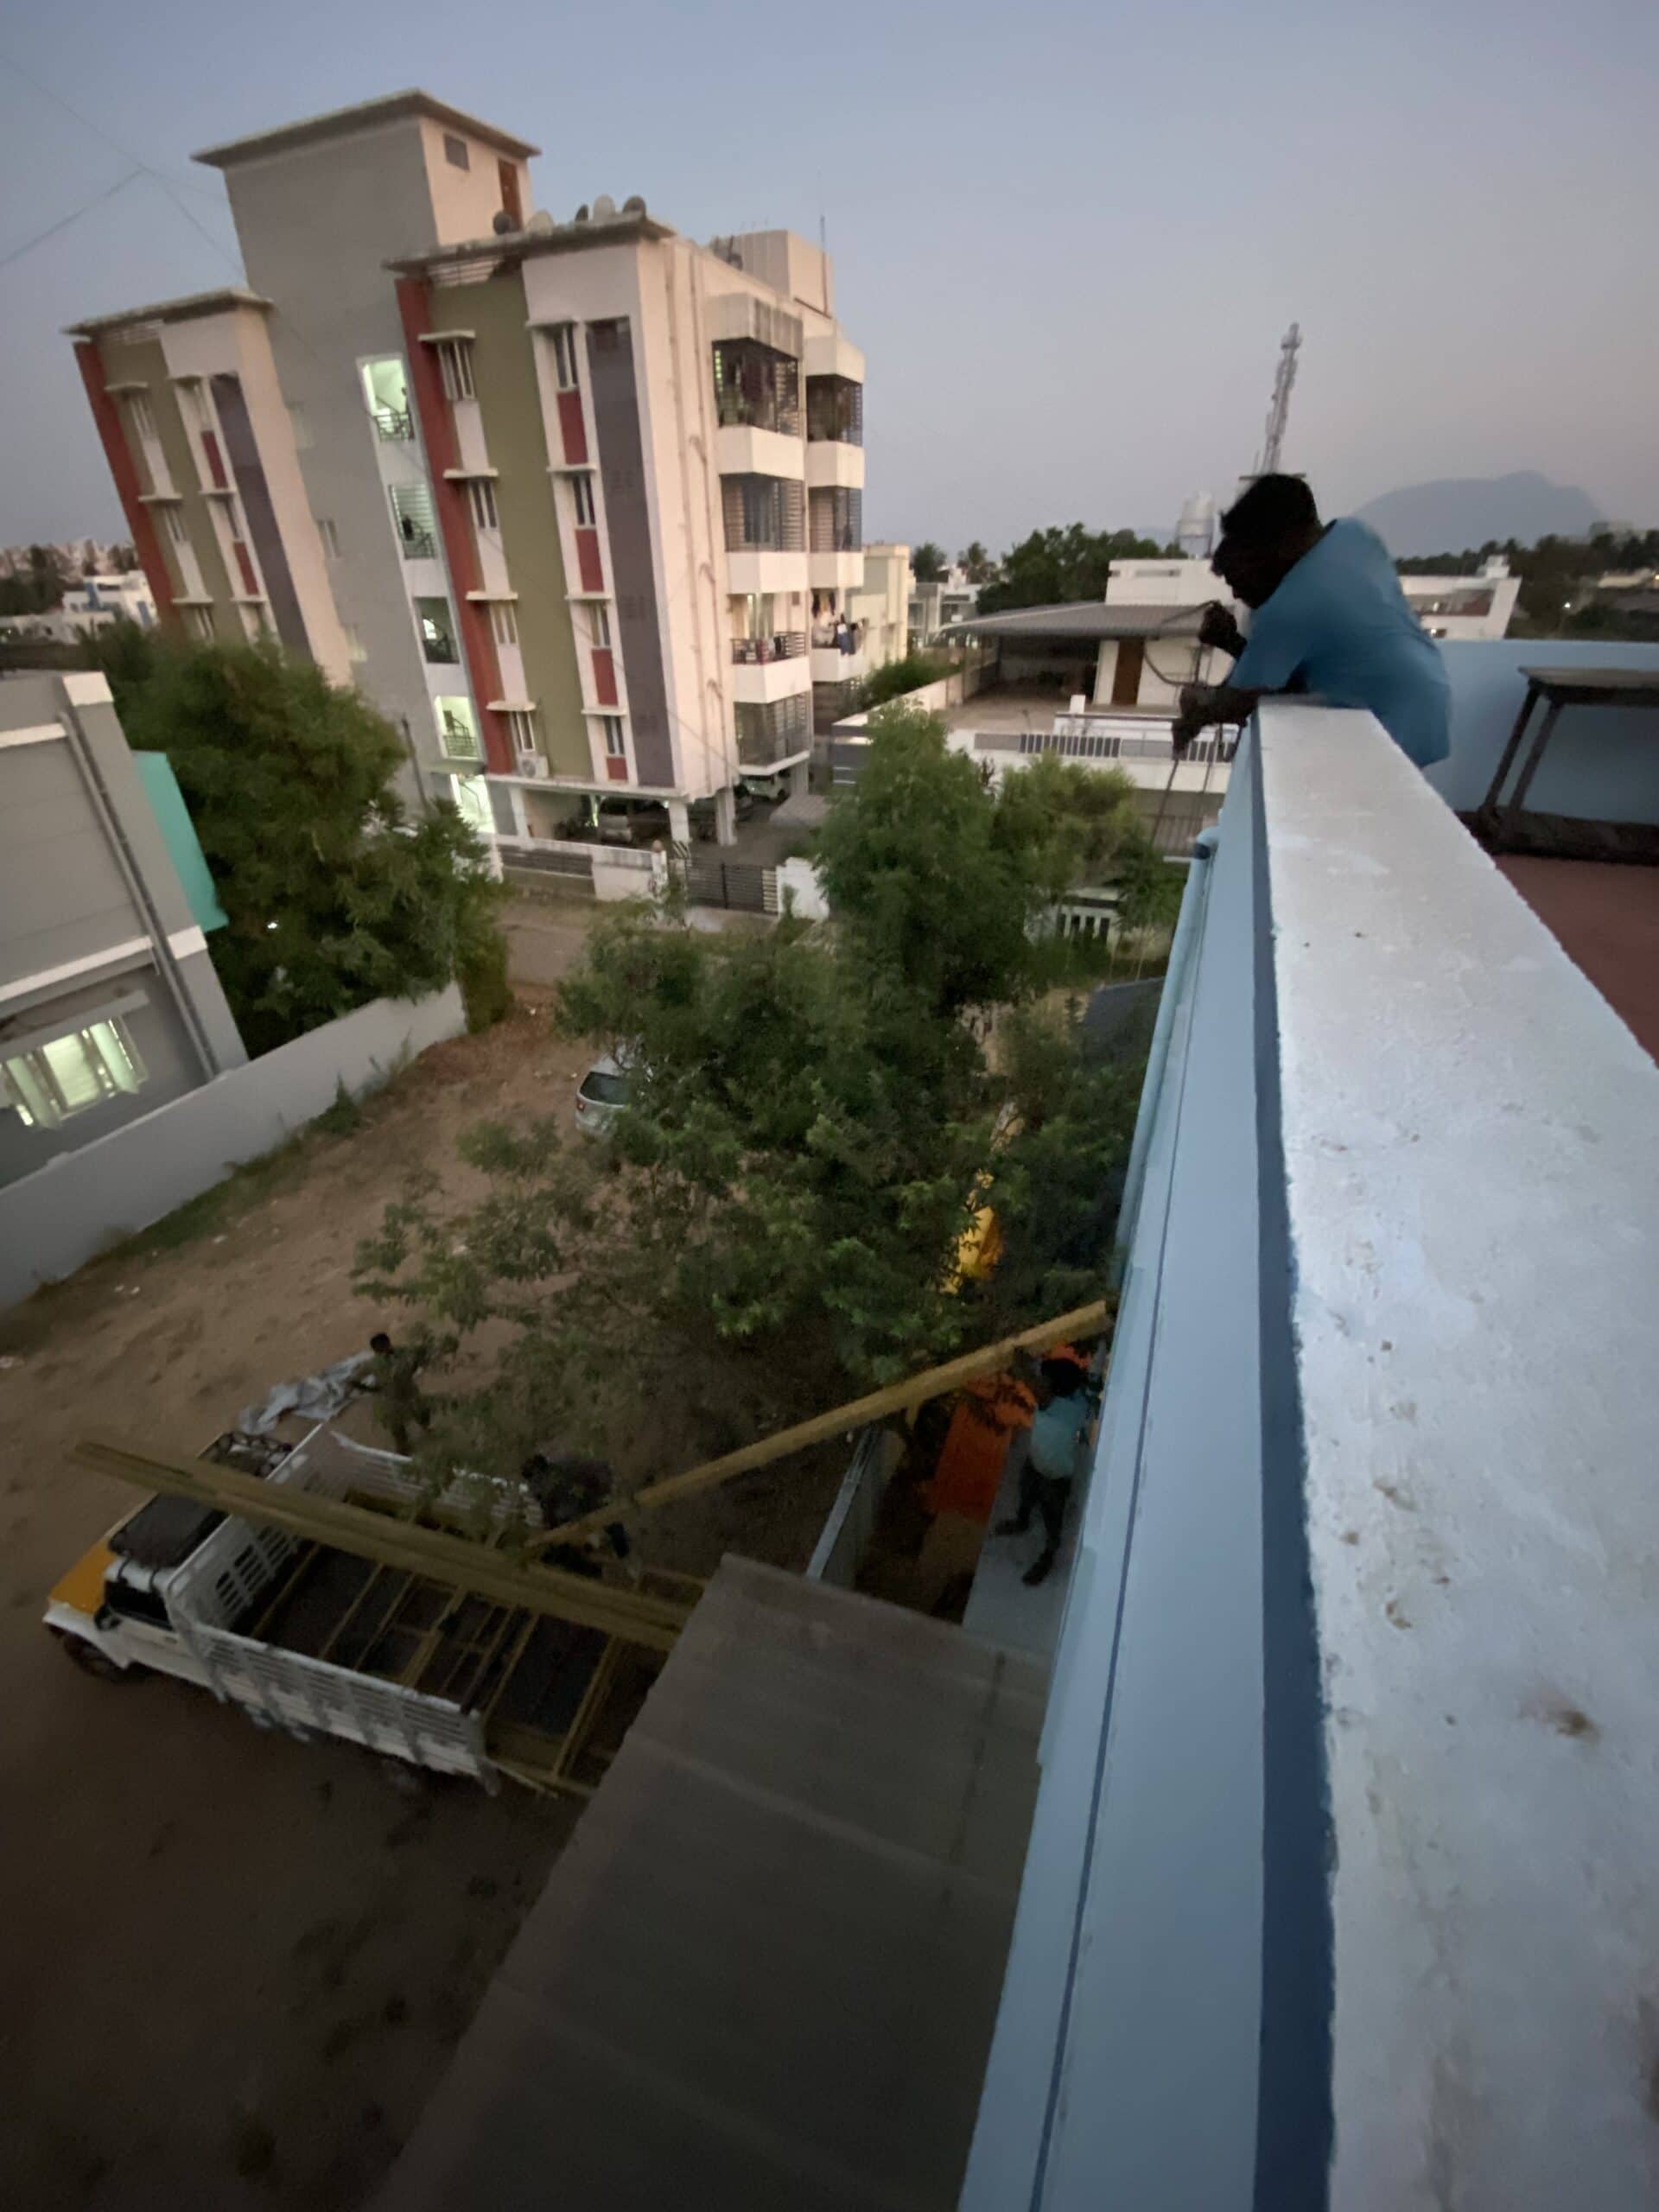
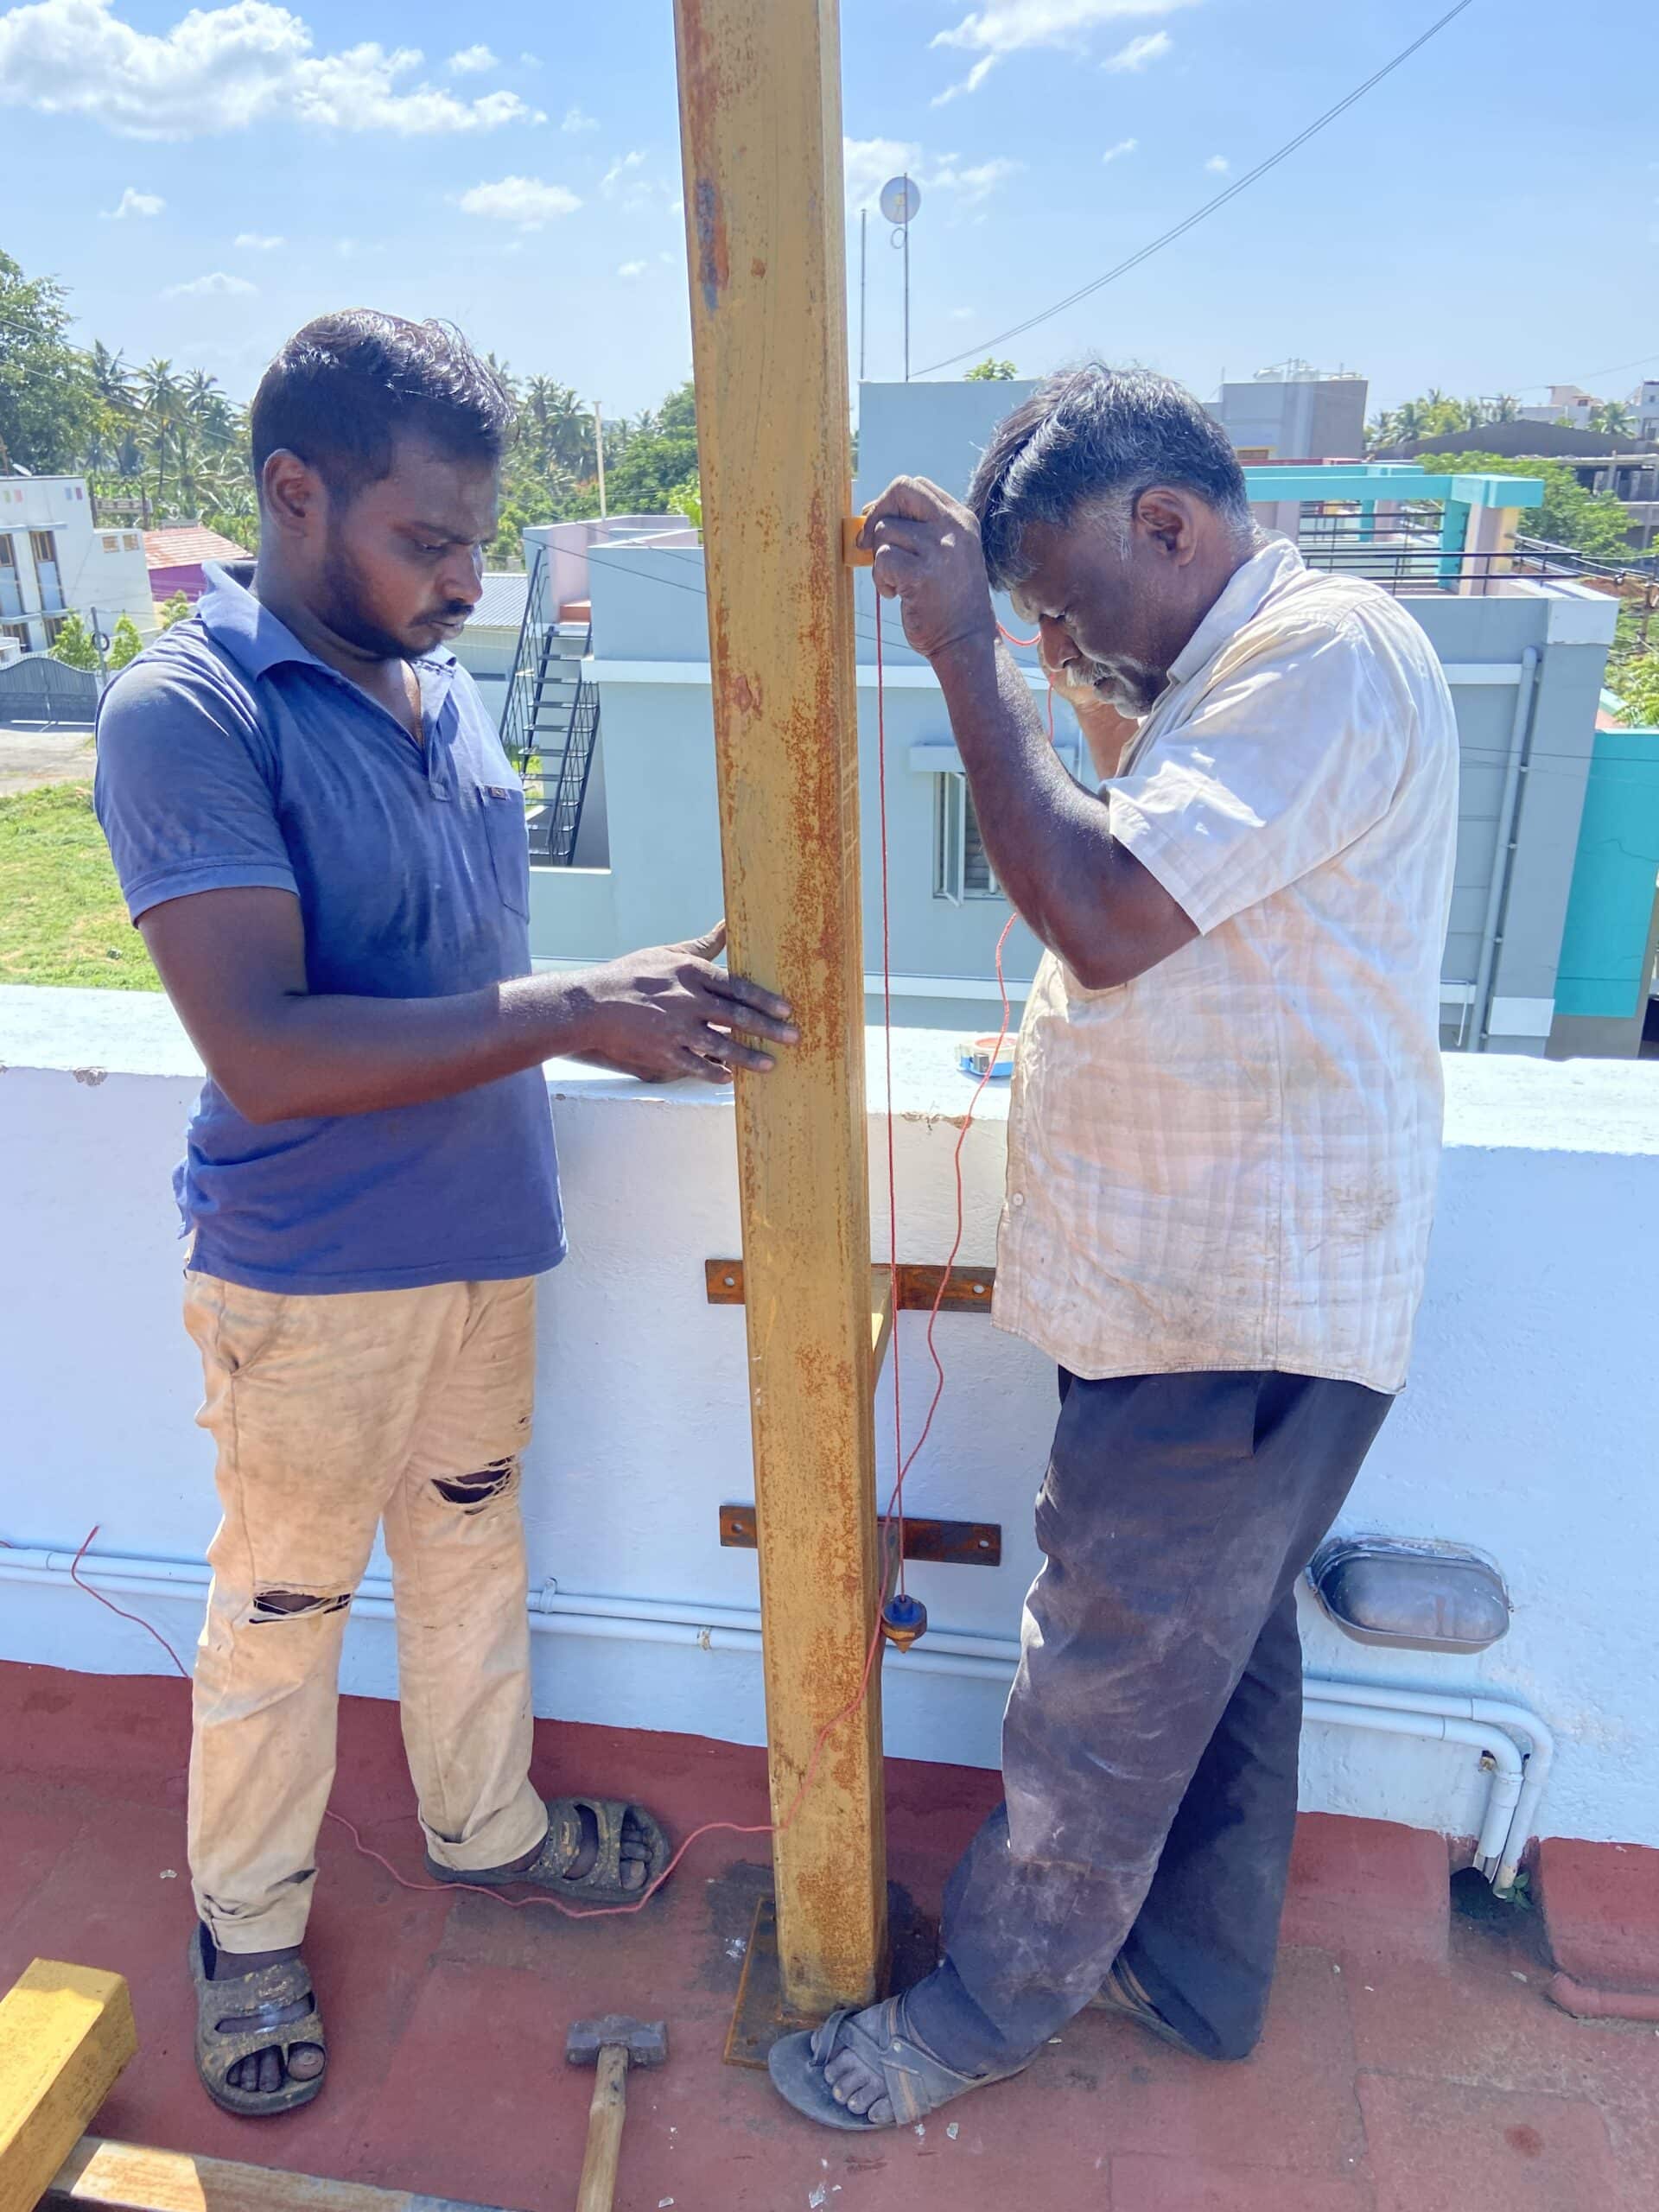
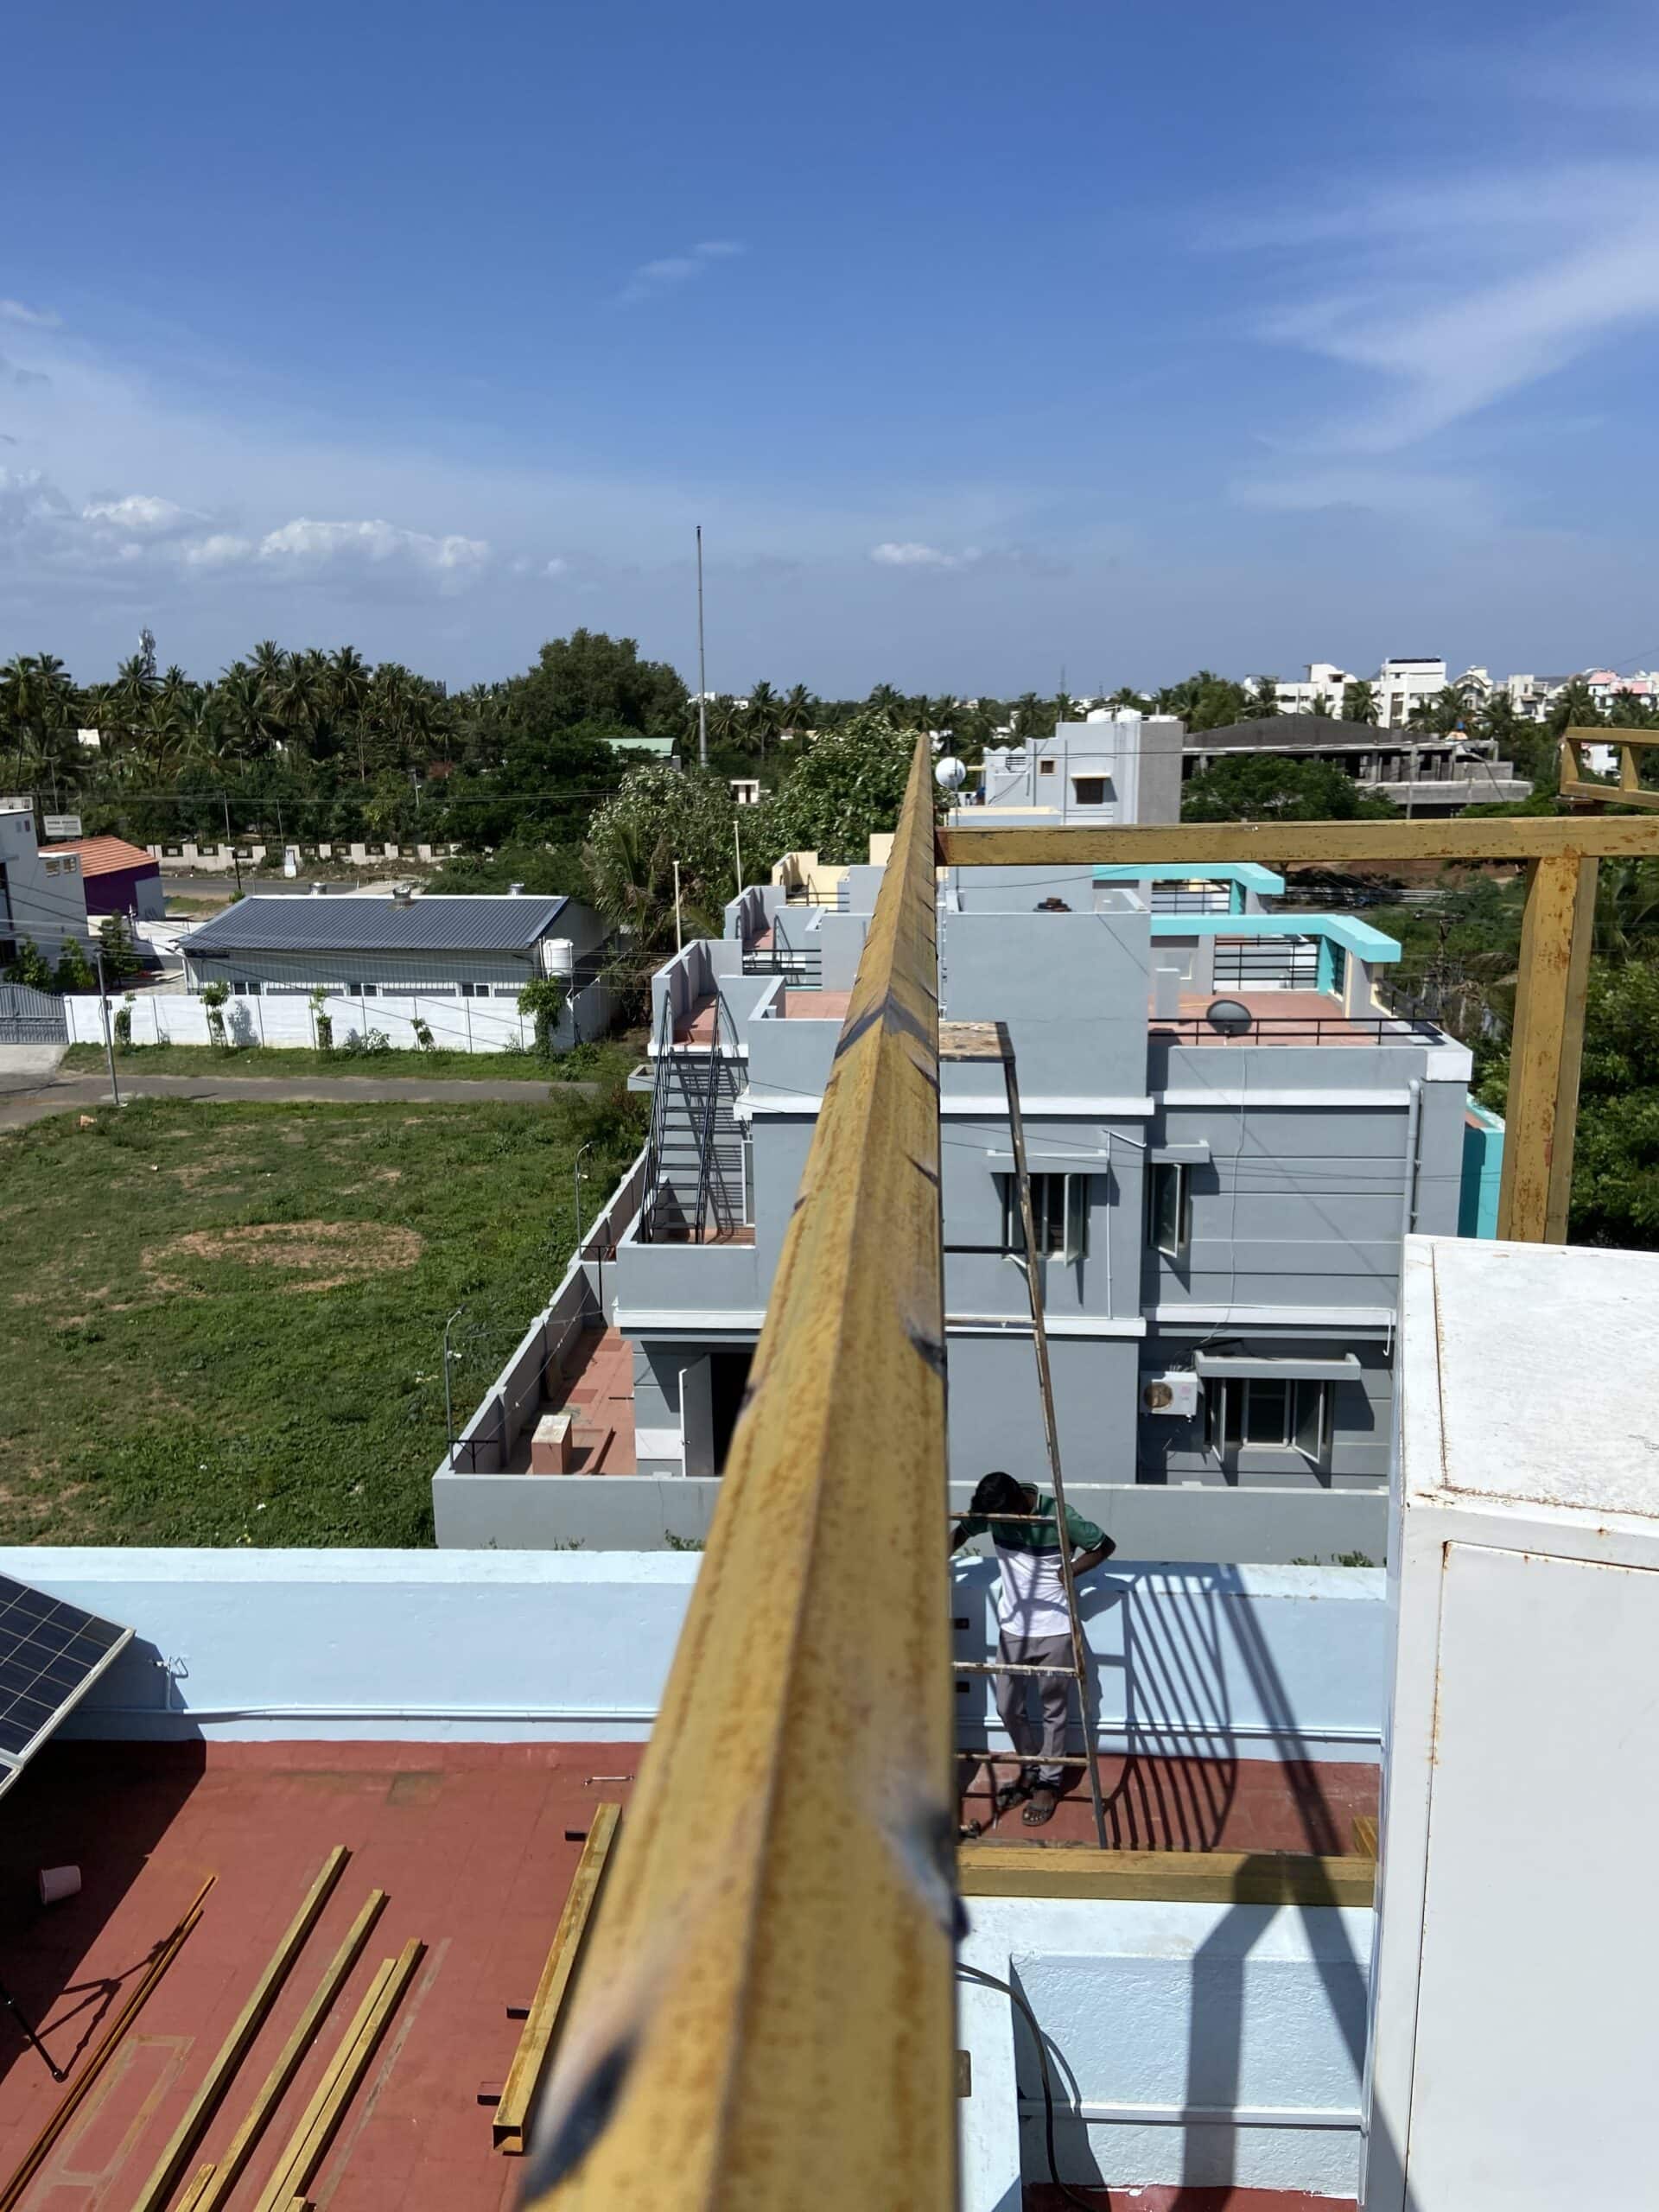
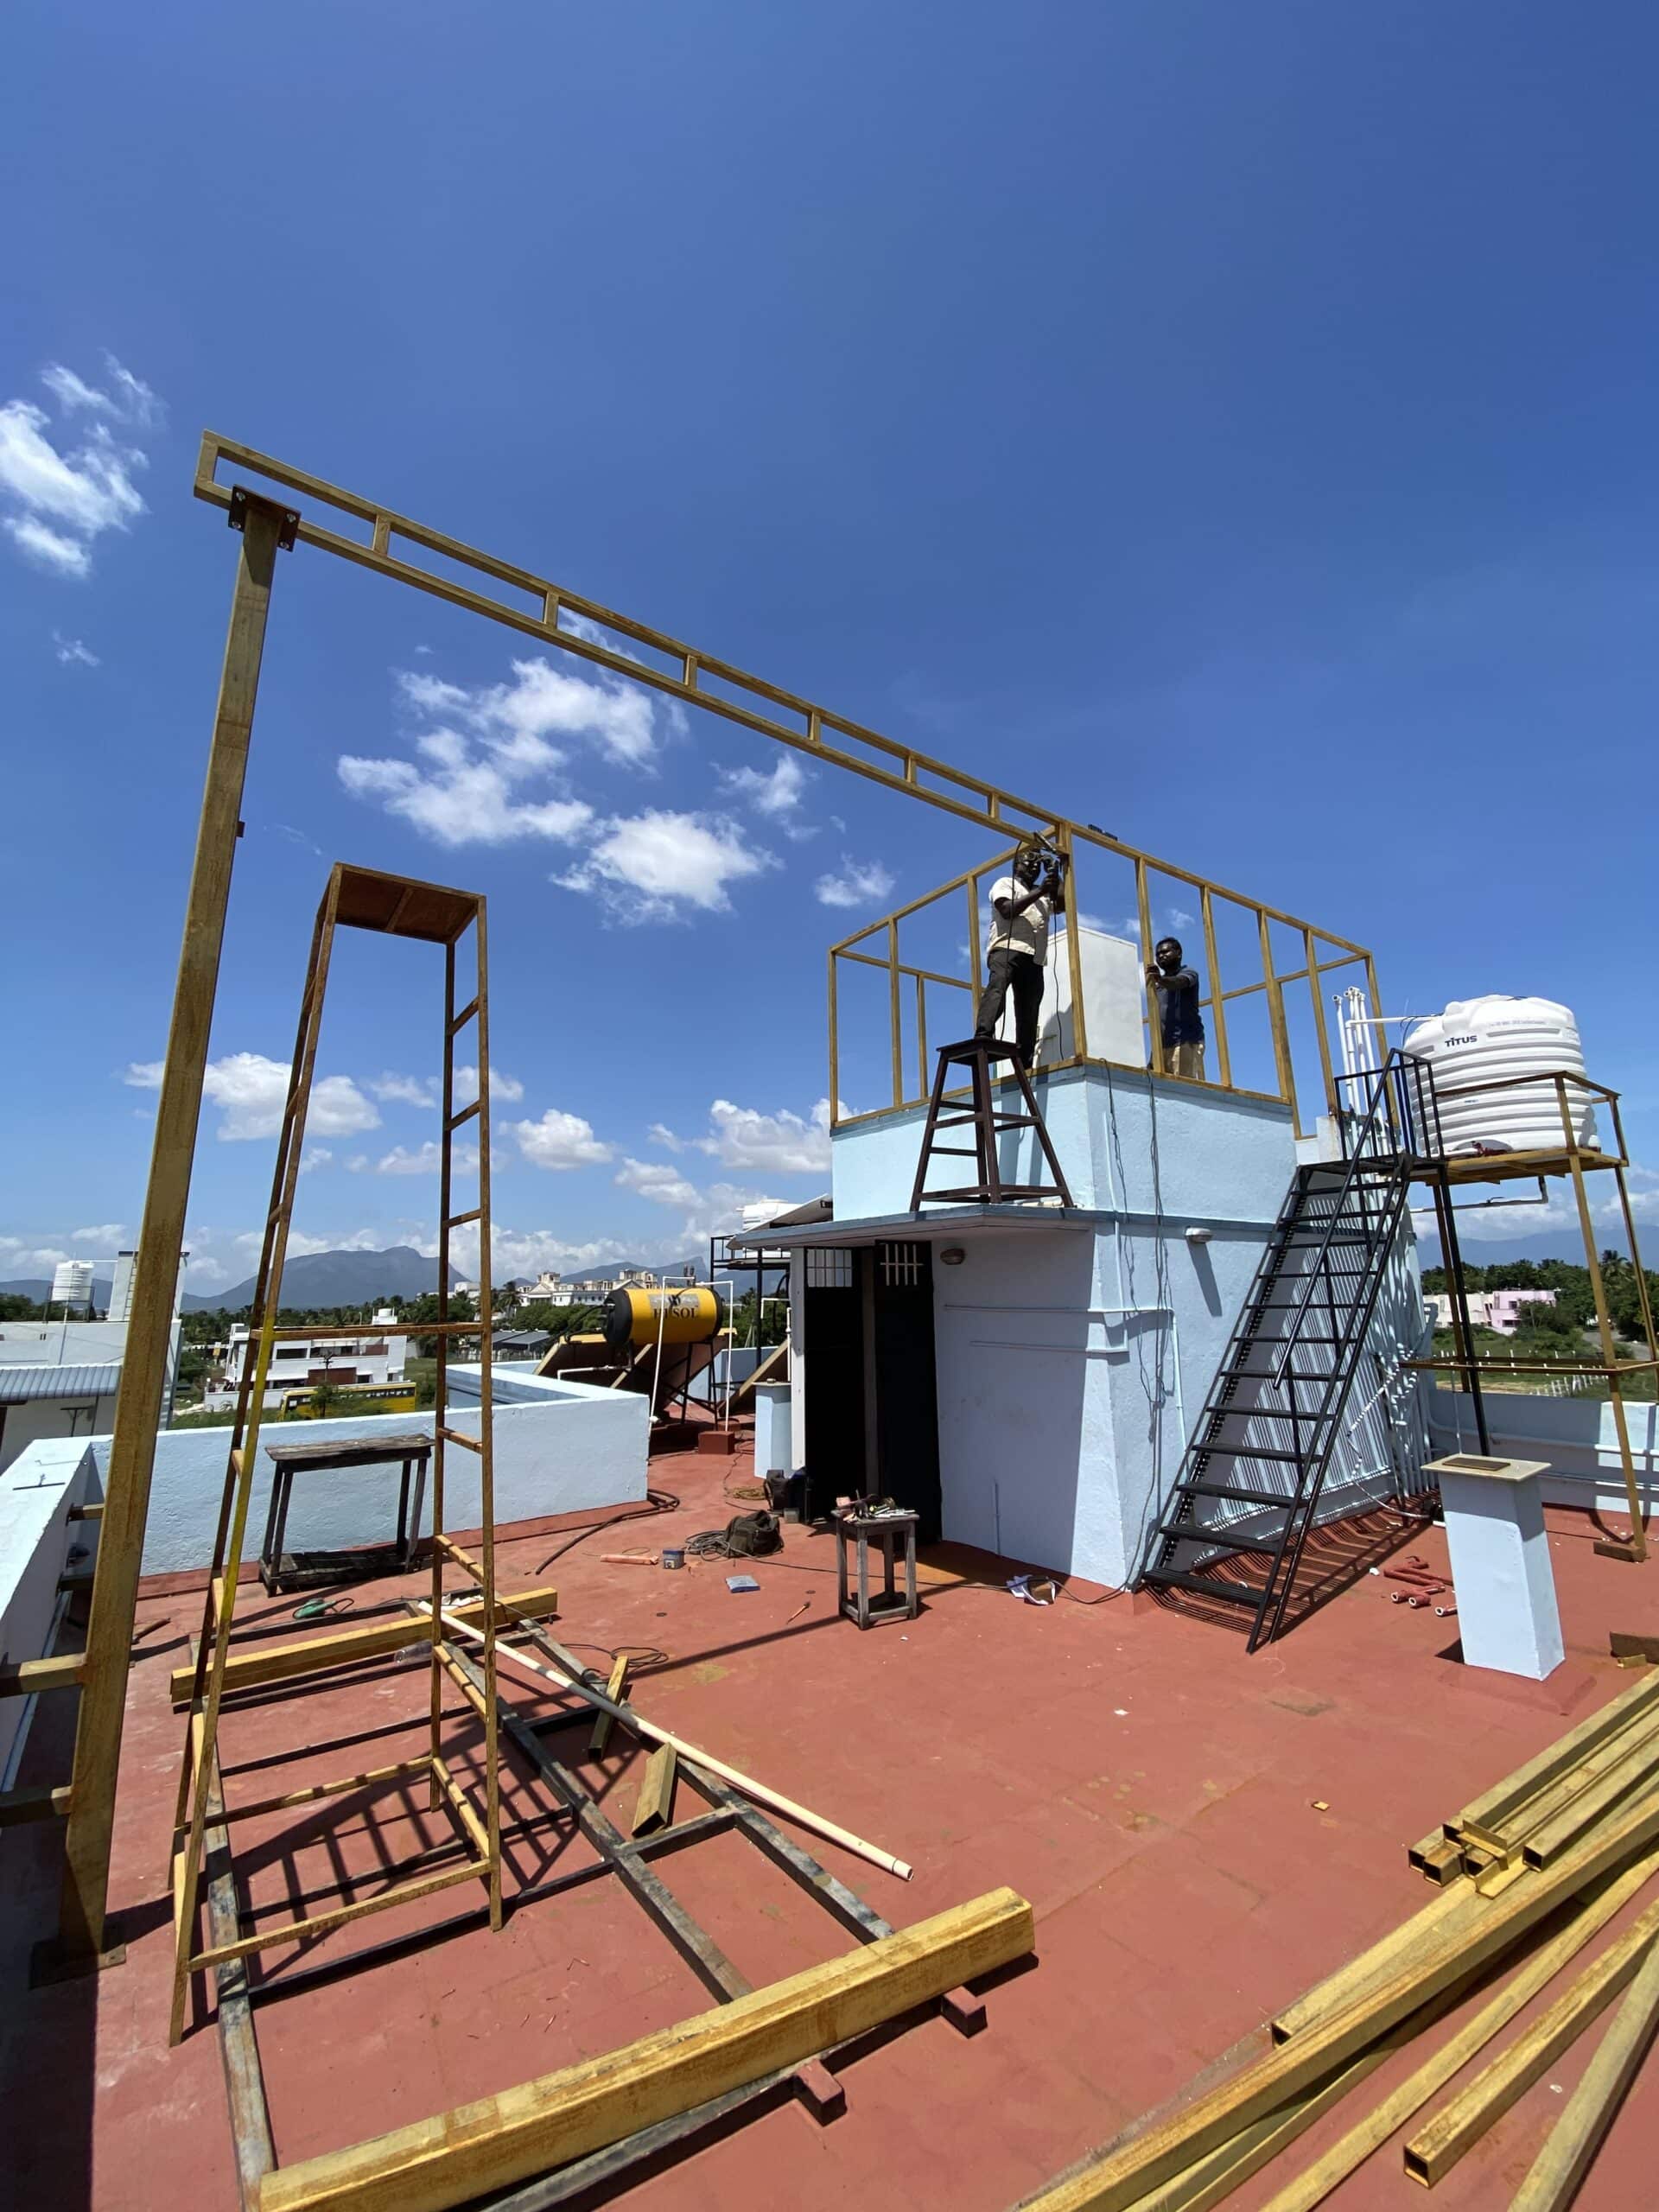
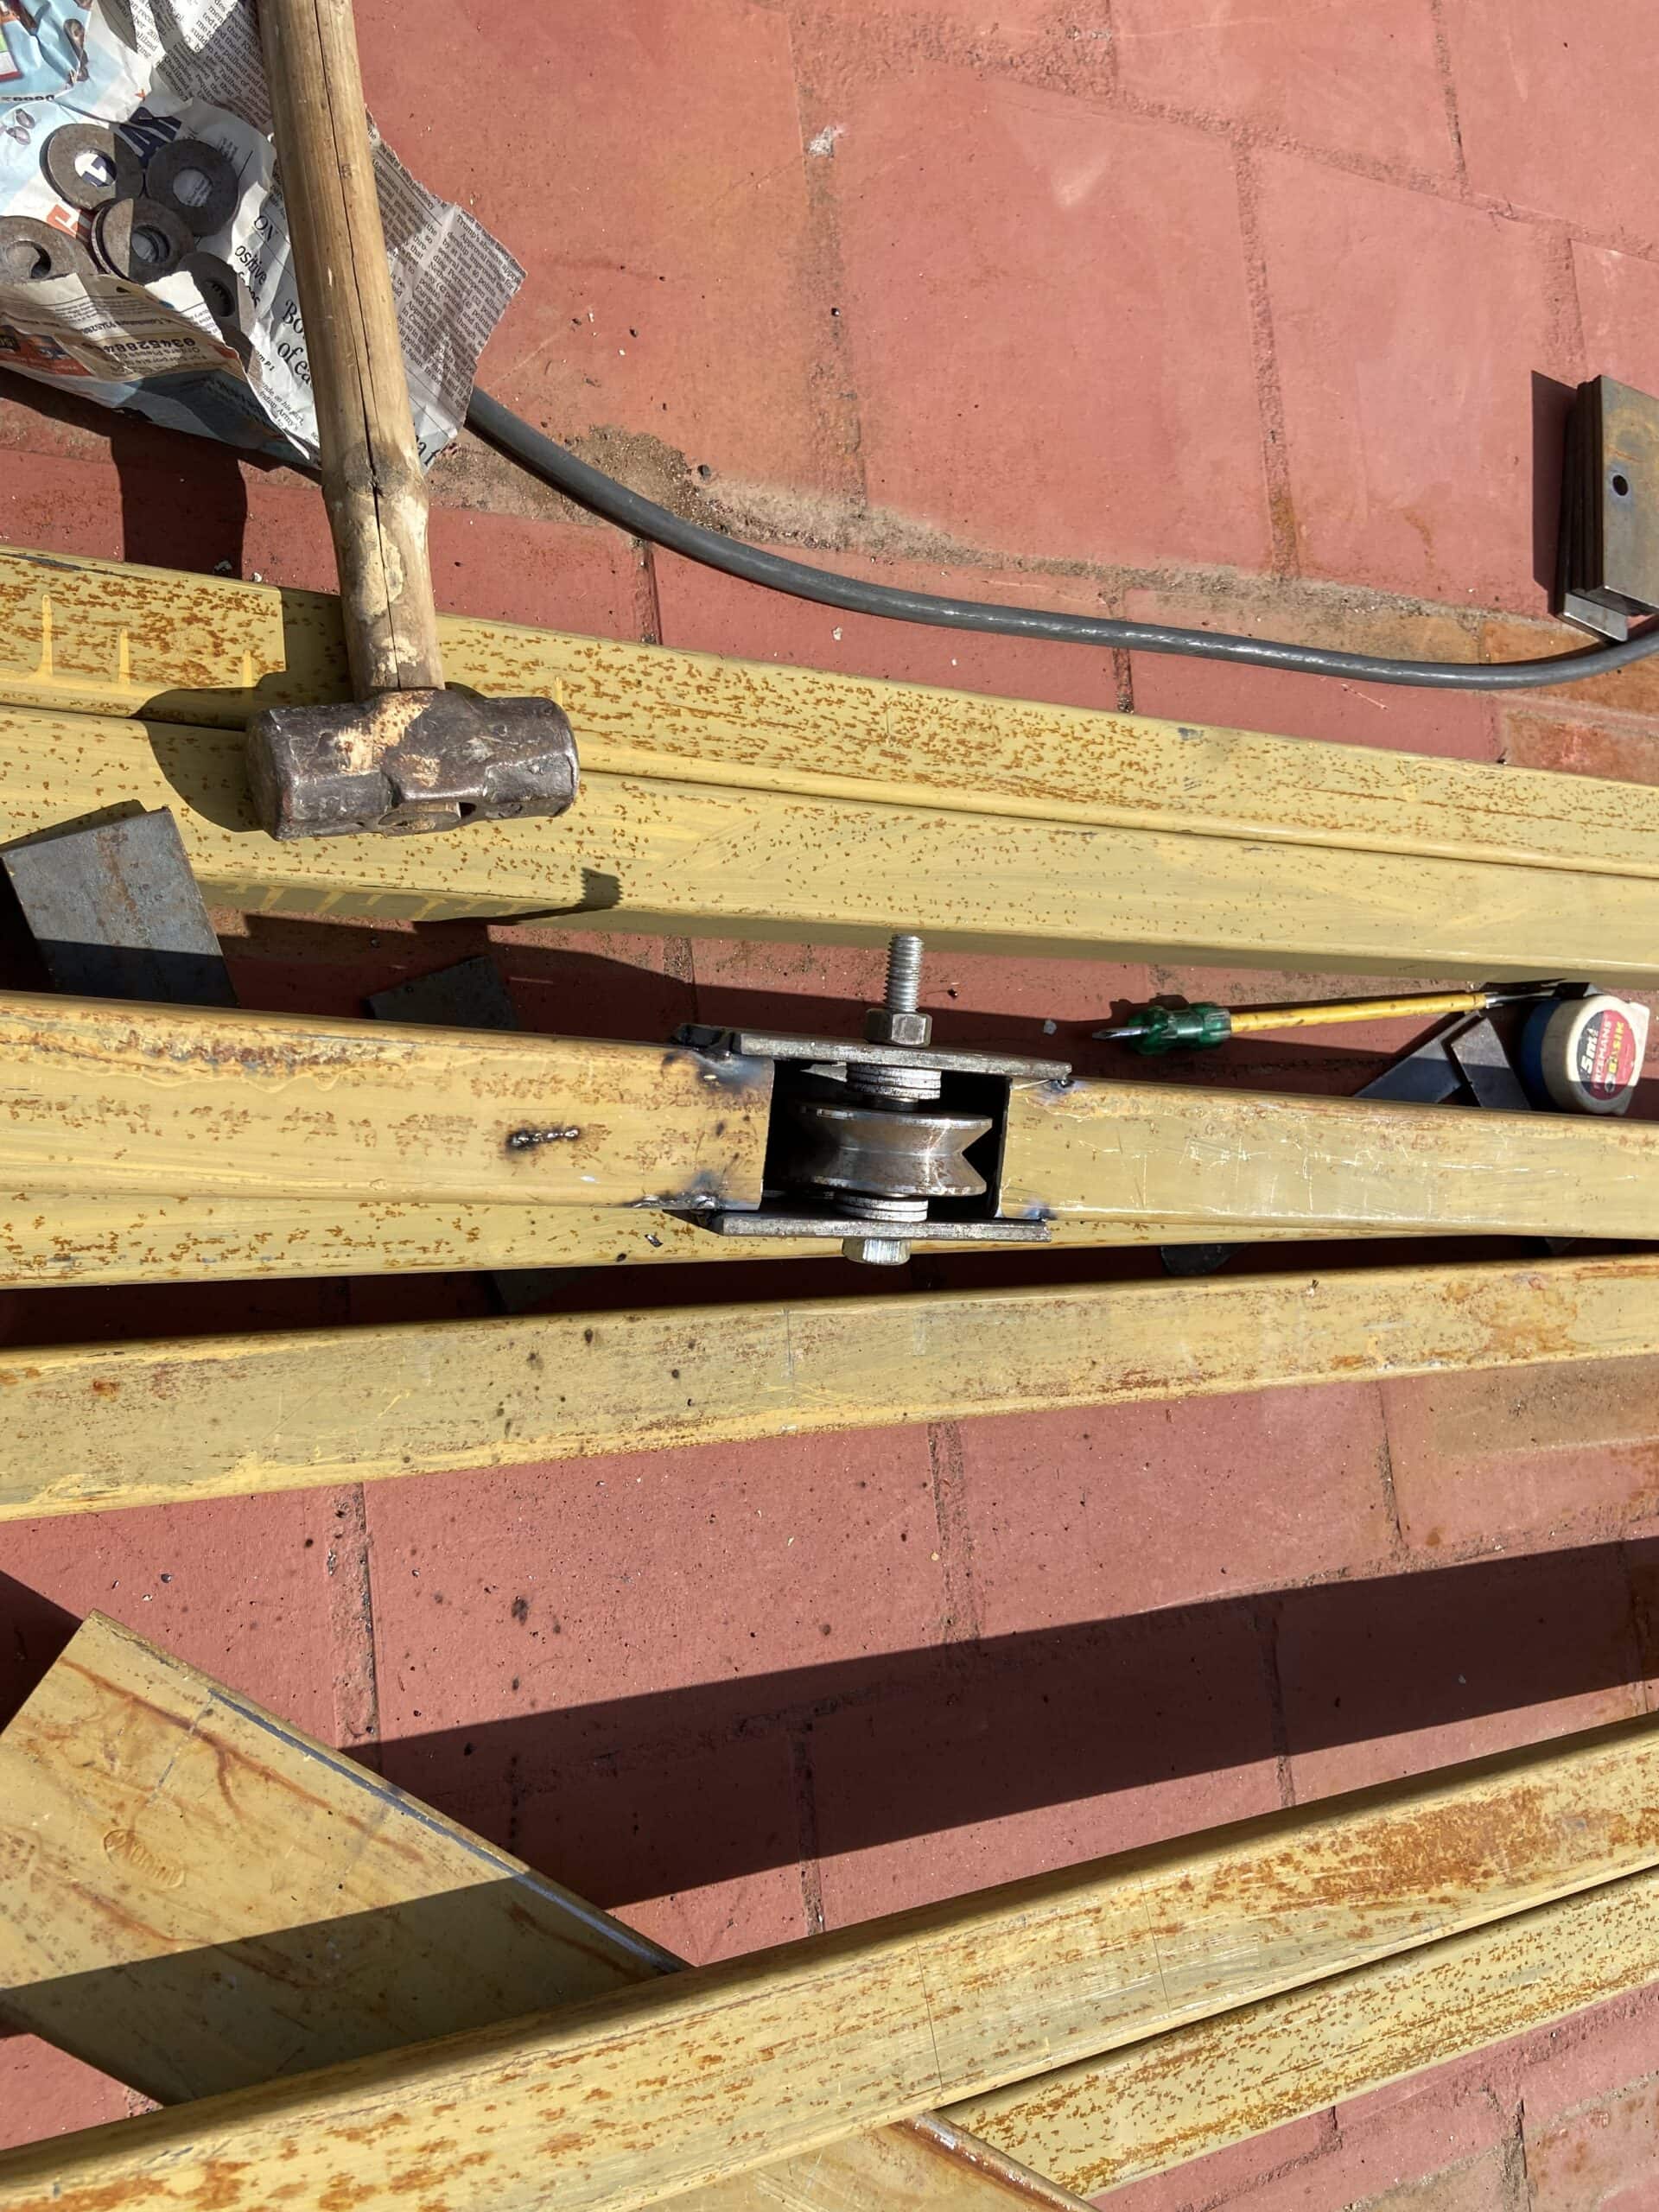
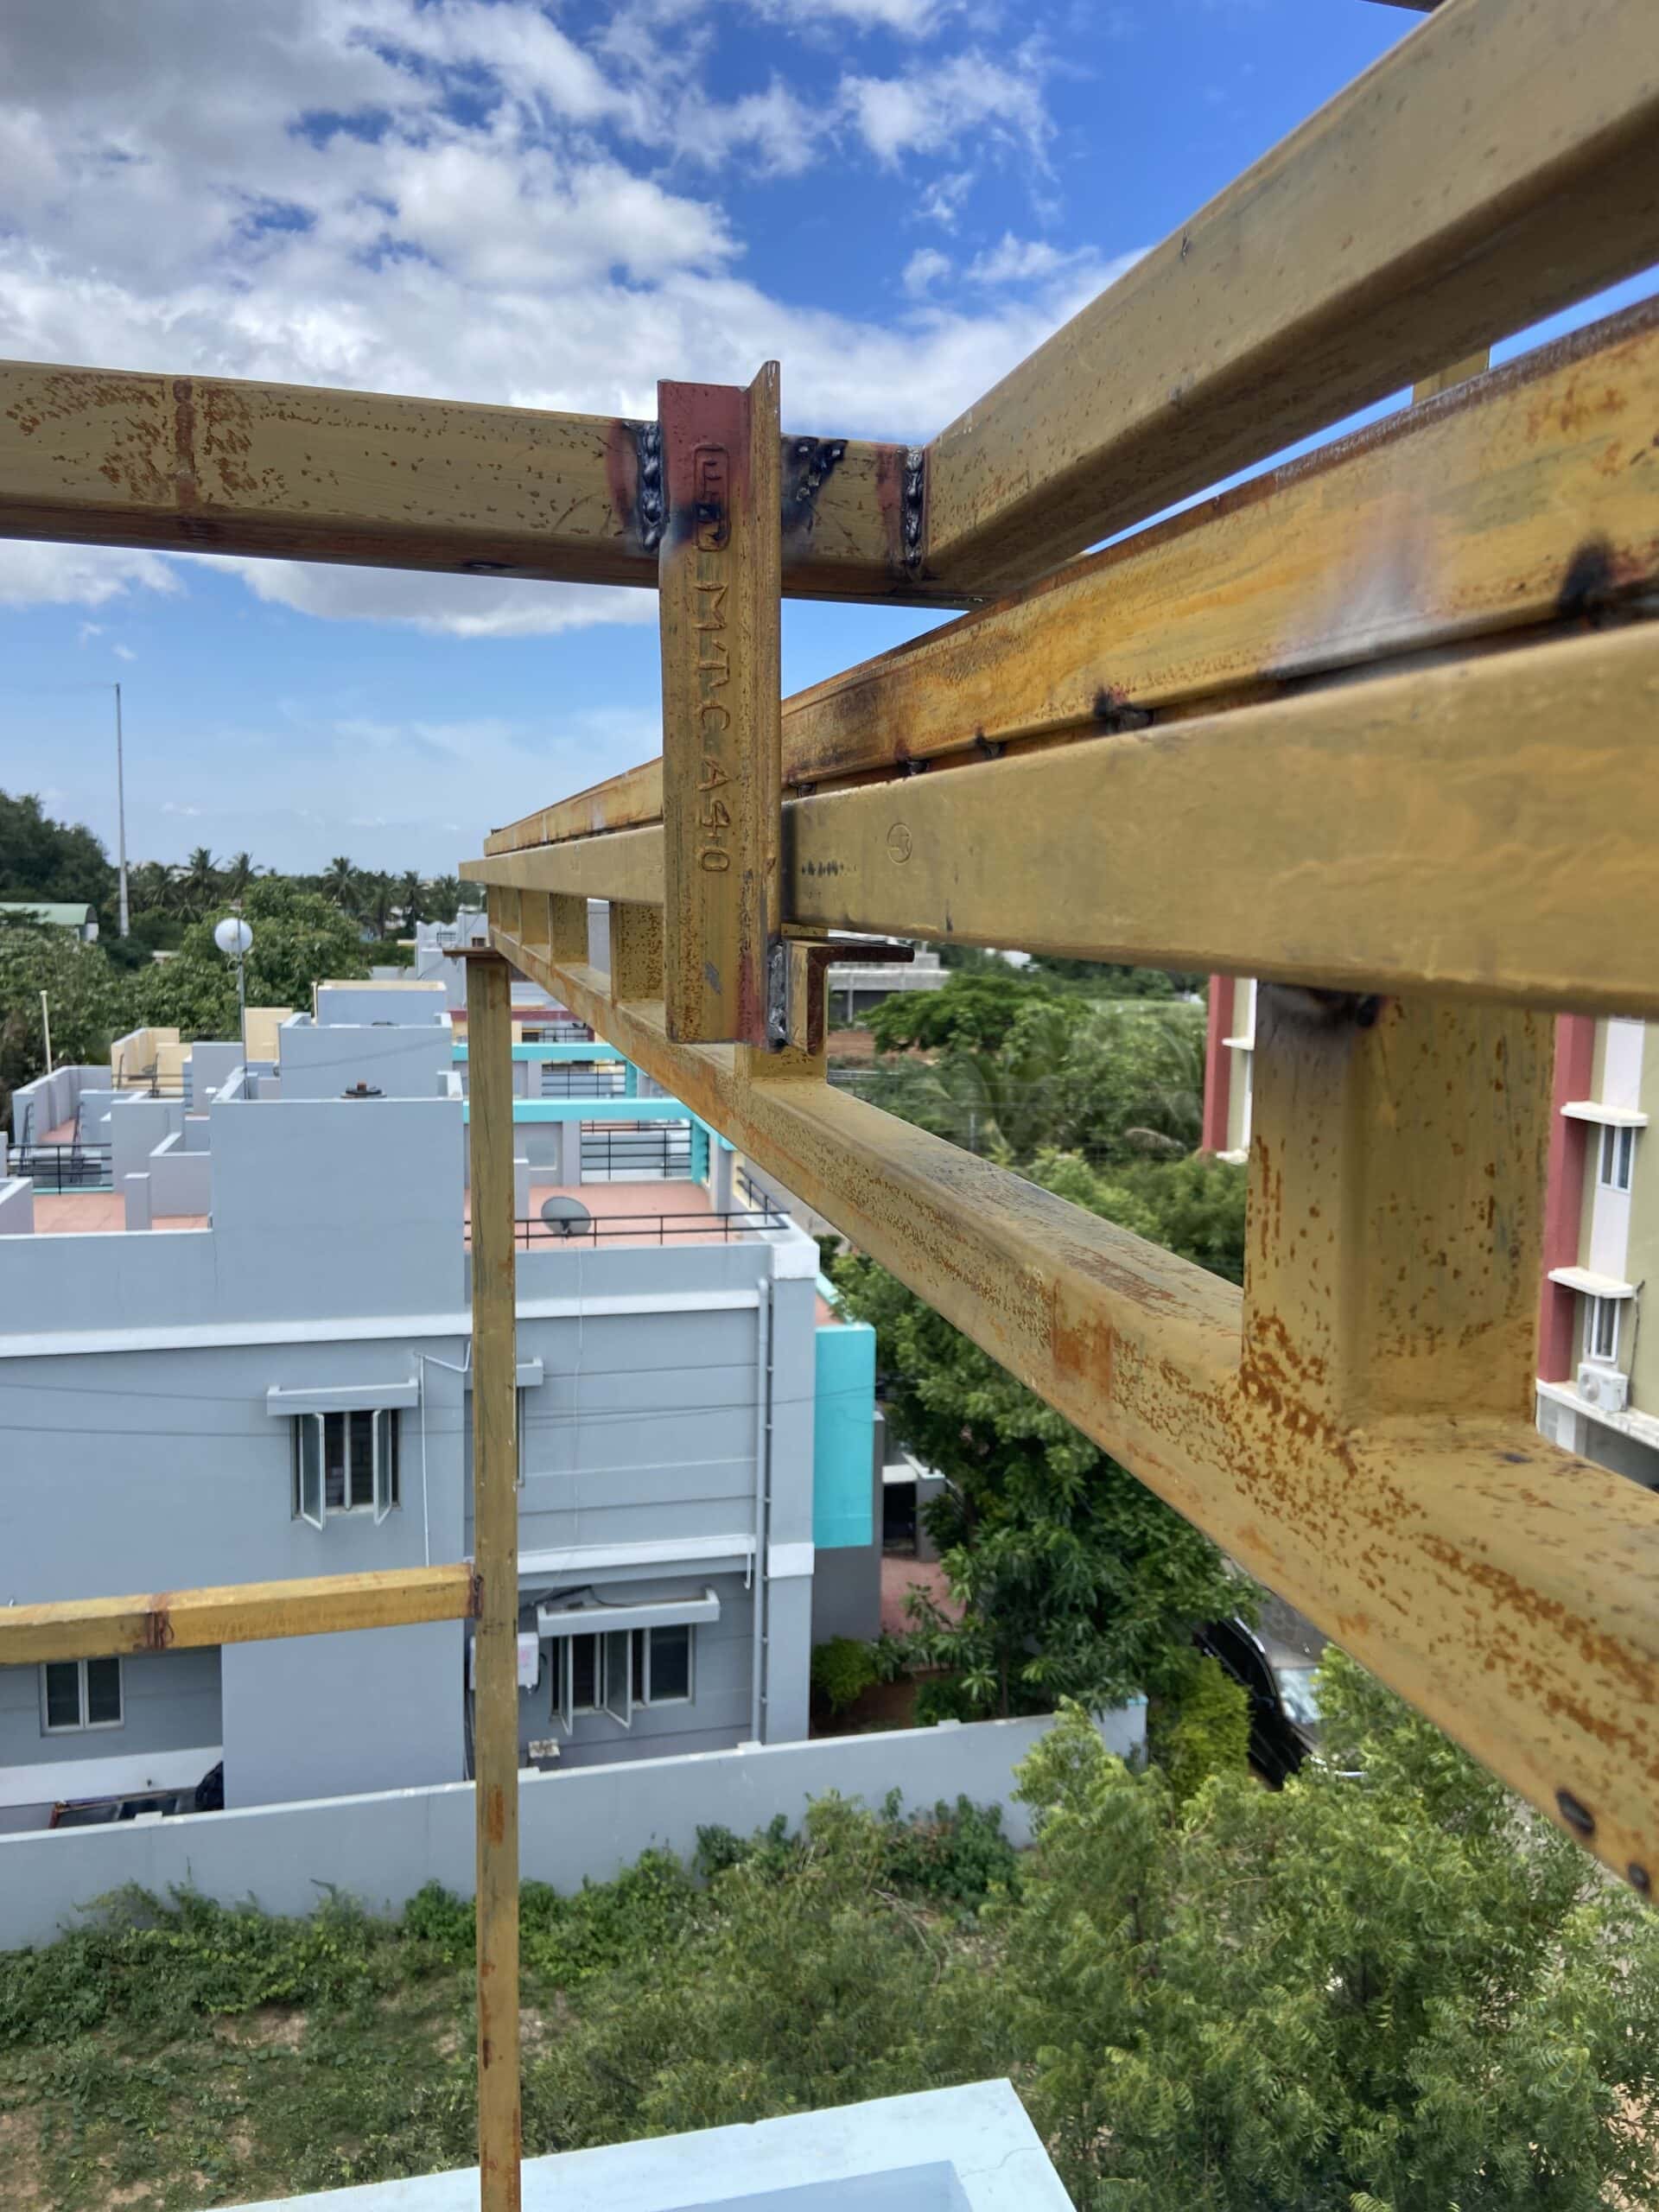
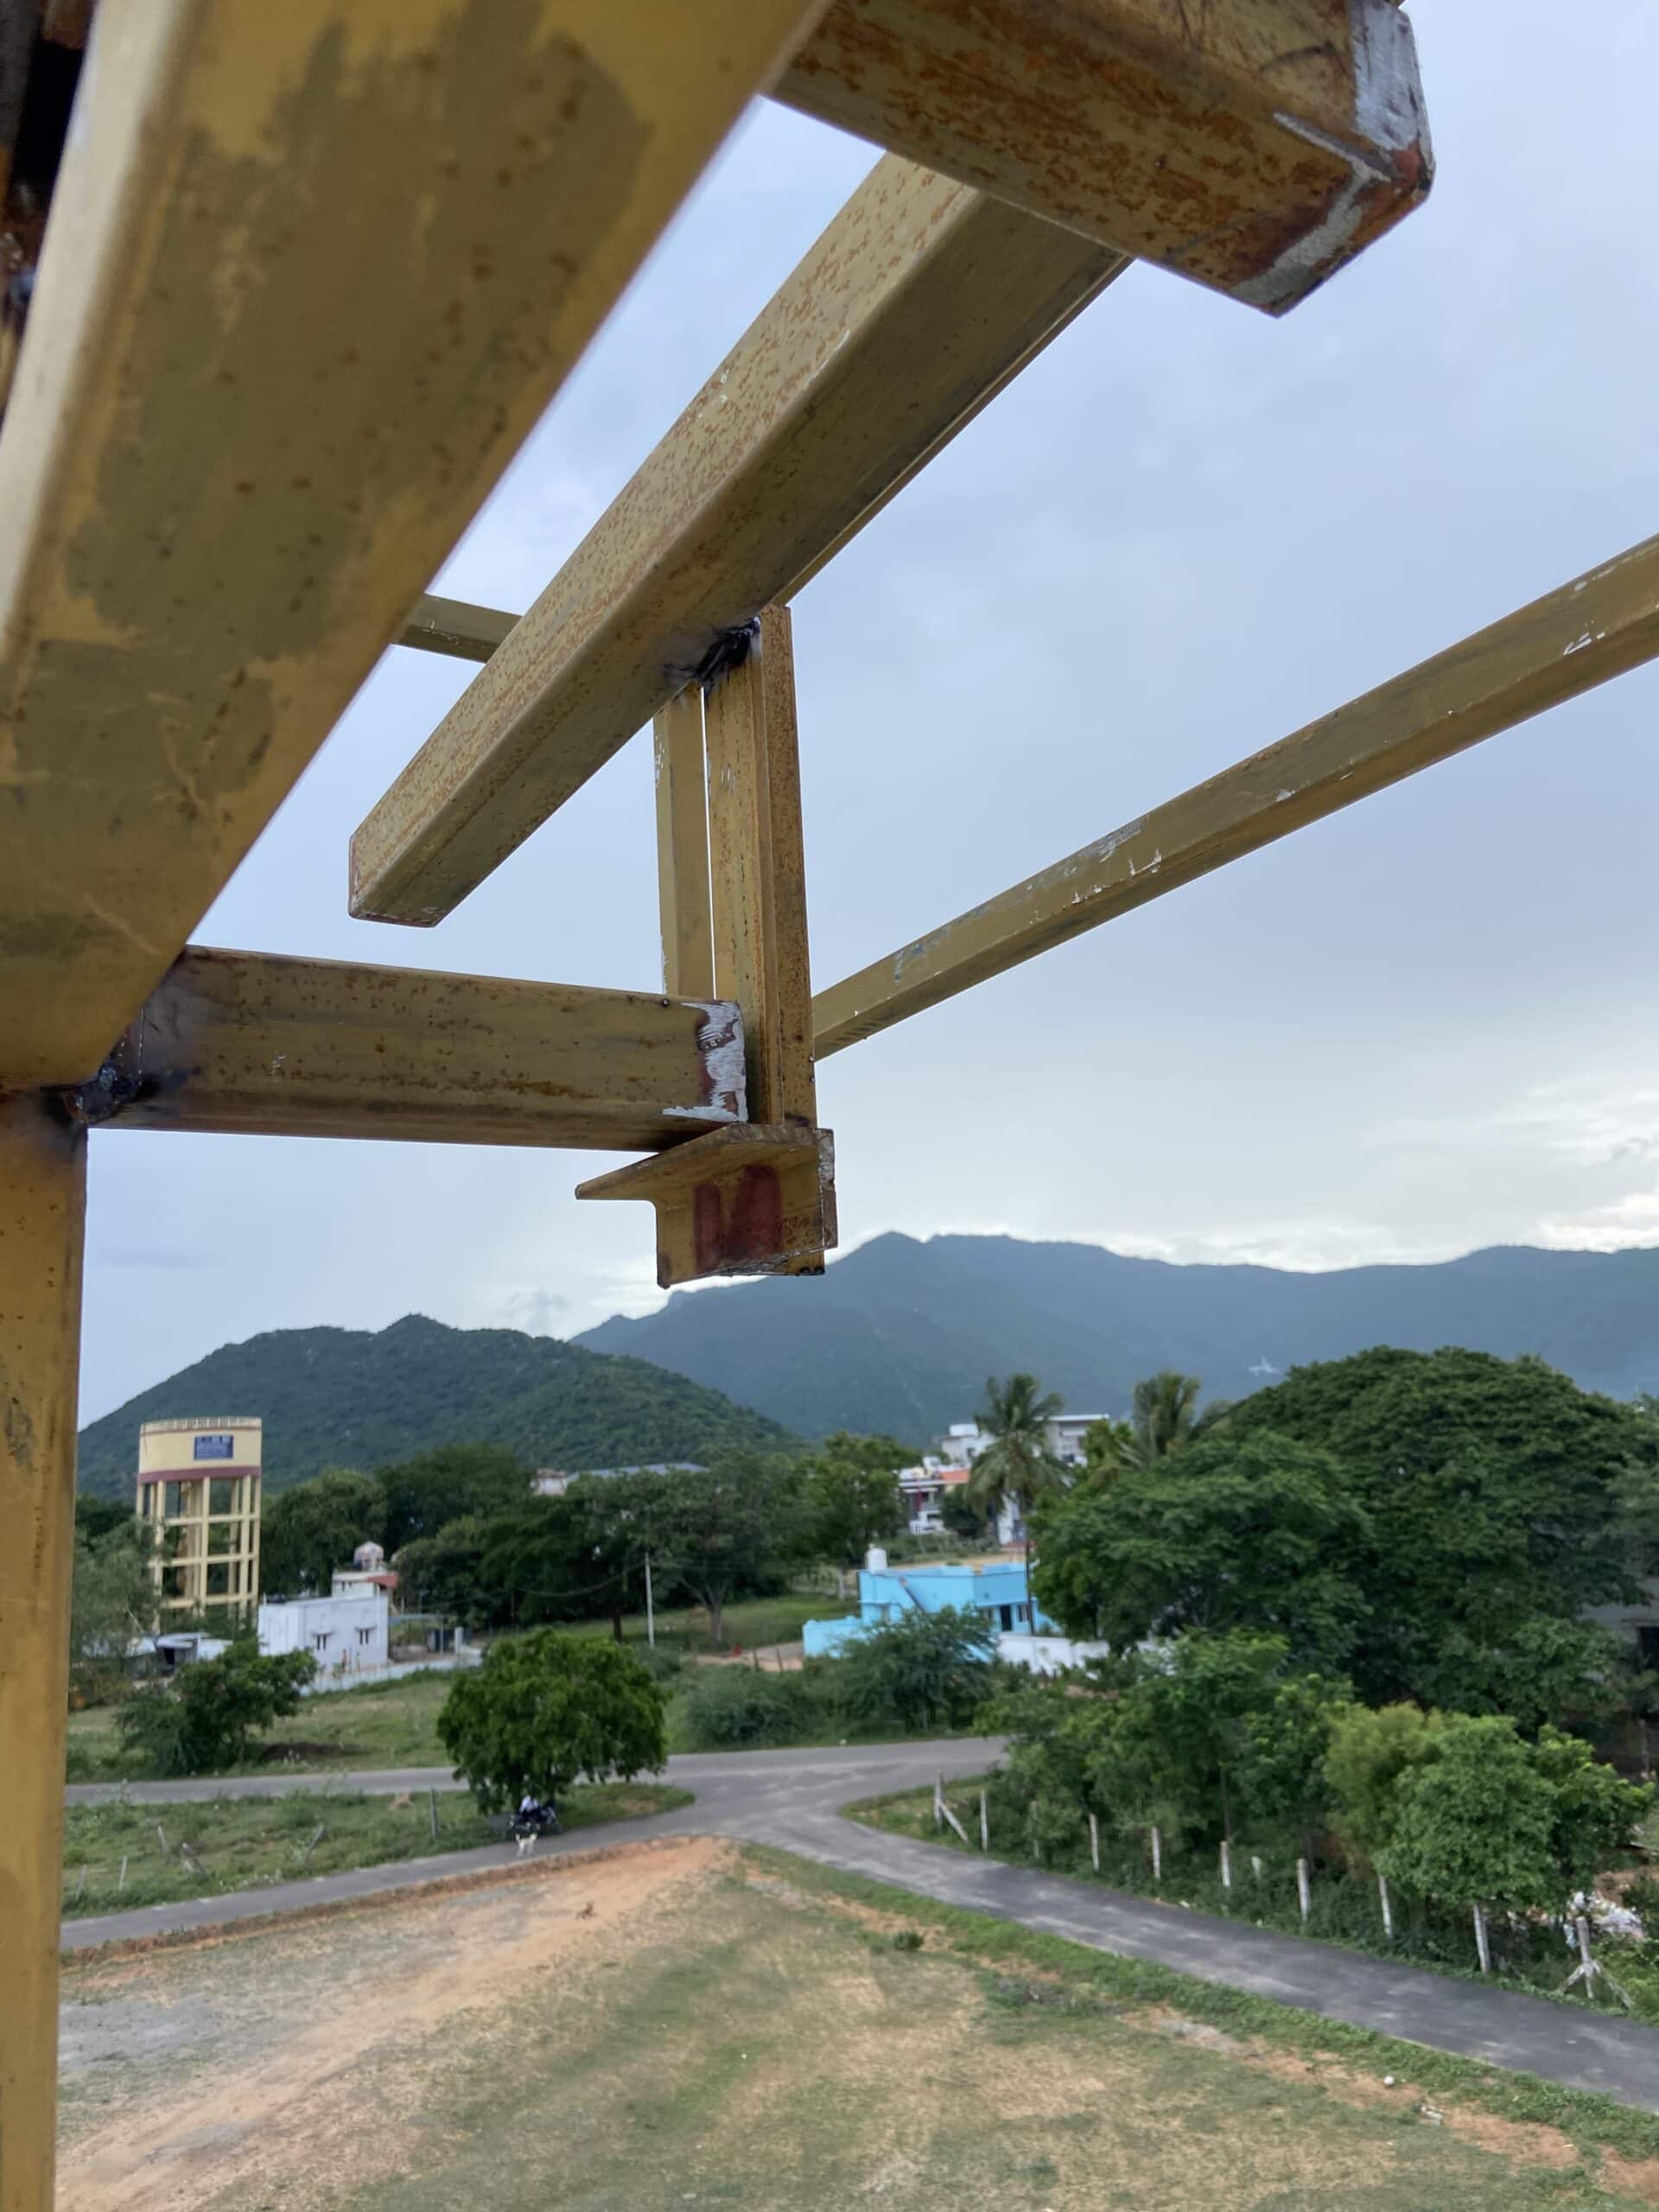
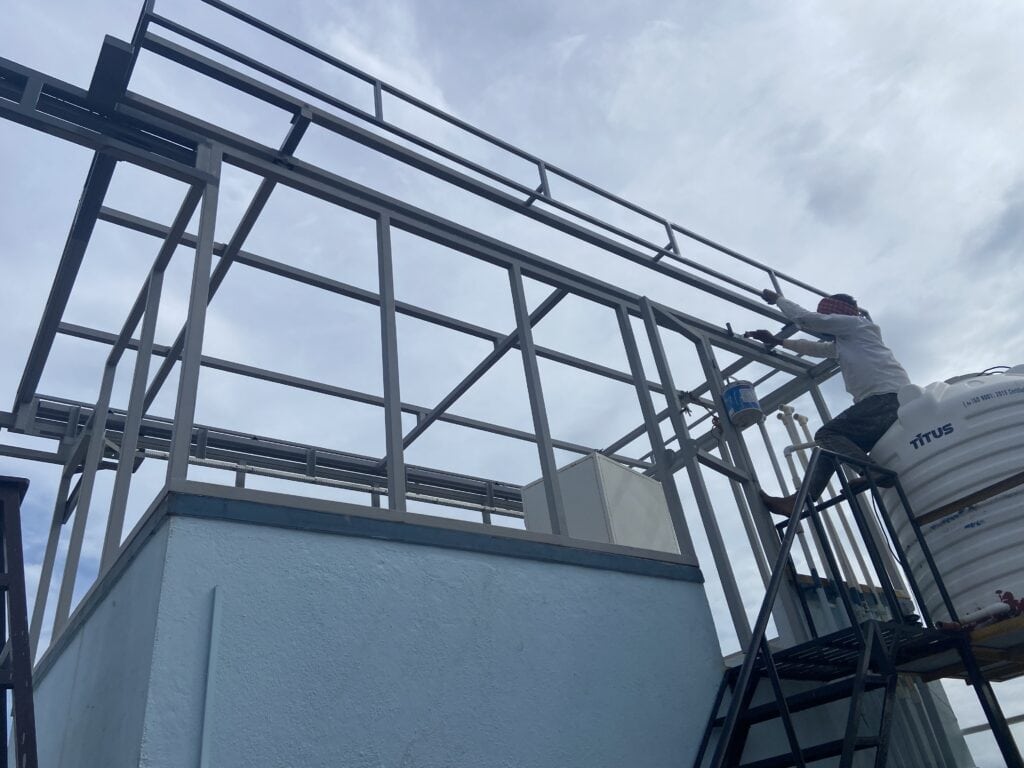
Installing the Framework
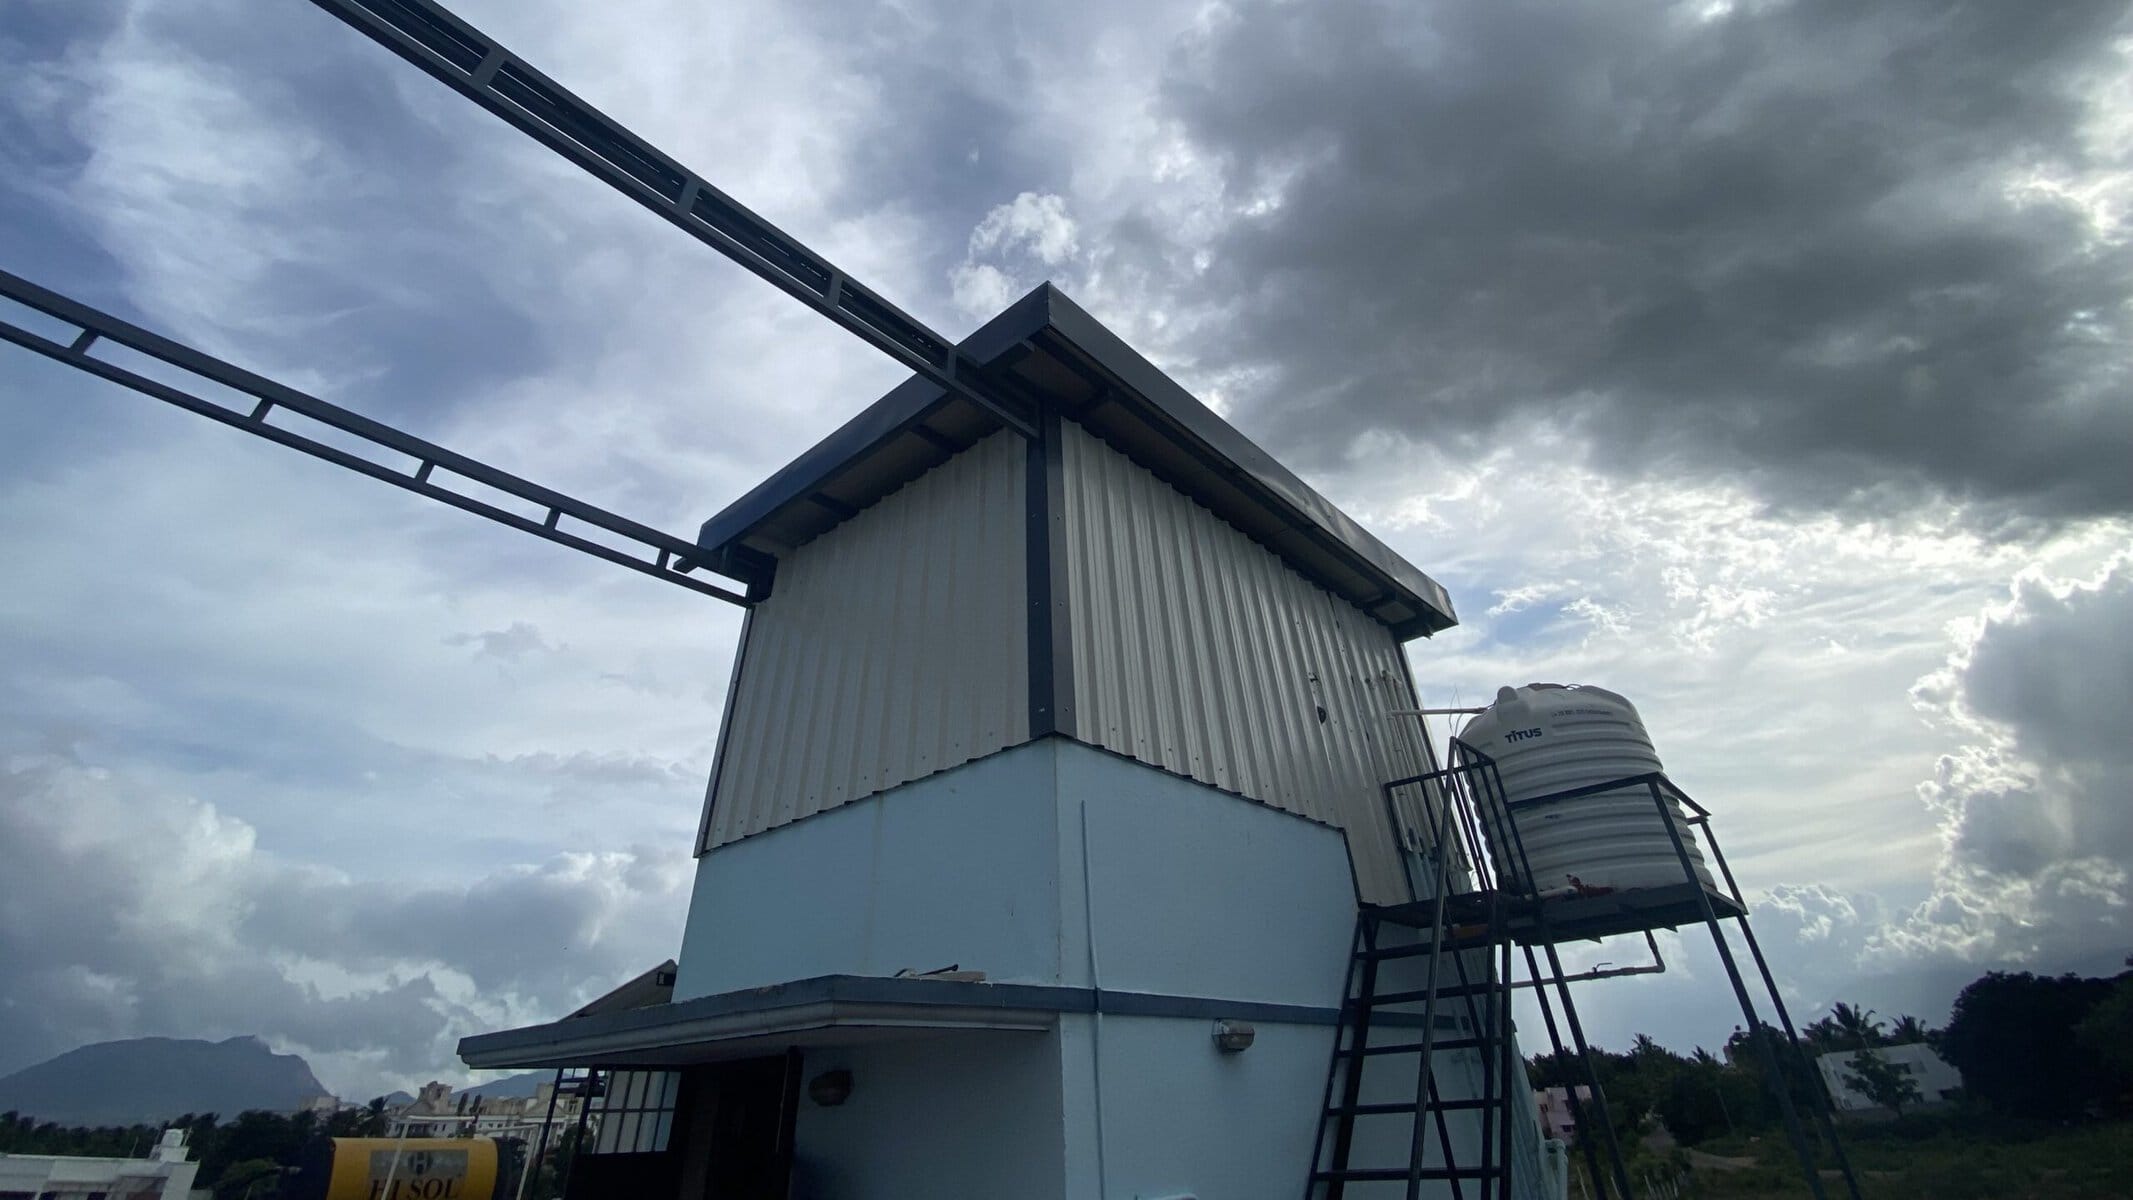
I installed the roll-off roof observatory on the stairwell on my terrace. The room is made over the stairwell, and the pillars to support the railings on which the roof slides over are installed on the terrace. The following are various parts of the framework.
- The framework for the main room
- Rails on which the roof slides
- Pillars to support the rails
- The rolling roof
Pictures below show the installation of the framework. I have added comments below each picture to explain.


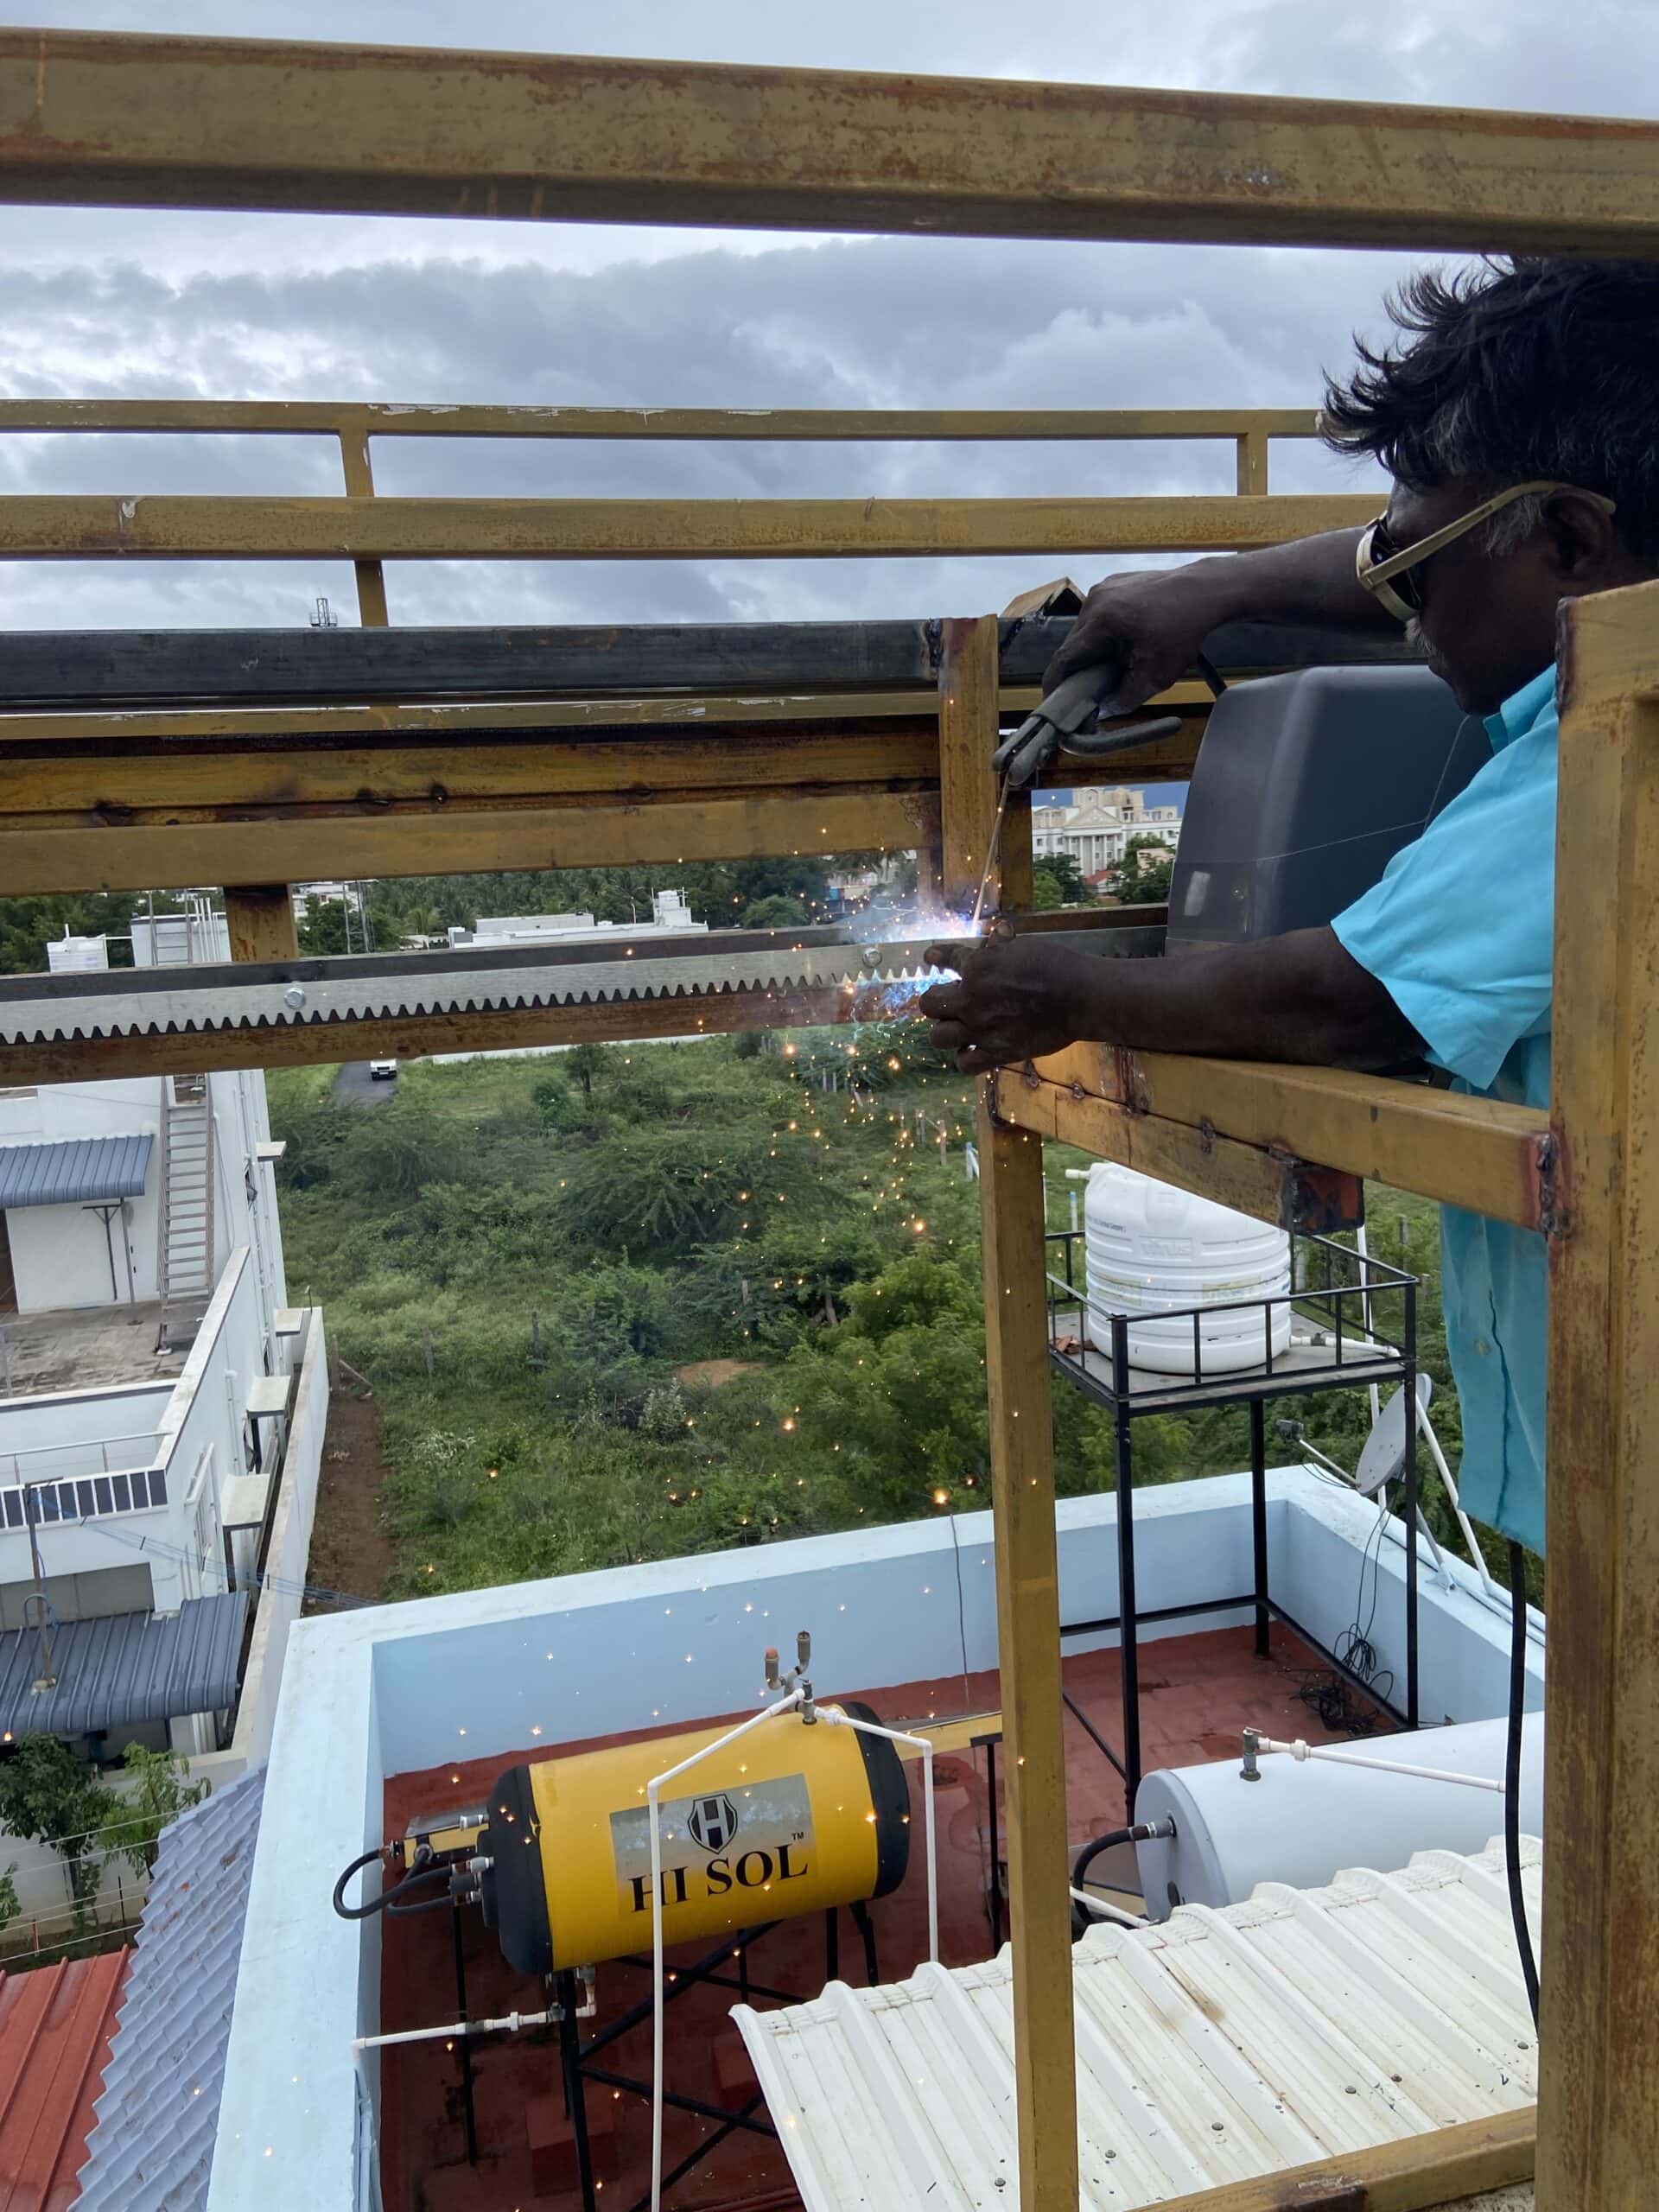
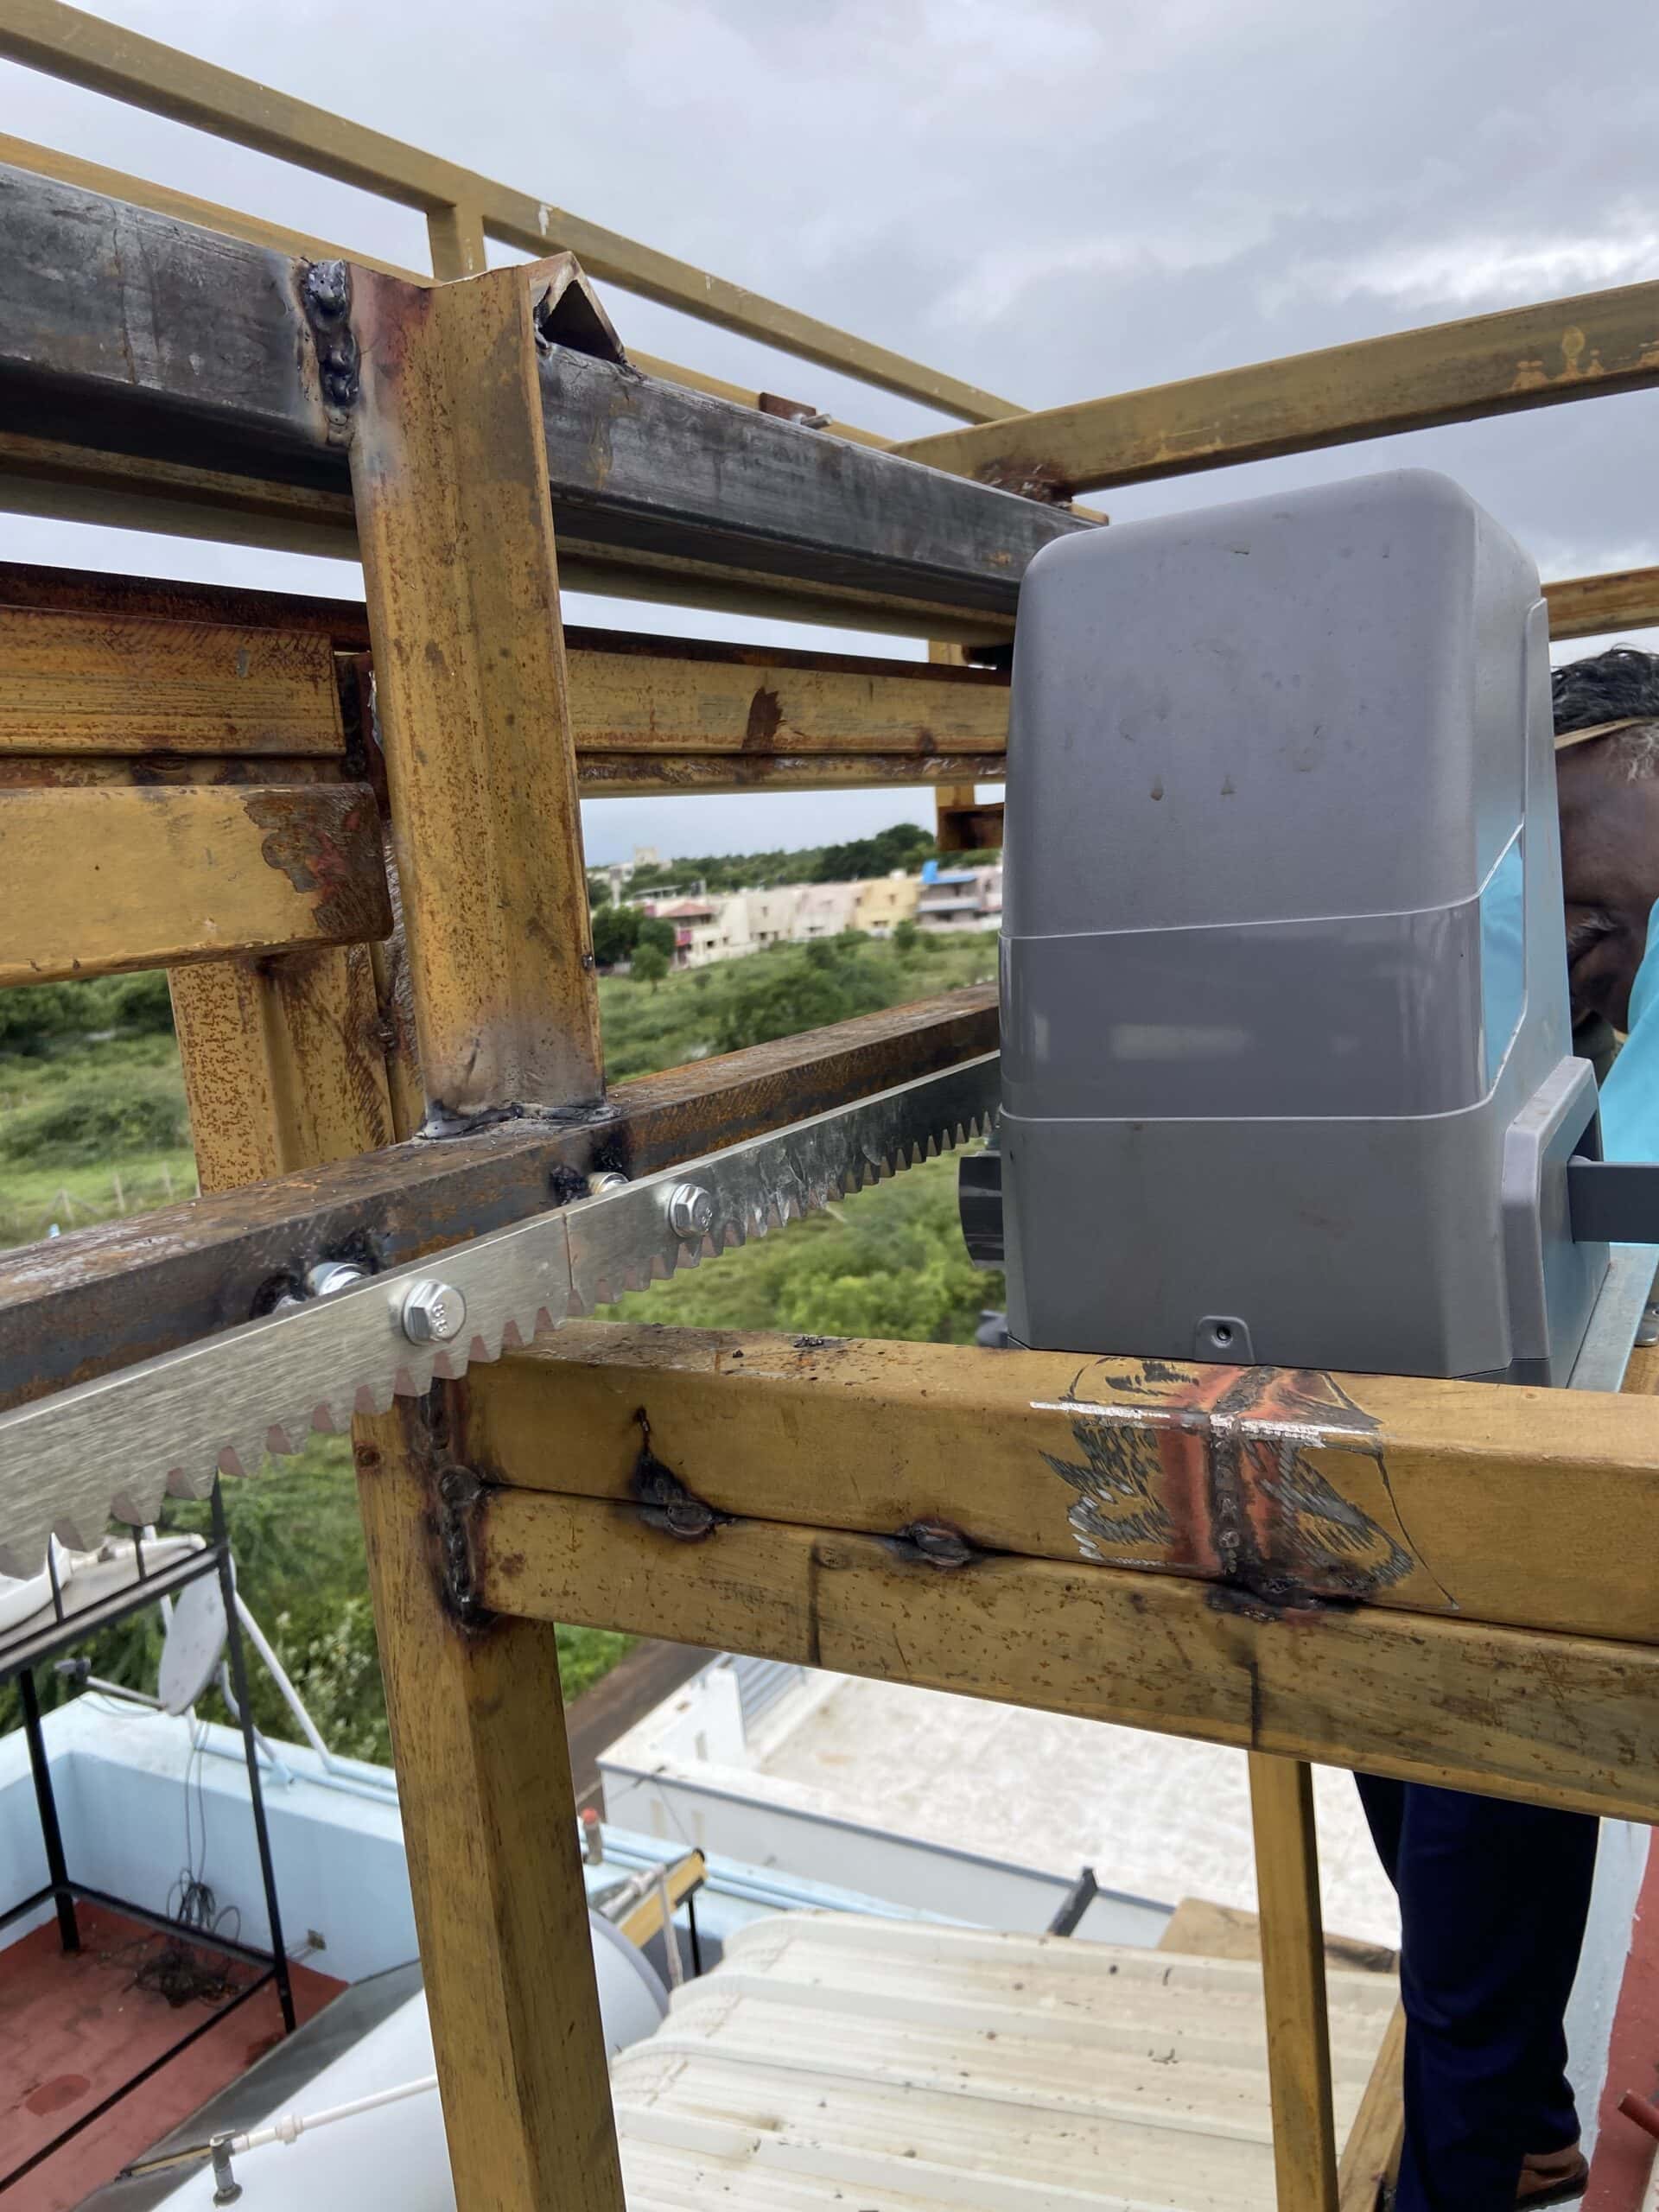
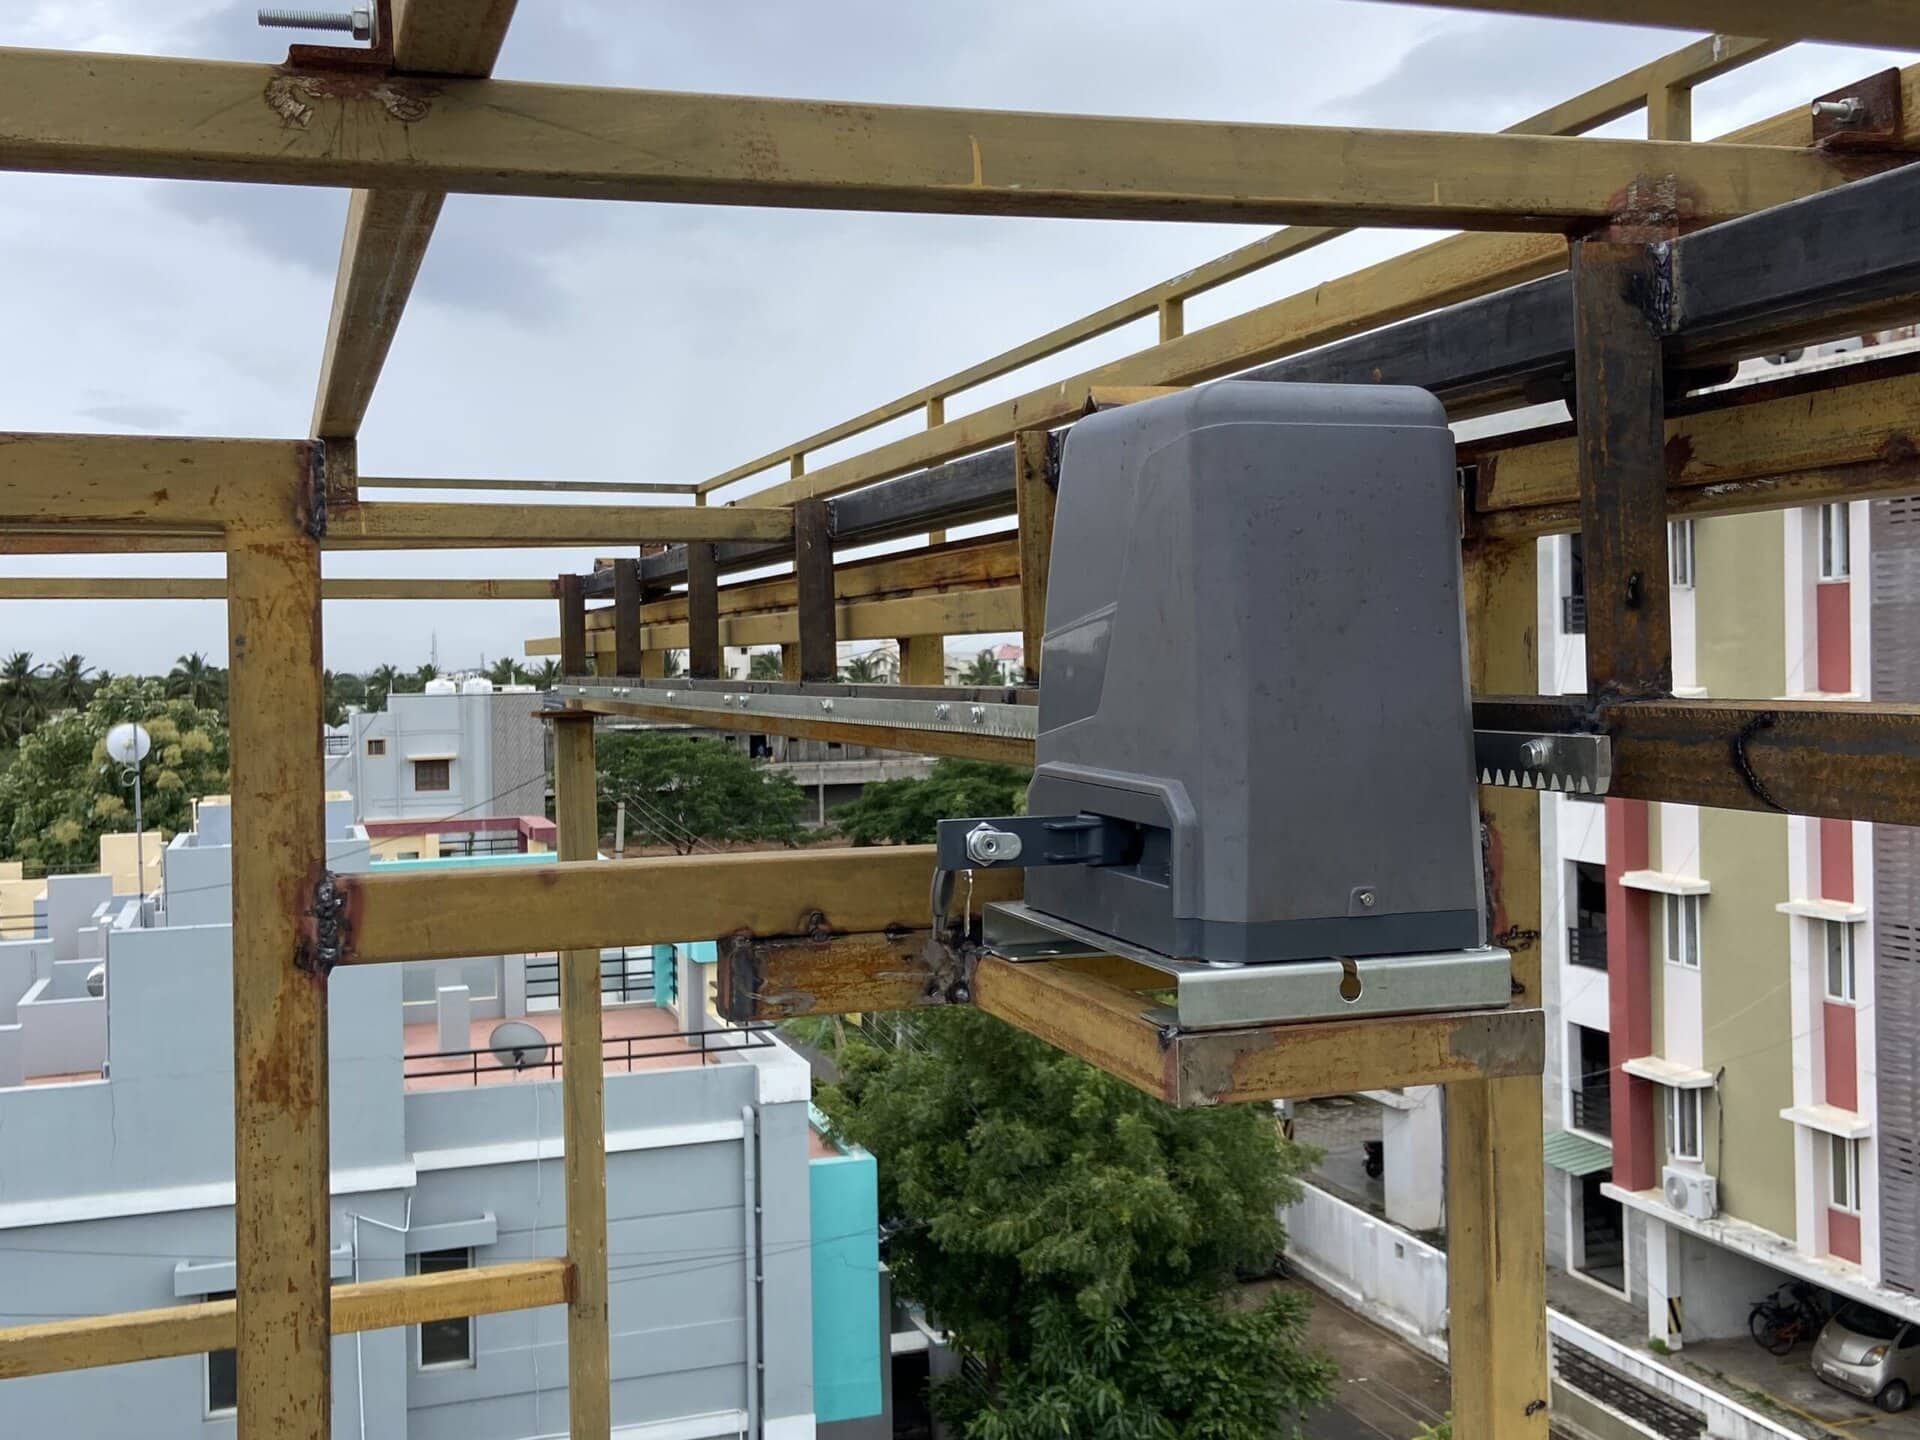
Installing and Testing the Motor
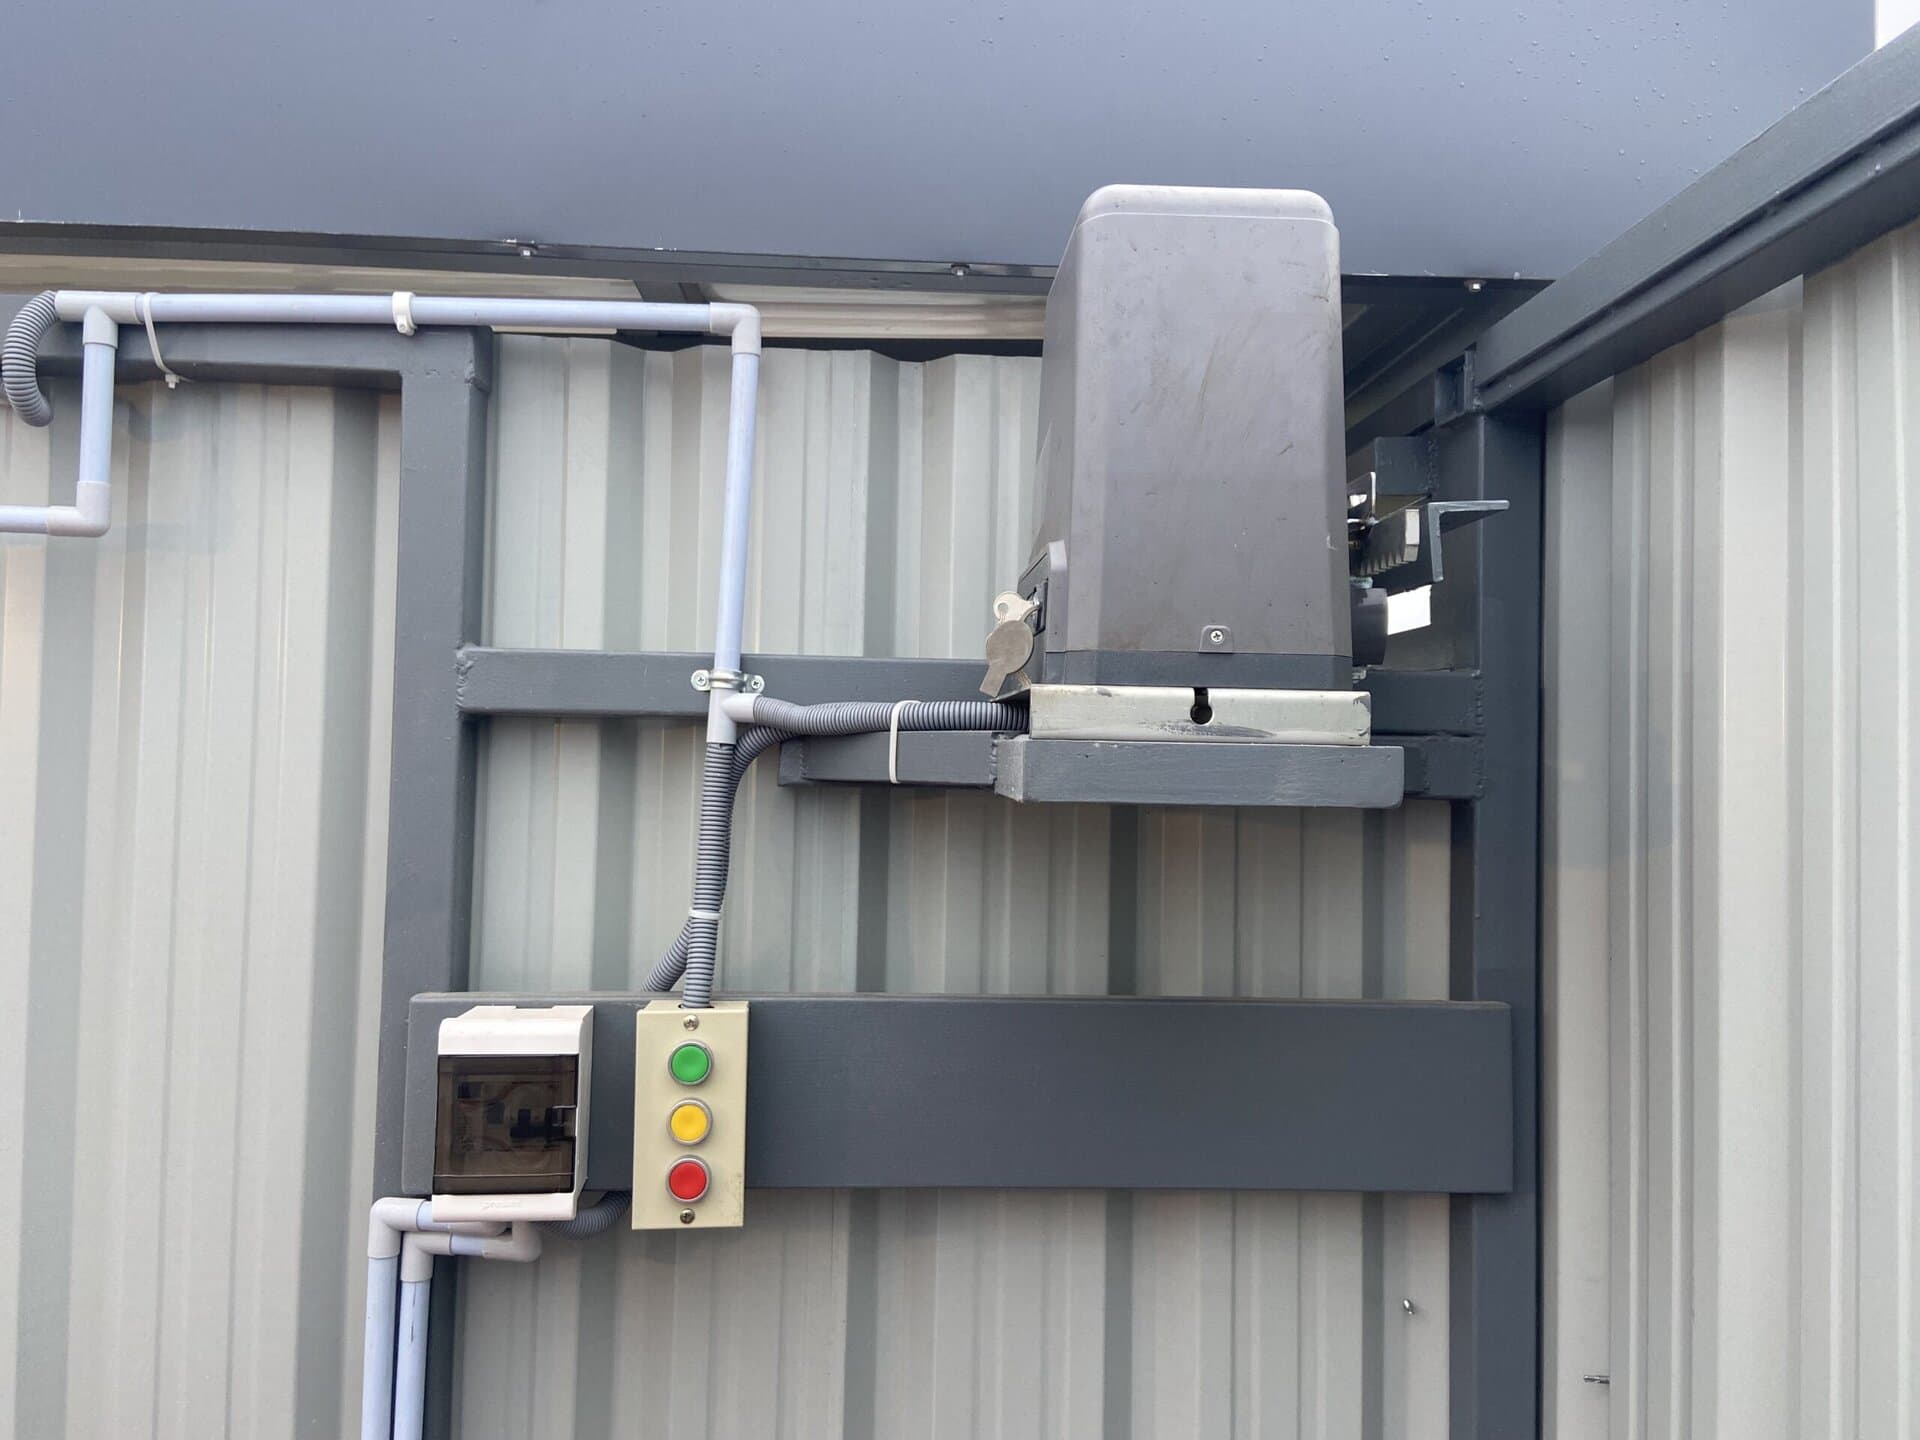
As the roof weighs close to 400 kilos, it would take a lot of effort to manually open or close the roof. So, I decided to use a gate automation motor to open and close the roof. I went with a motor rated for a load of 800 kilos. The motor drives a geared rail attached to the roof.
The motor comes with a controller that automatically stops the motor when the roof reaches the end of travel on either end. The roof can be opened or closed using a remote control or switches in a control panel. As part of the structure construction, the frame to fix the motor, the geared rail on the roof, etc., were fixed, and a trial run was done to test the function of the motor.
After this, the motor was uninstalled. It was reinstalled after painting the structure and fixing the sheets.
The pictures below show the installation of the motor.


The video below shows the testing of the sliding roof.
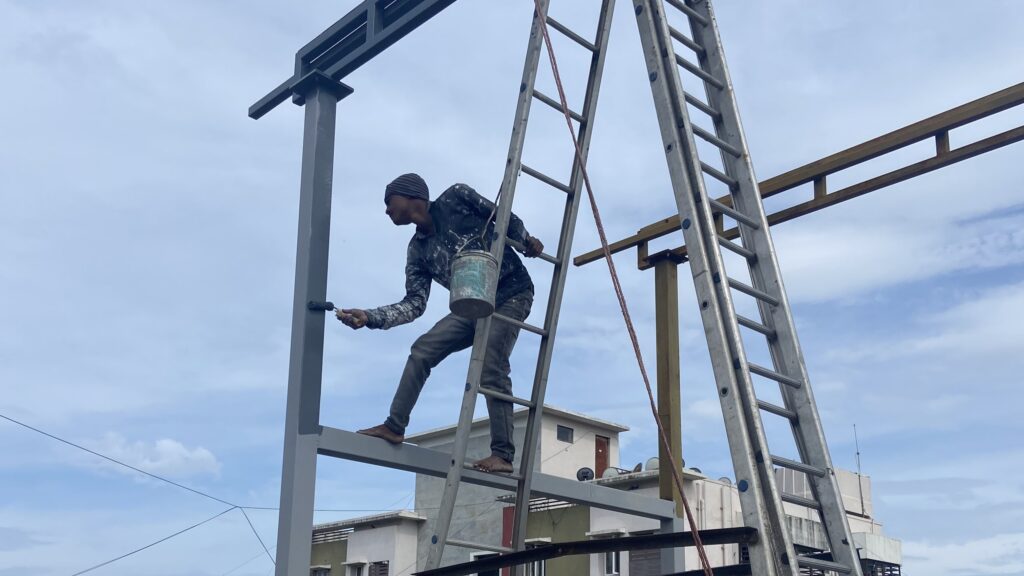
Painting the structure
The next step was to paint the structure. This was a straightforward process. A couple of pictures of this step.
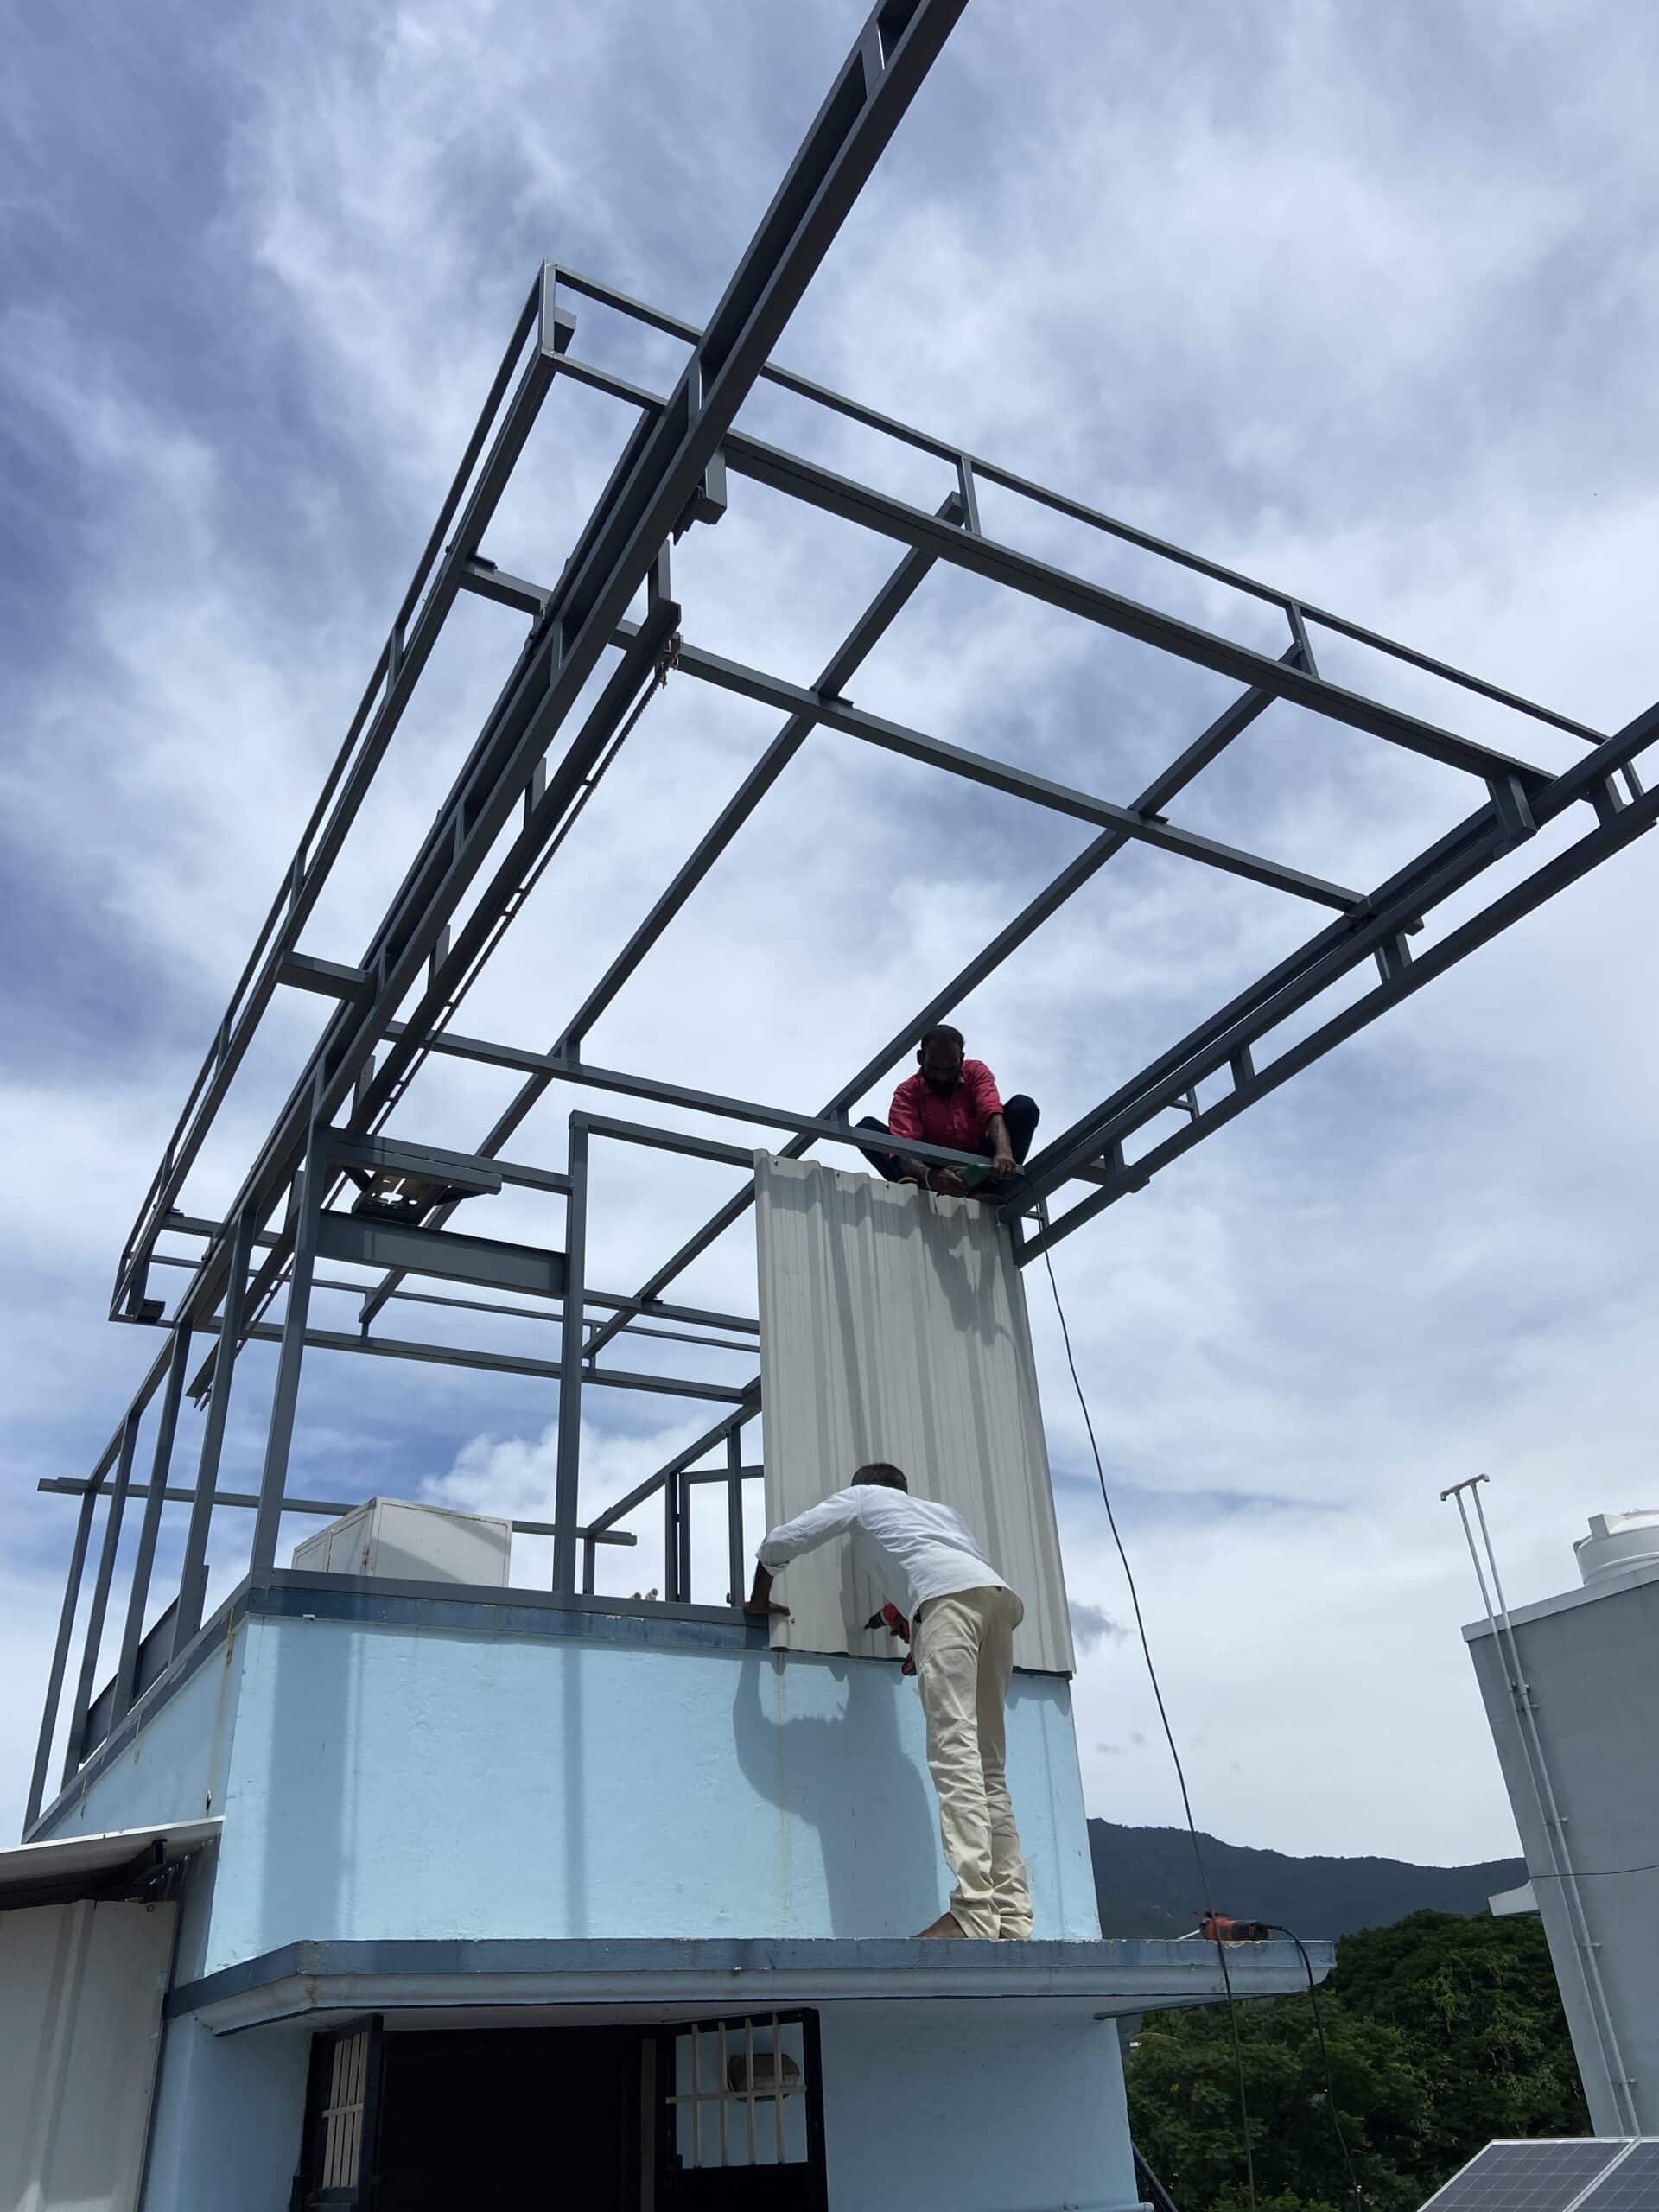
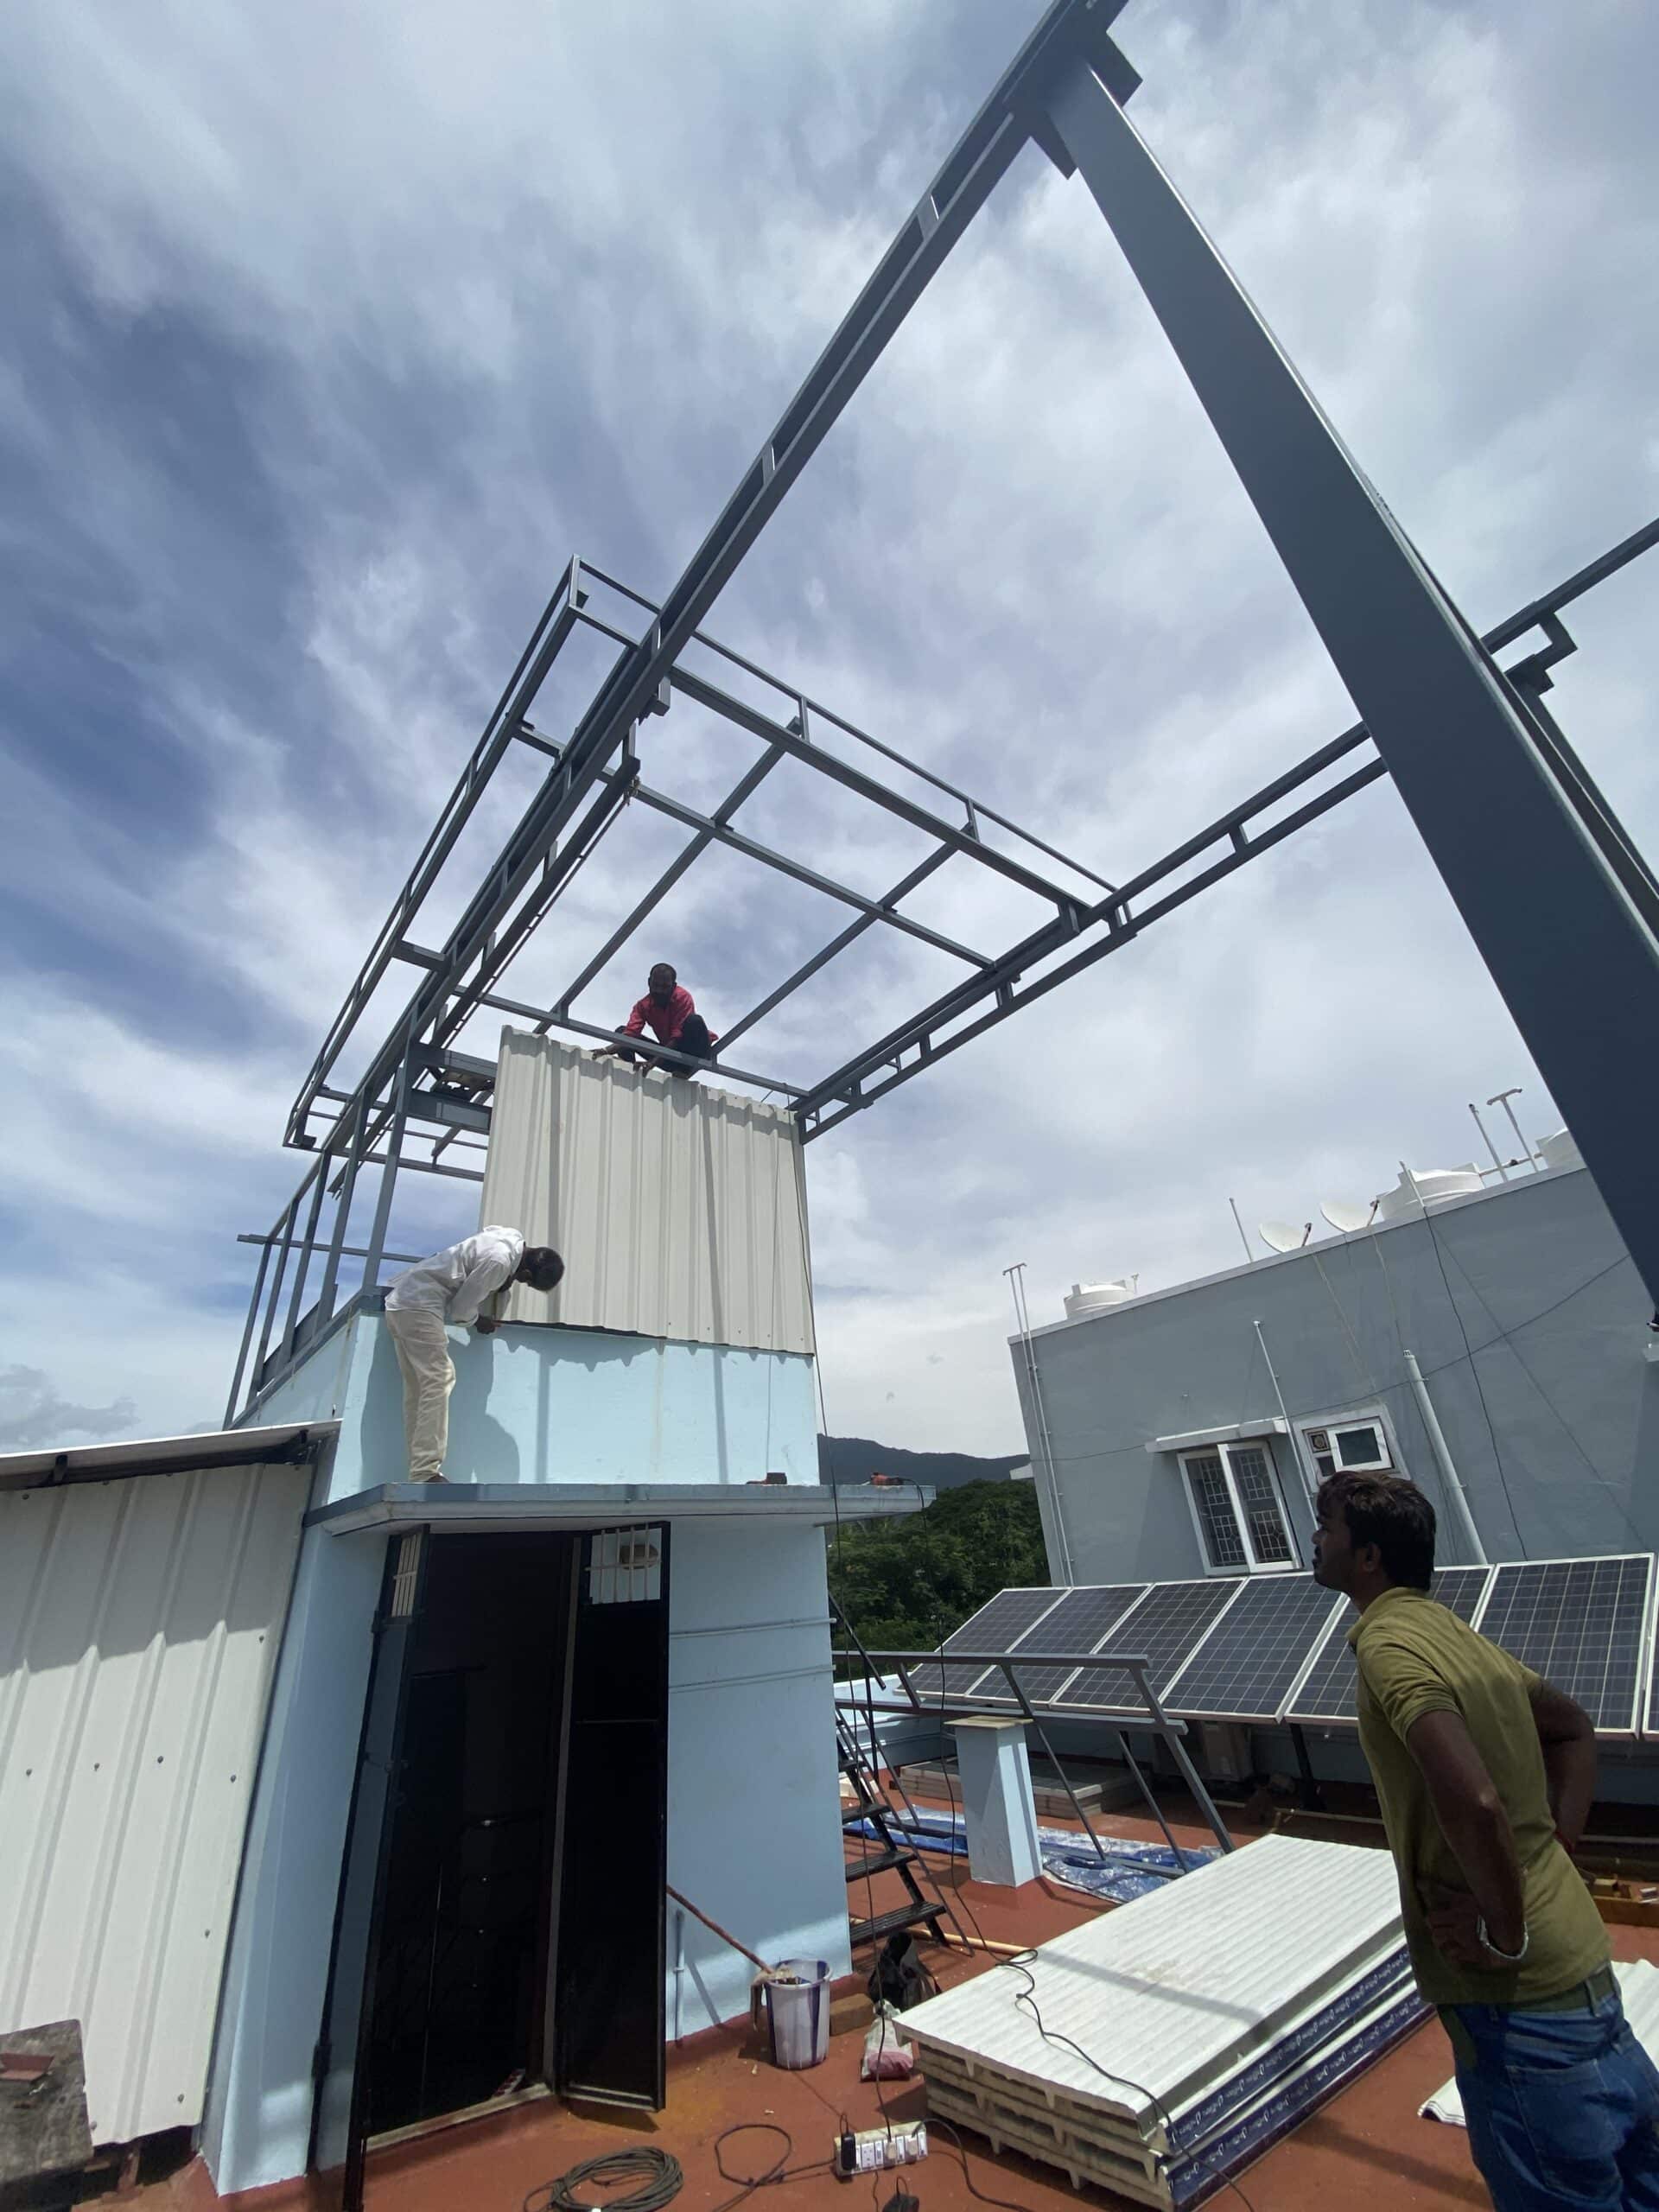
Installing Corrugated Sheets
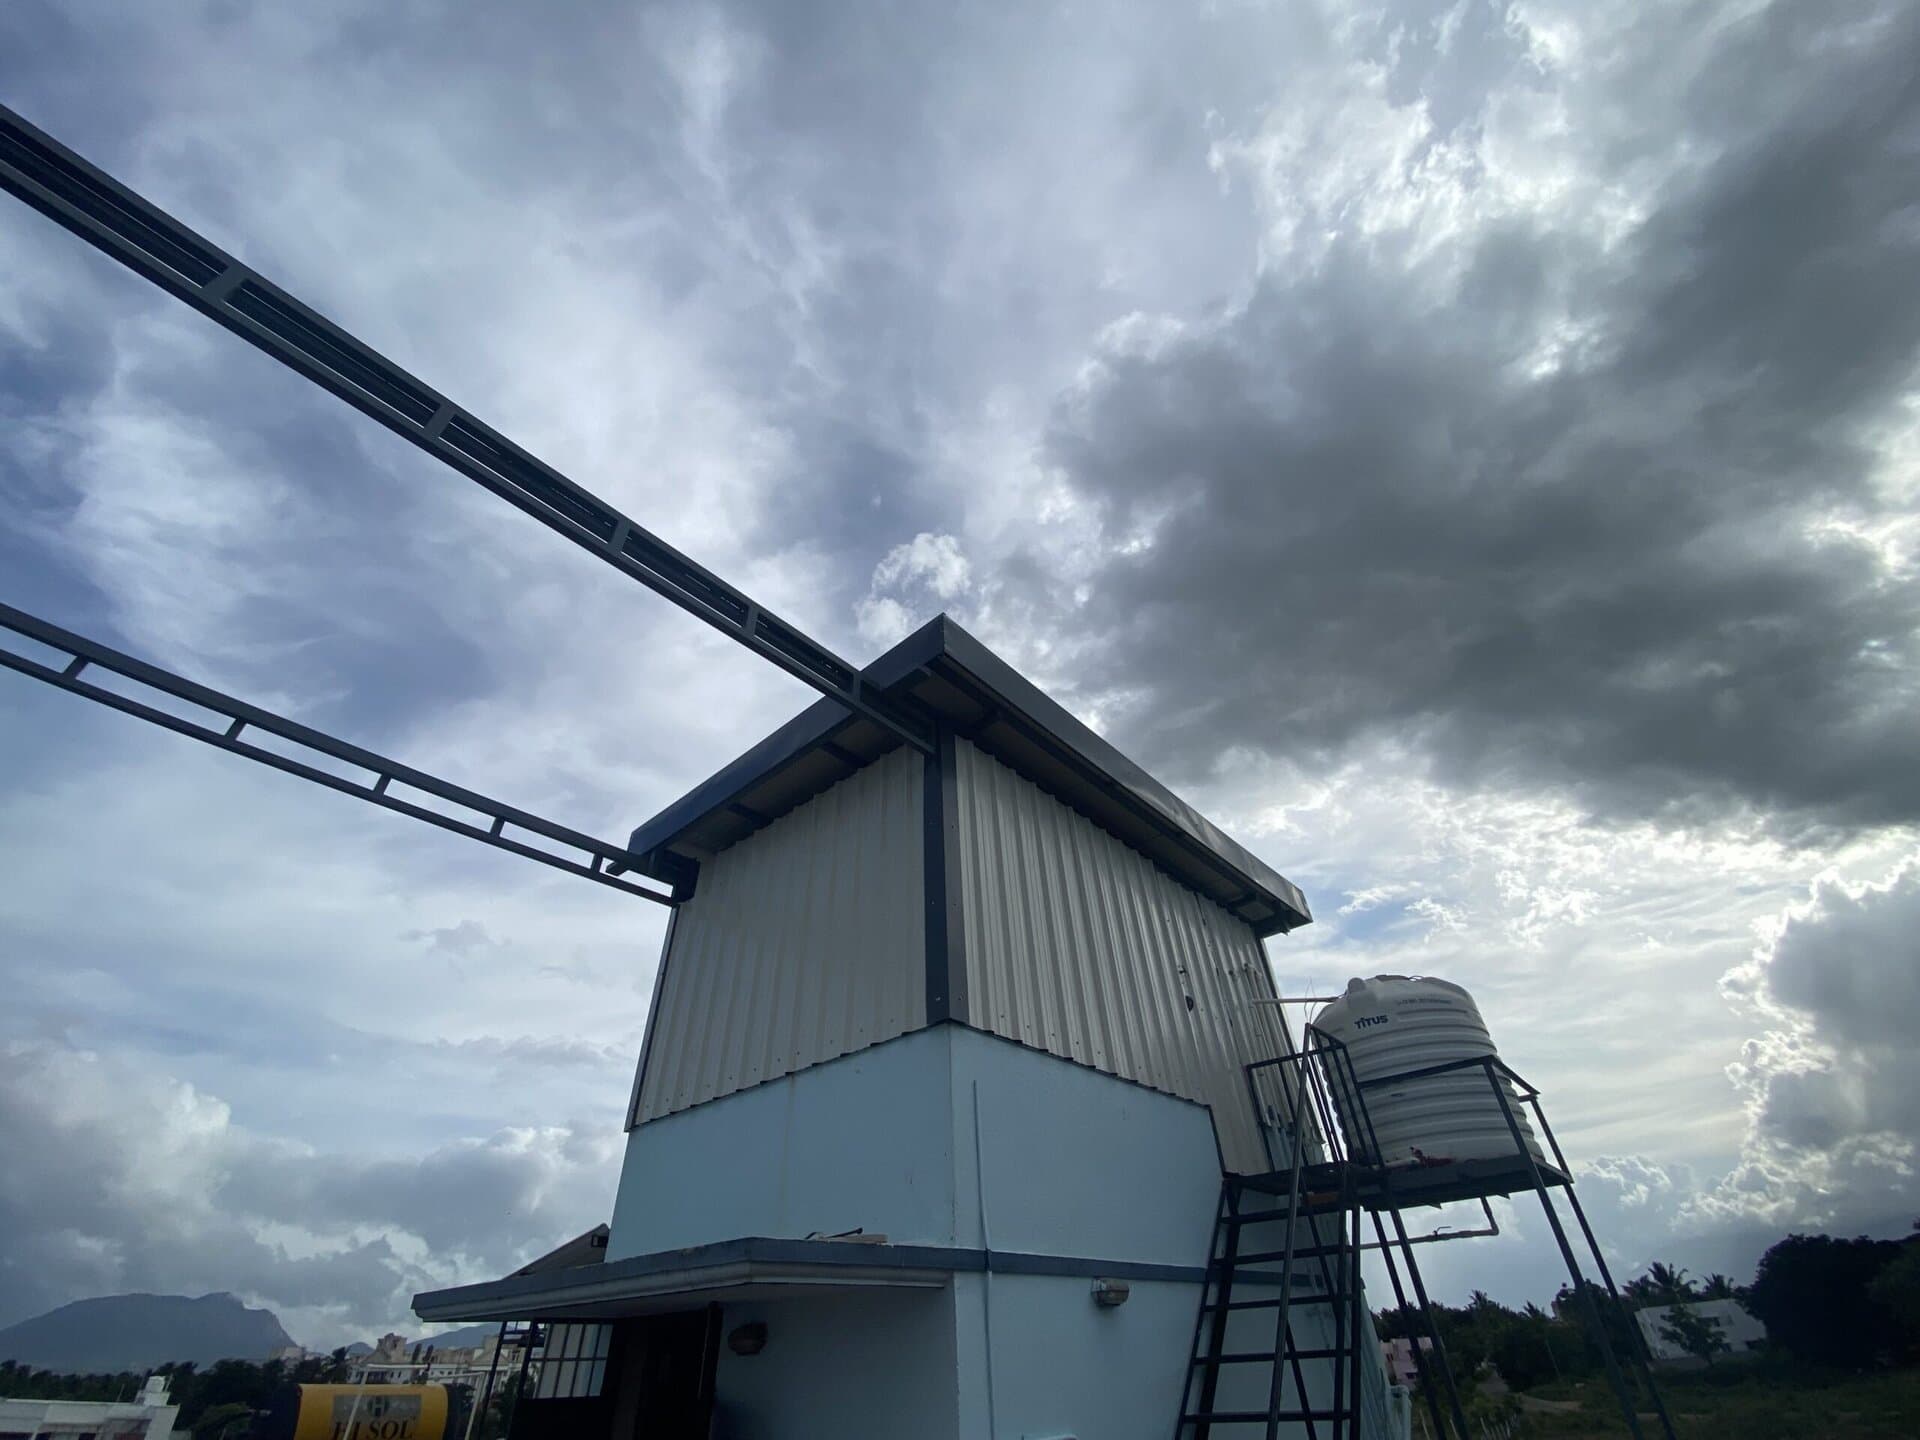
Once the frame was painted, the next step was to install corrugated sheets to cover the enclosure and the roof. I used white color sheets to reflect heat, and also used a 5mm PUF insulated roof for added heat insulation. Below are a few pictures of the installation of corrugated sheets and the finished structure.

Electrical Wiring
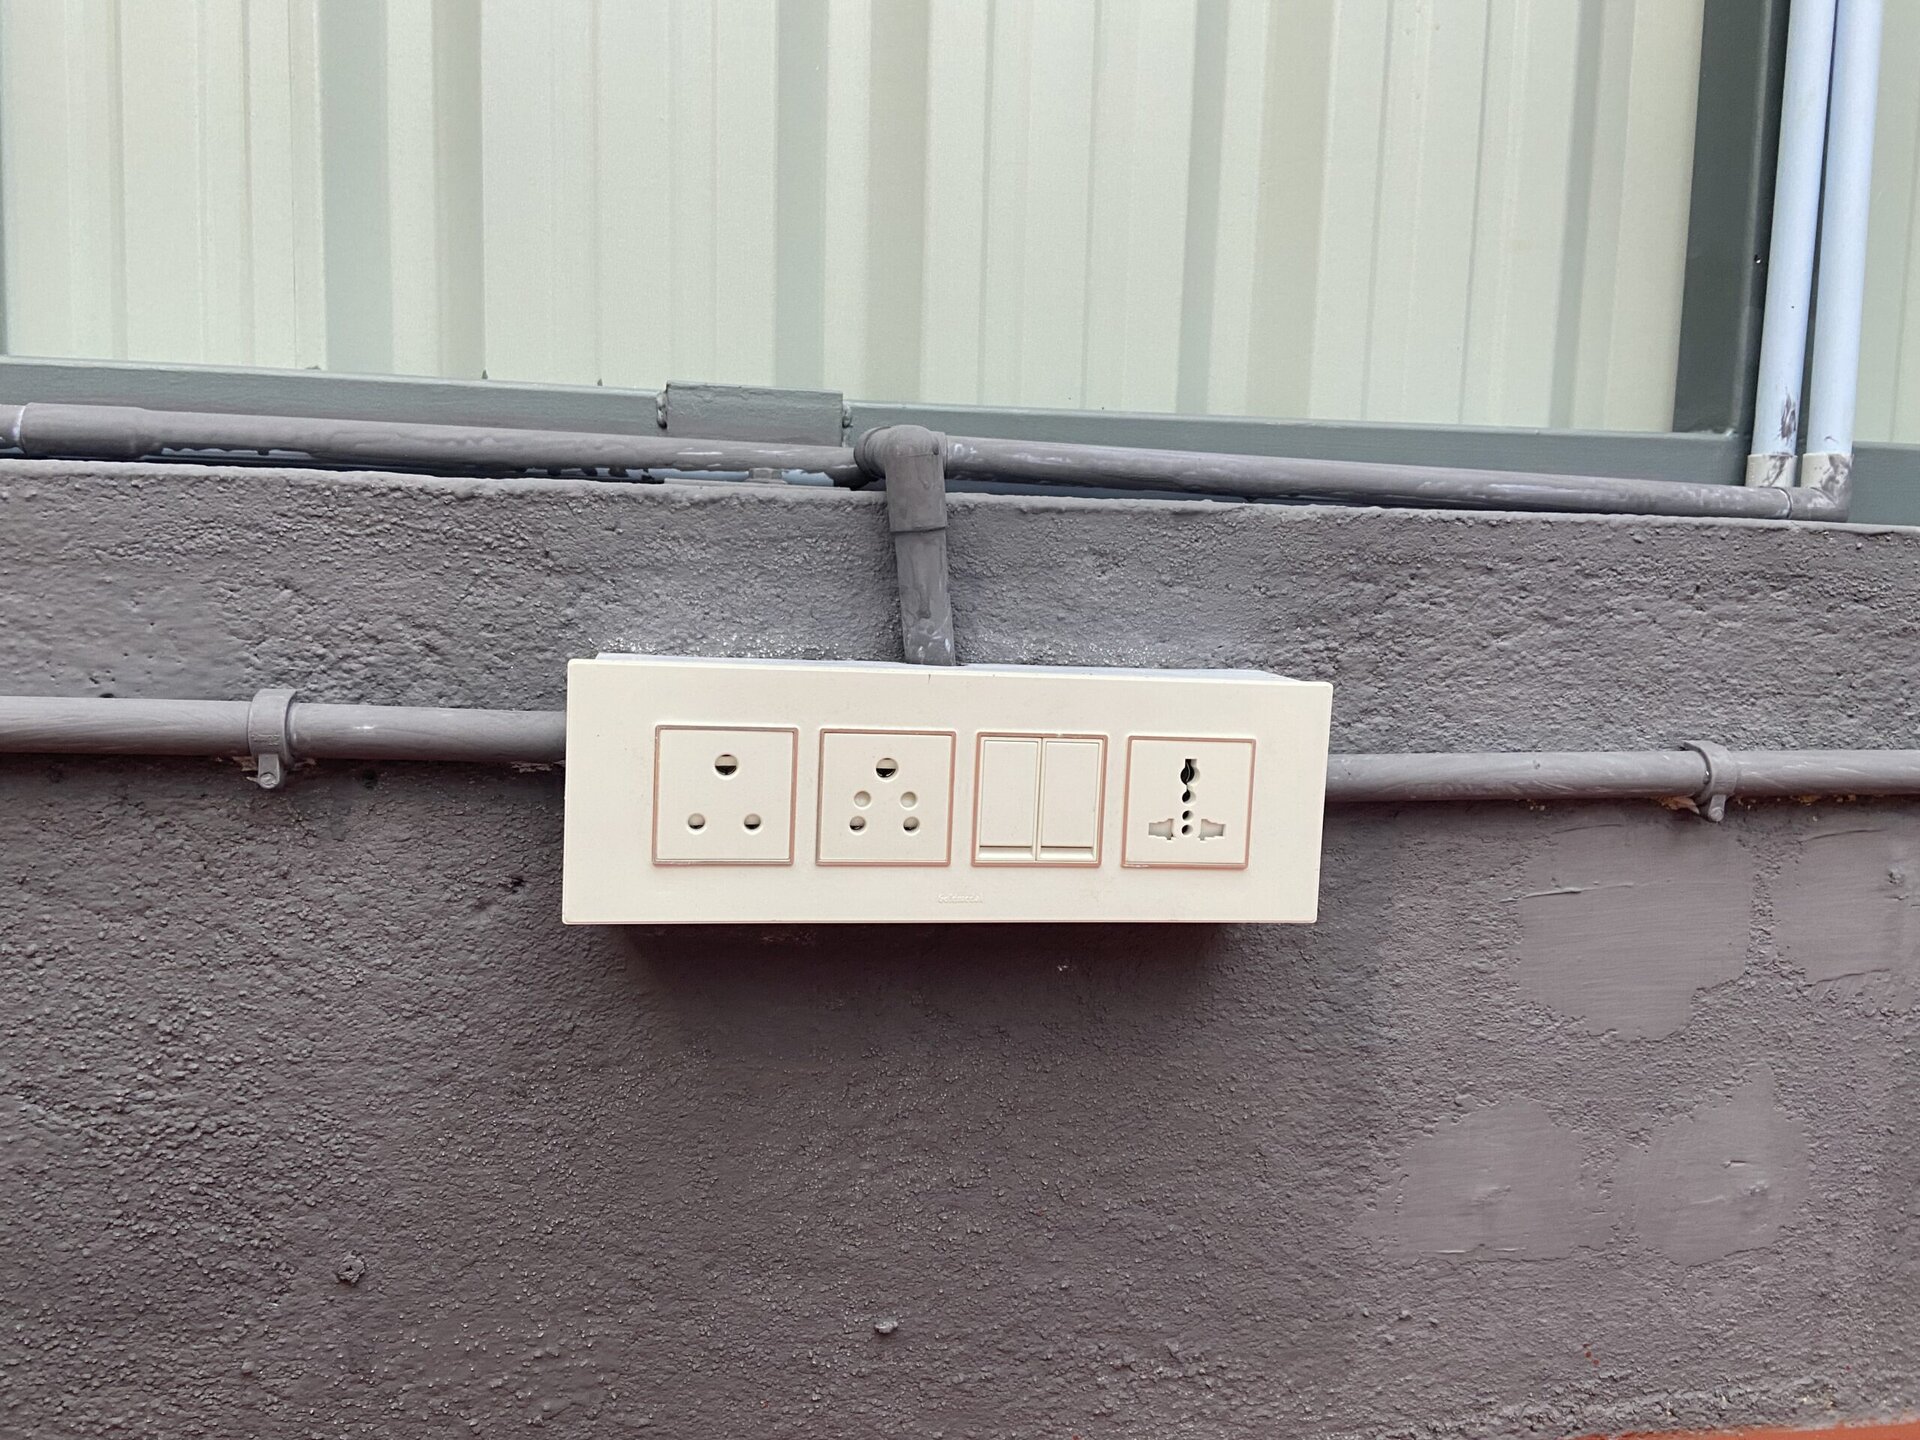
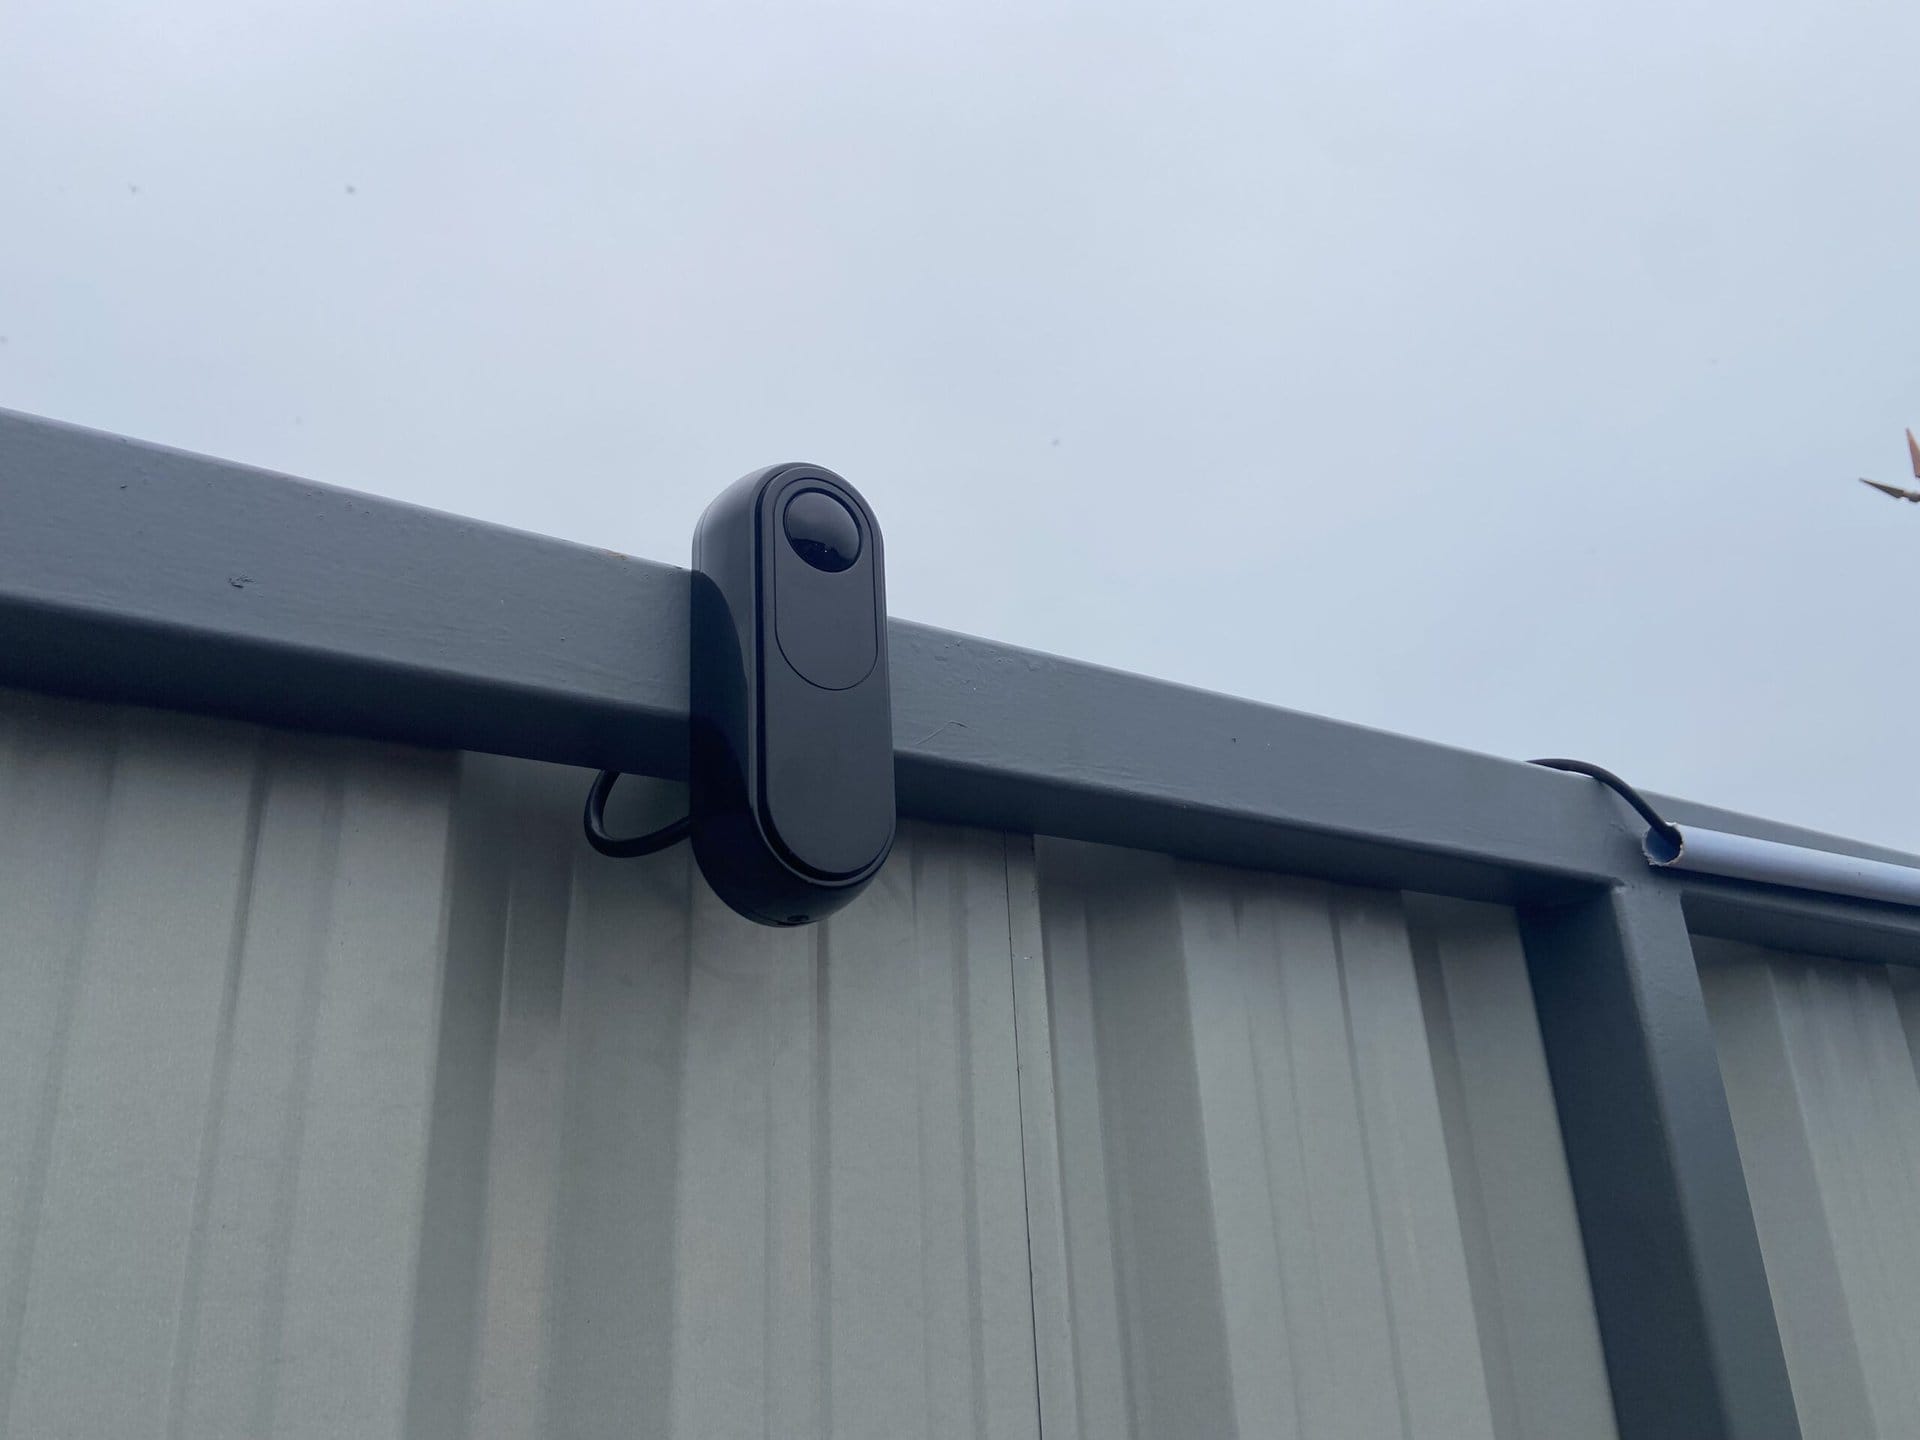
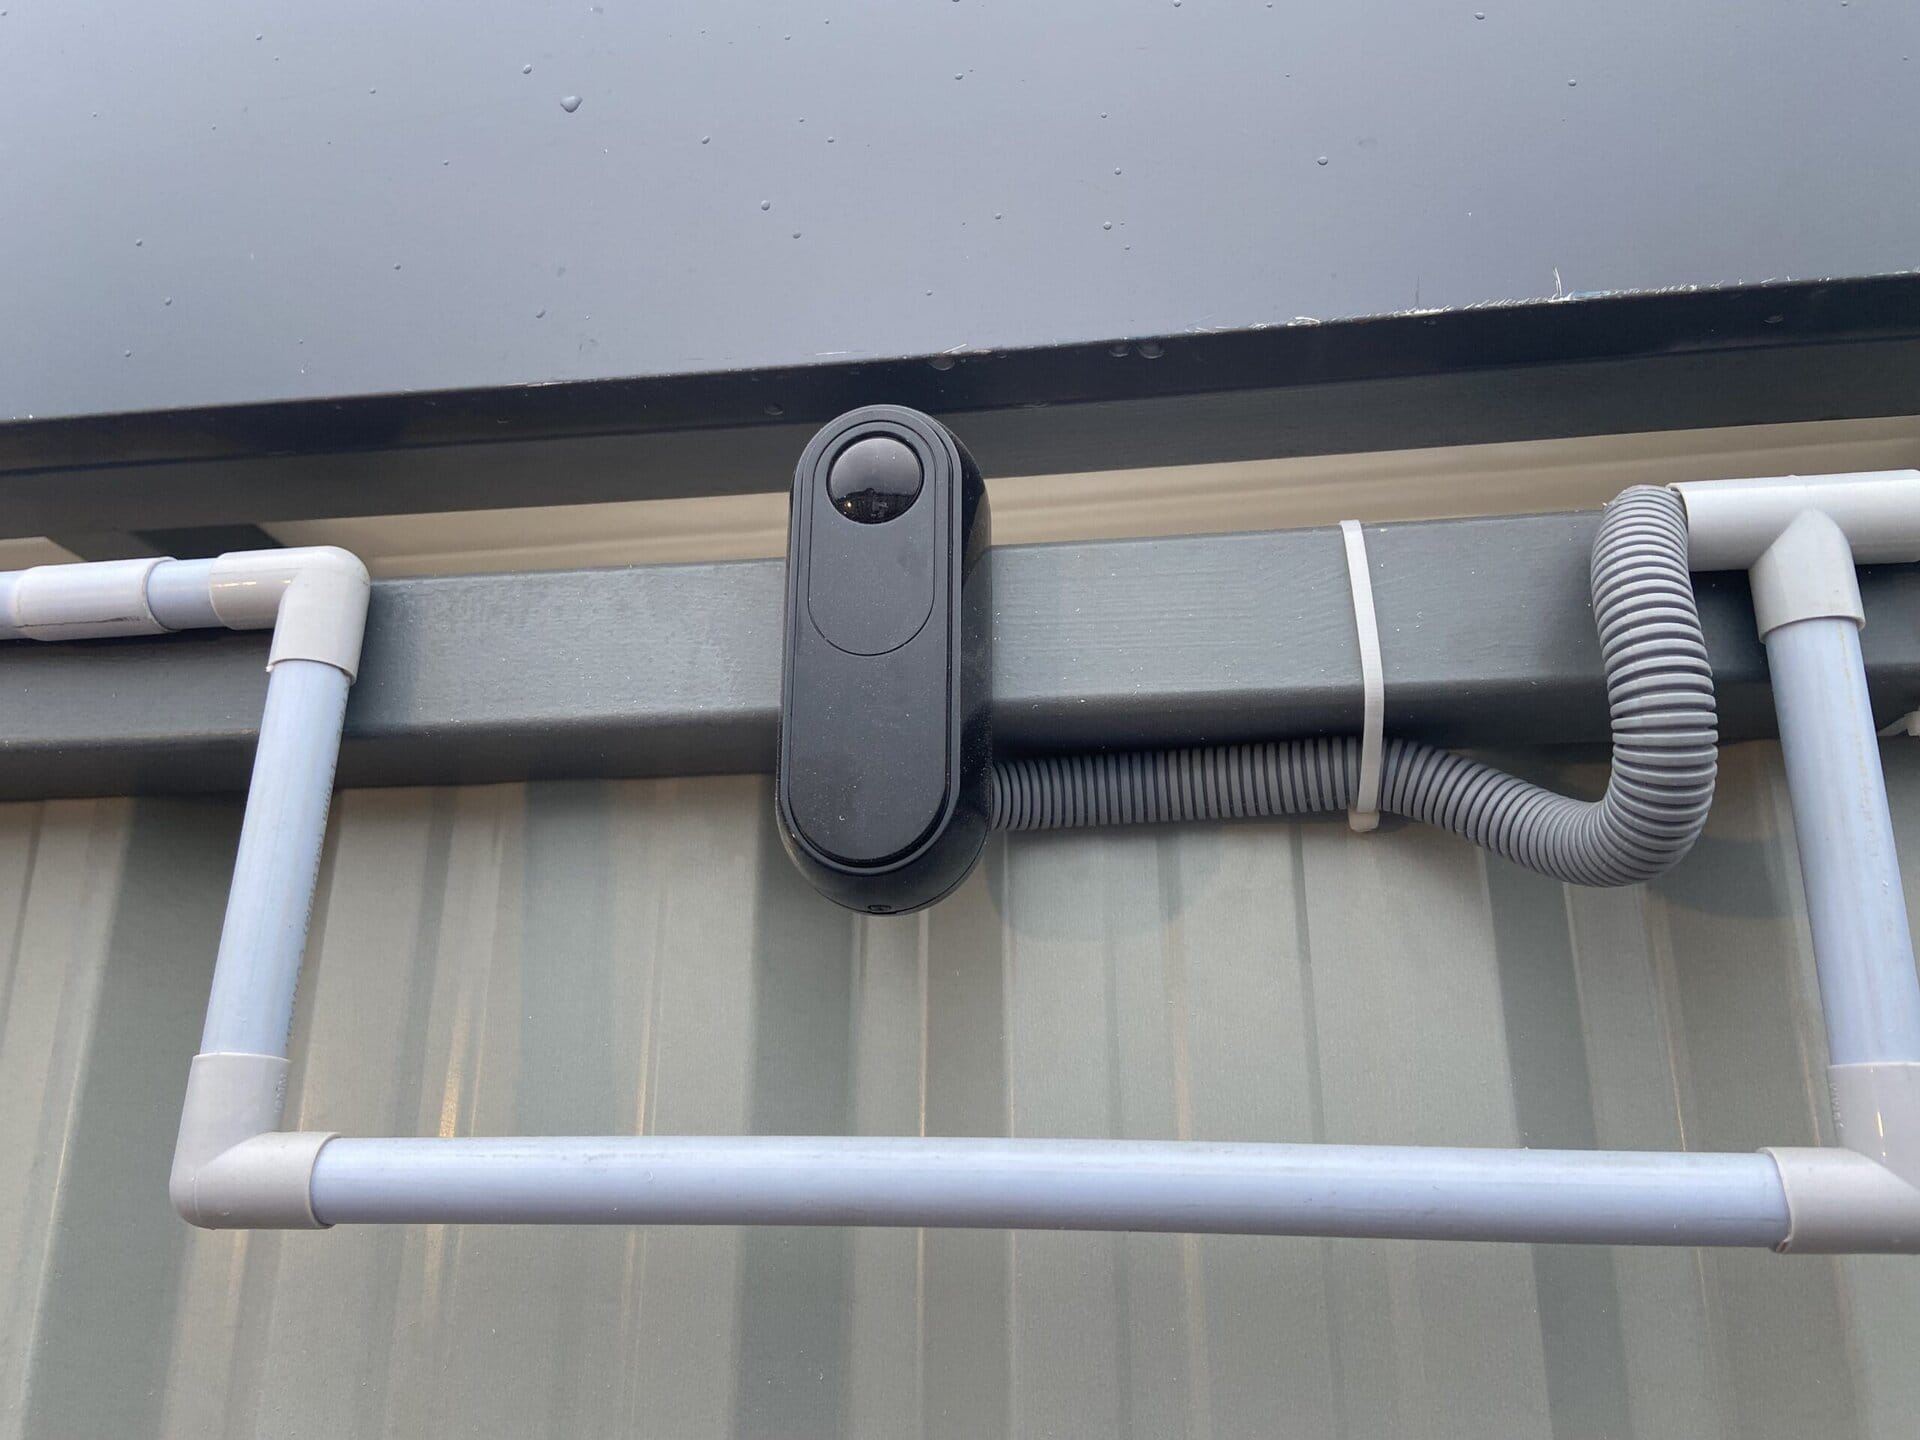
After this, I got the electrical wiring done. This included installing plug points to connect the equipment, power supply for the motor, wiring for the infra-red sensor system (to prevent closing of roof when telescopes are deployed), and the control panel for the motor with switches to open and close the roof. The pictures below show various parts of the electrical wiring.

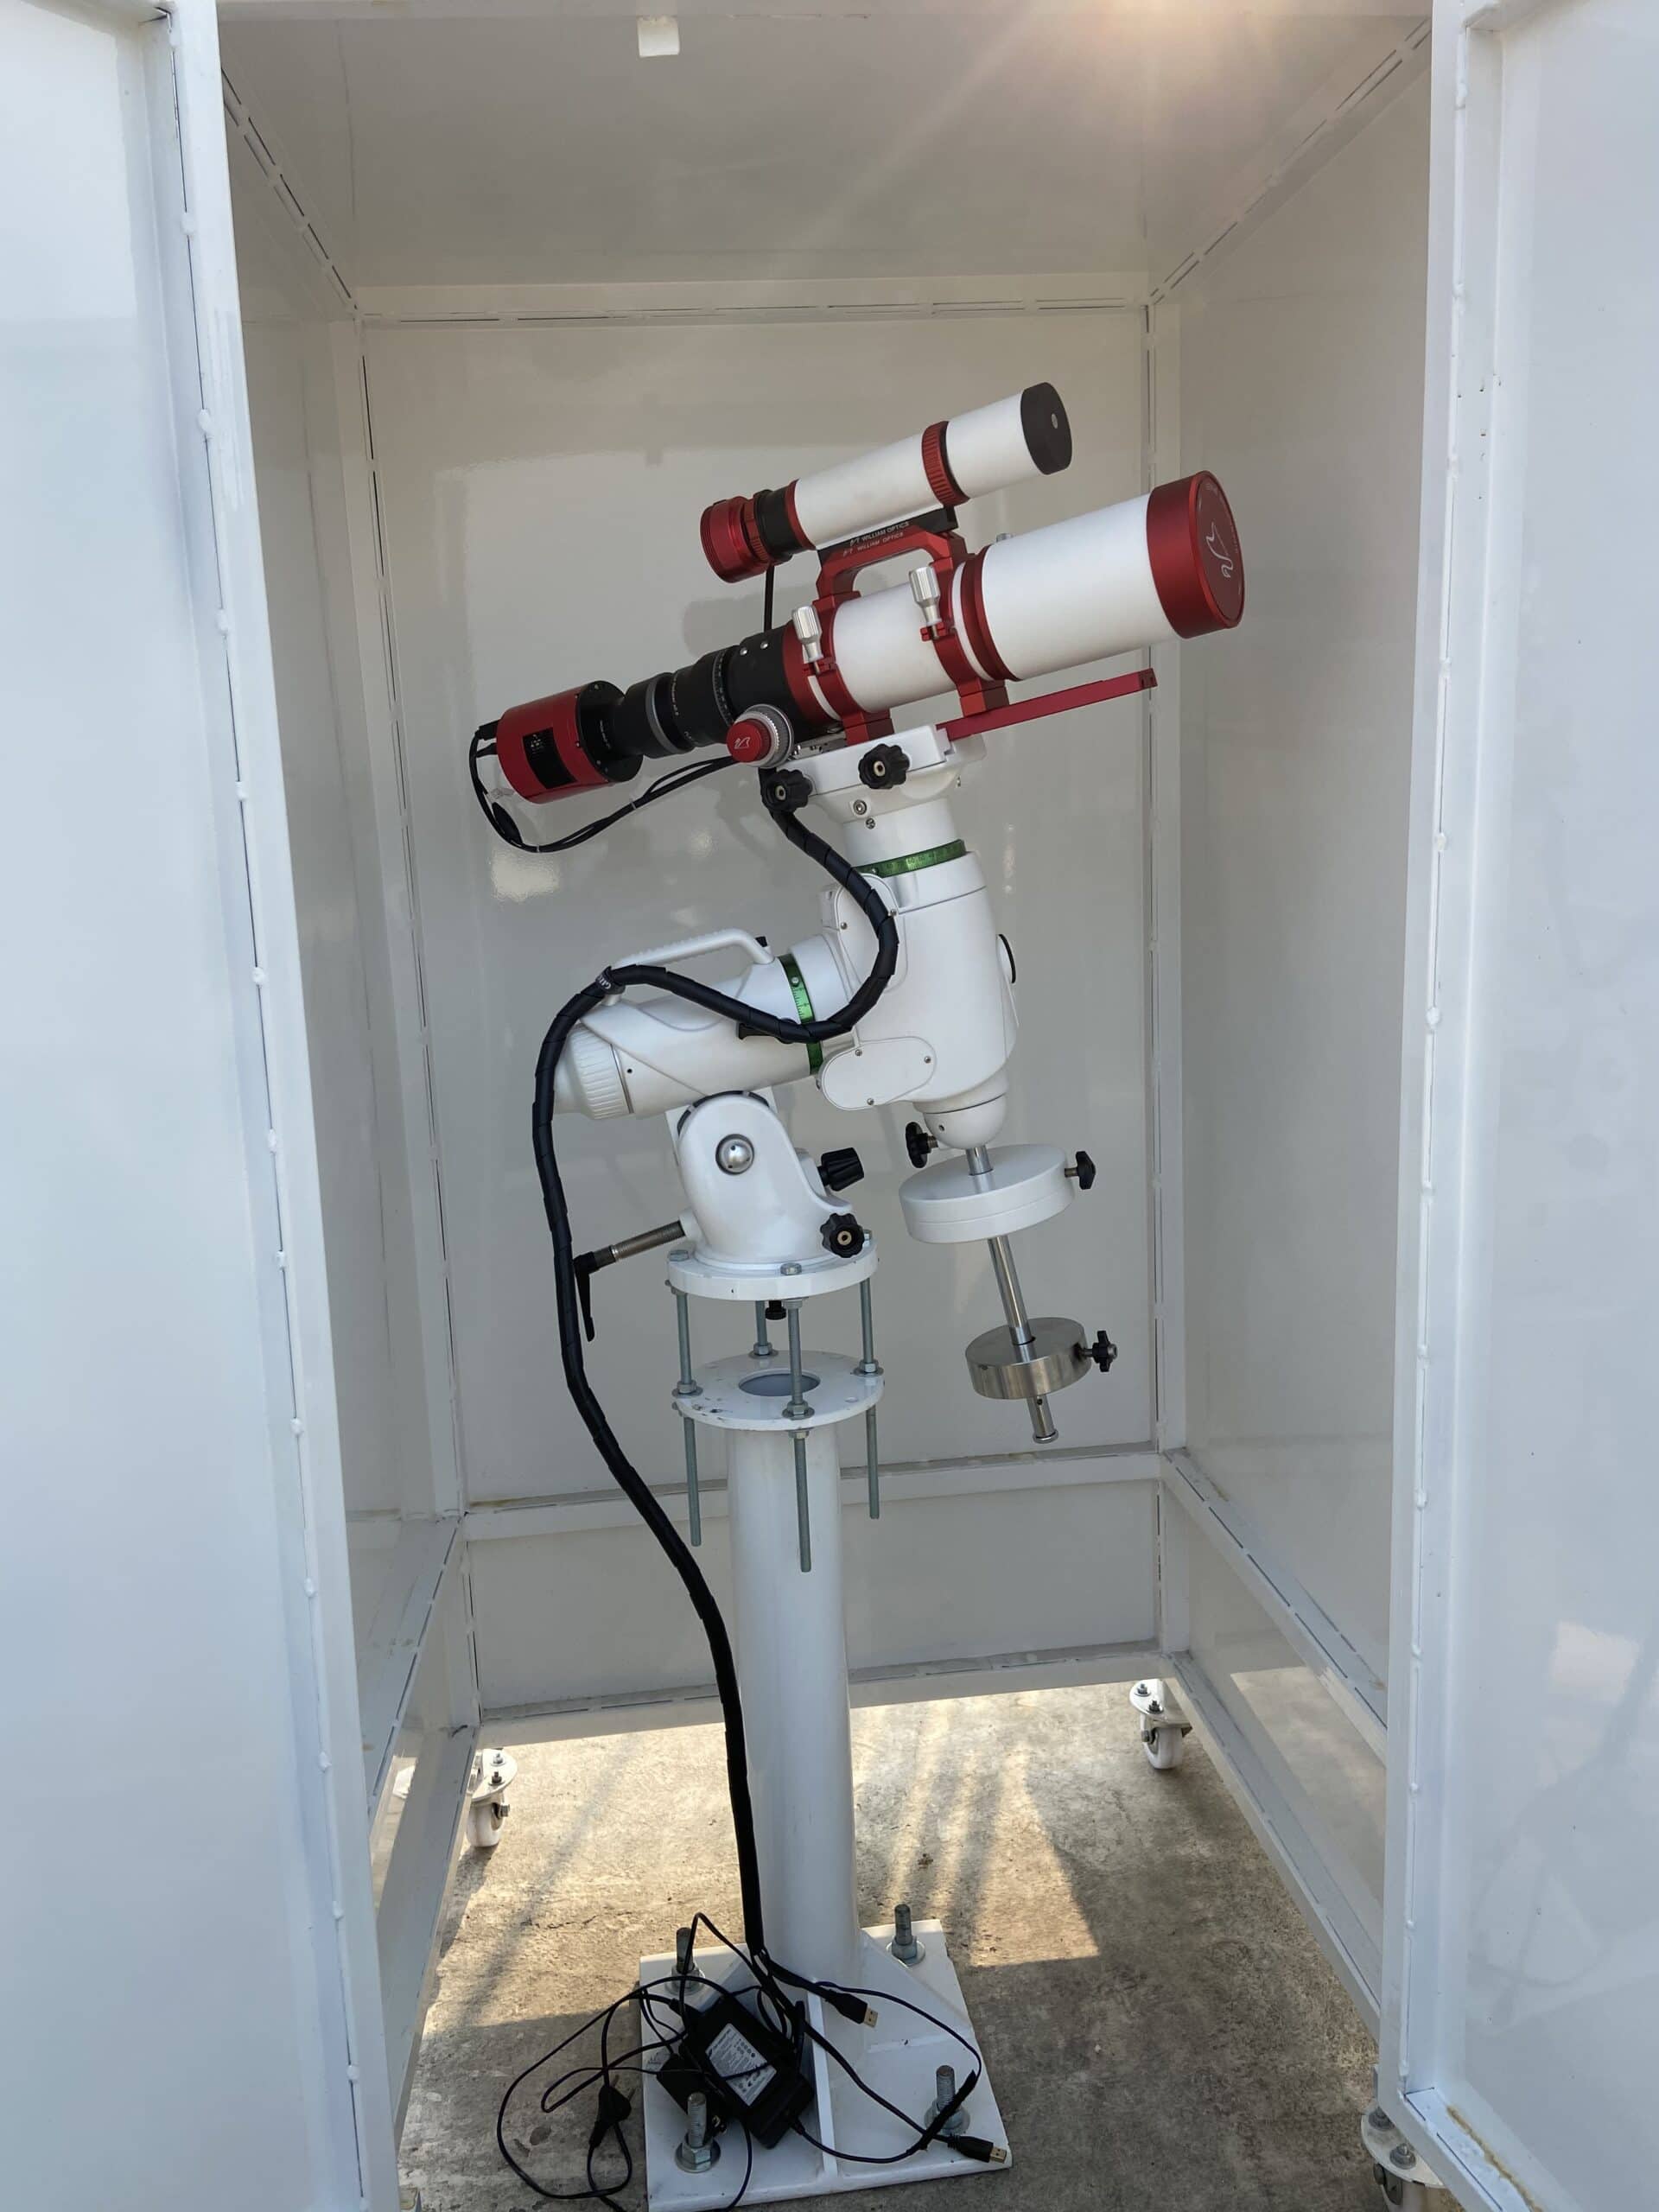
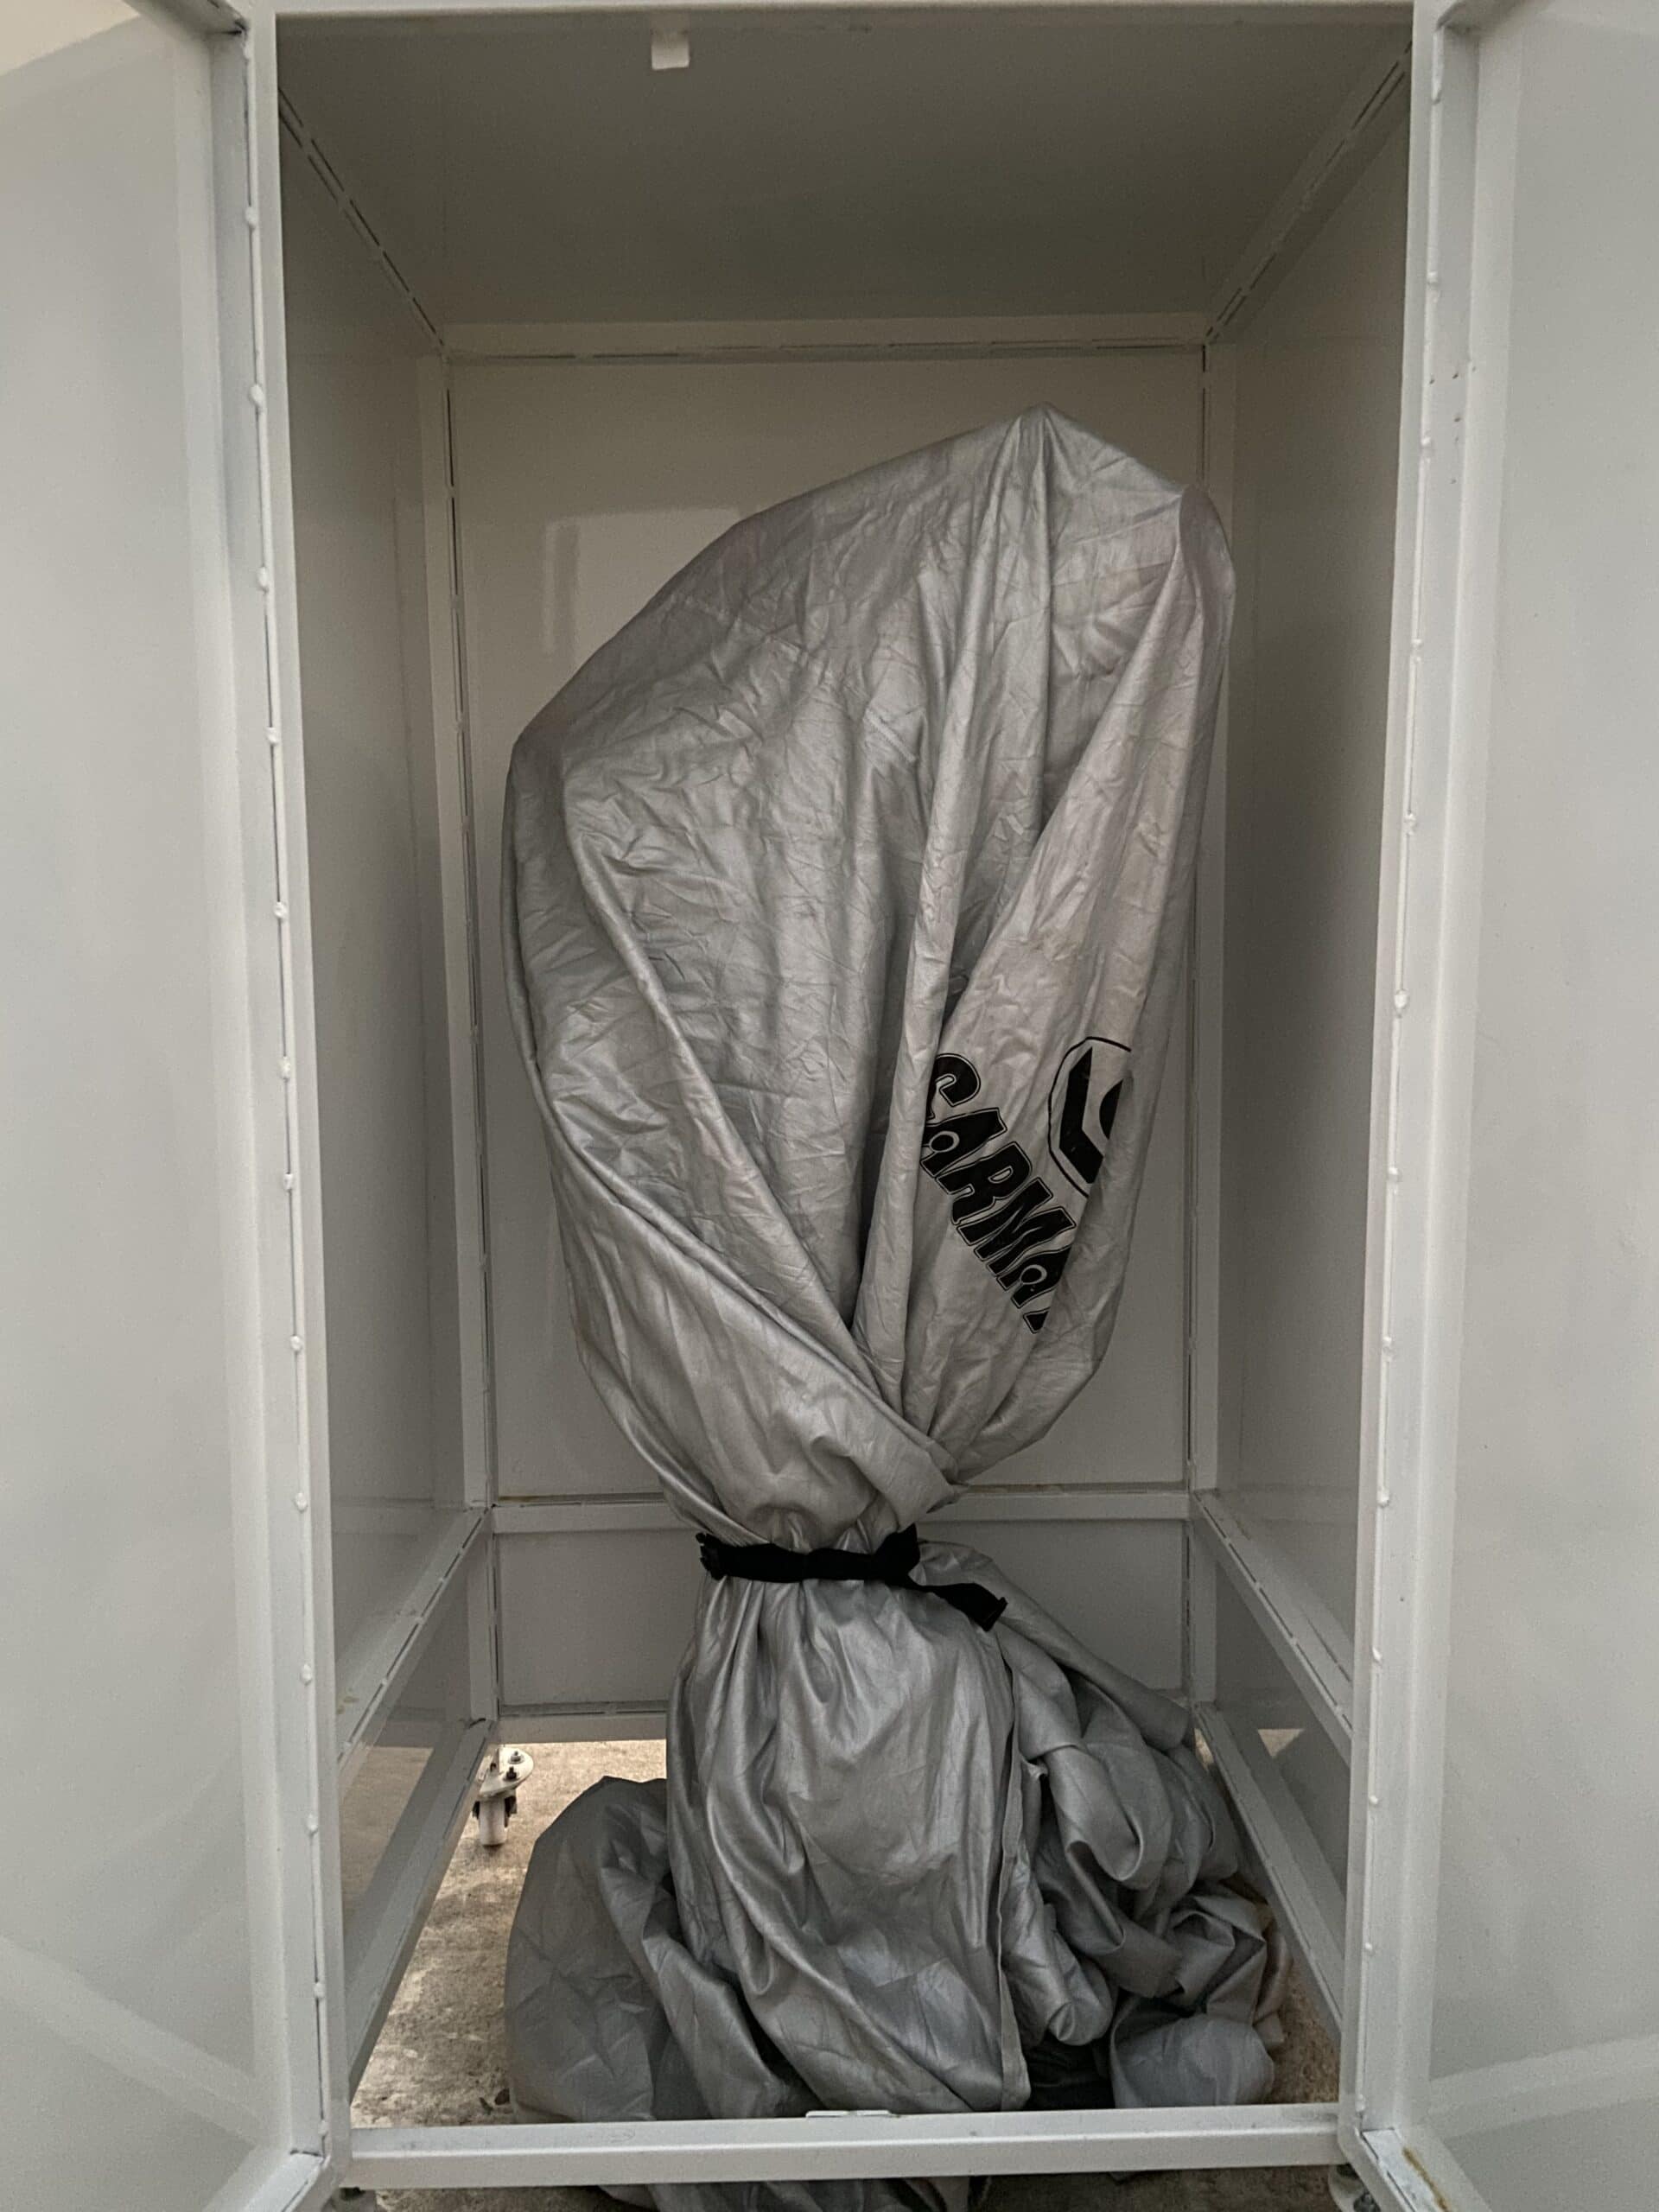
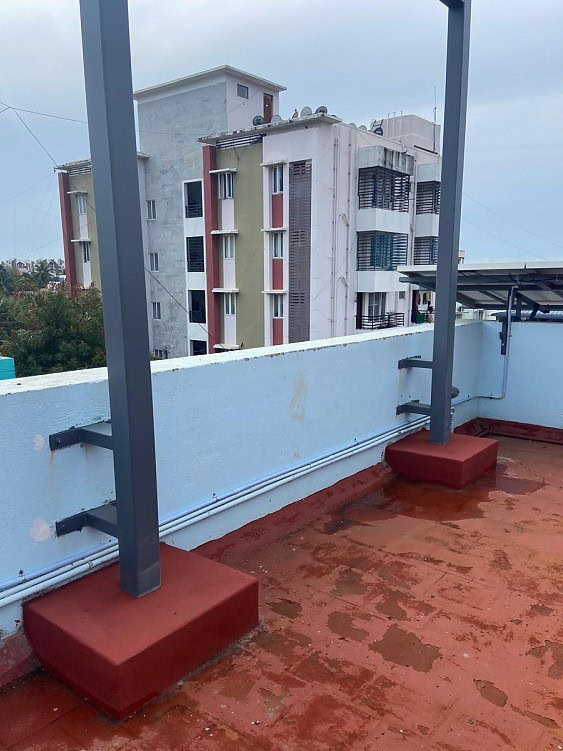
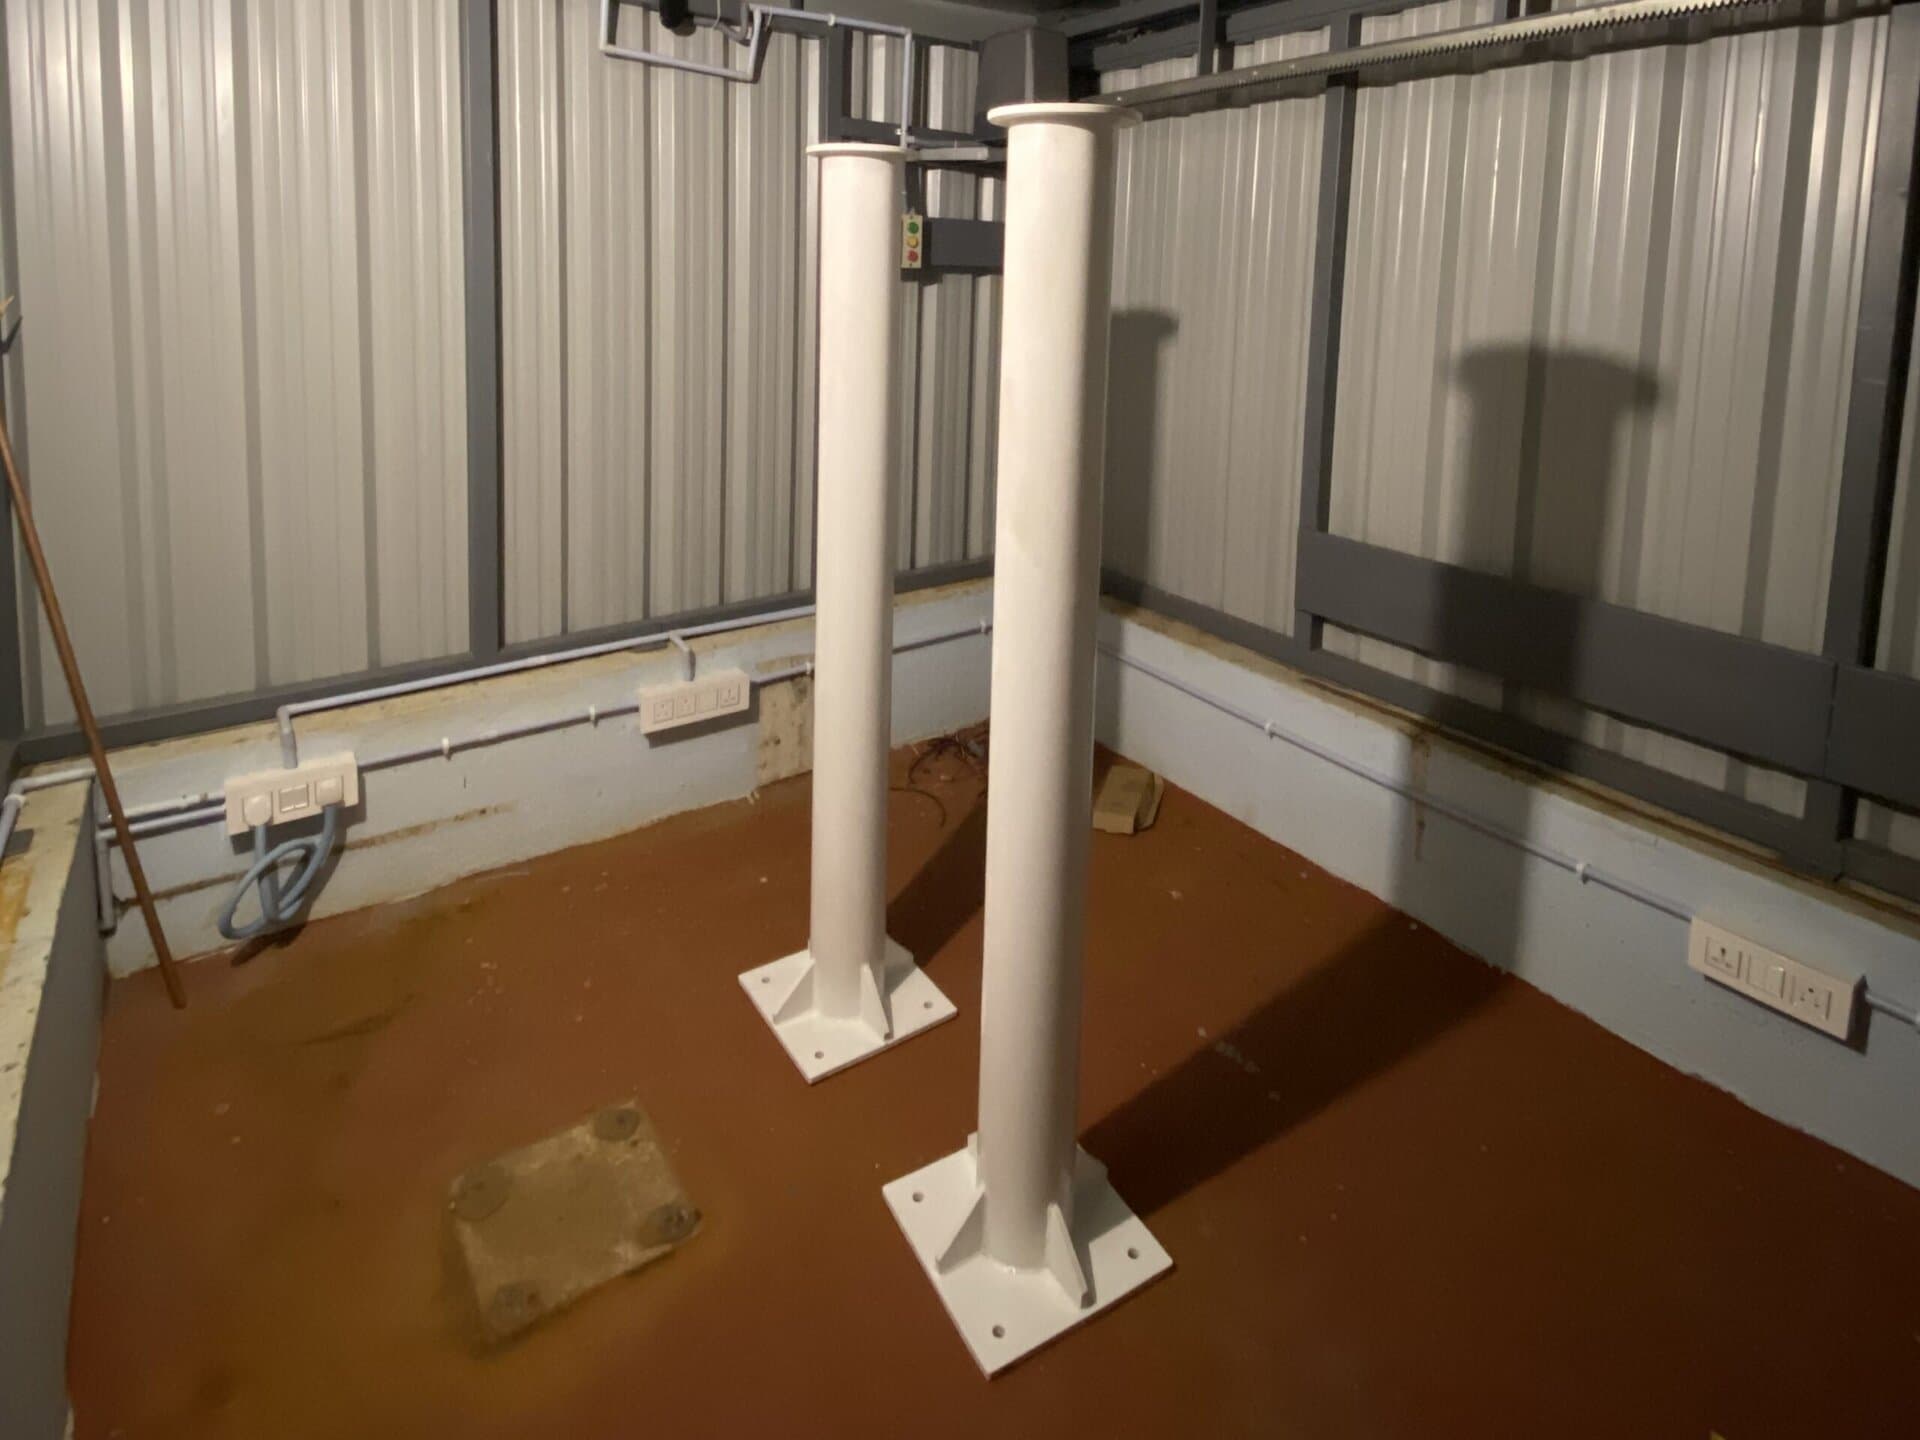
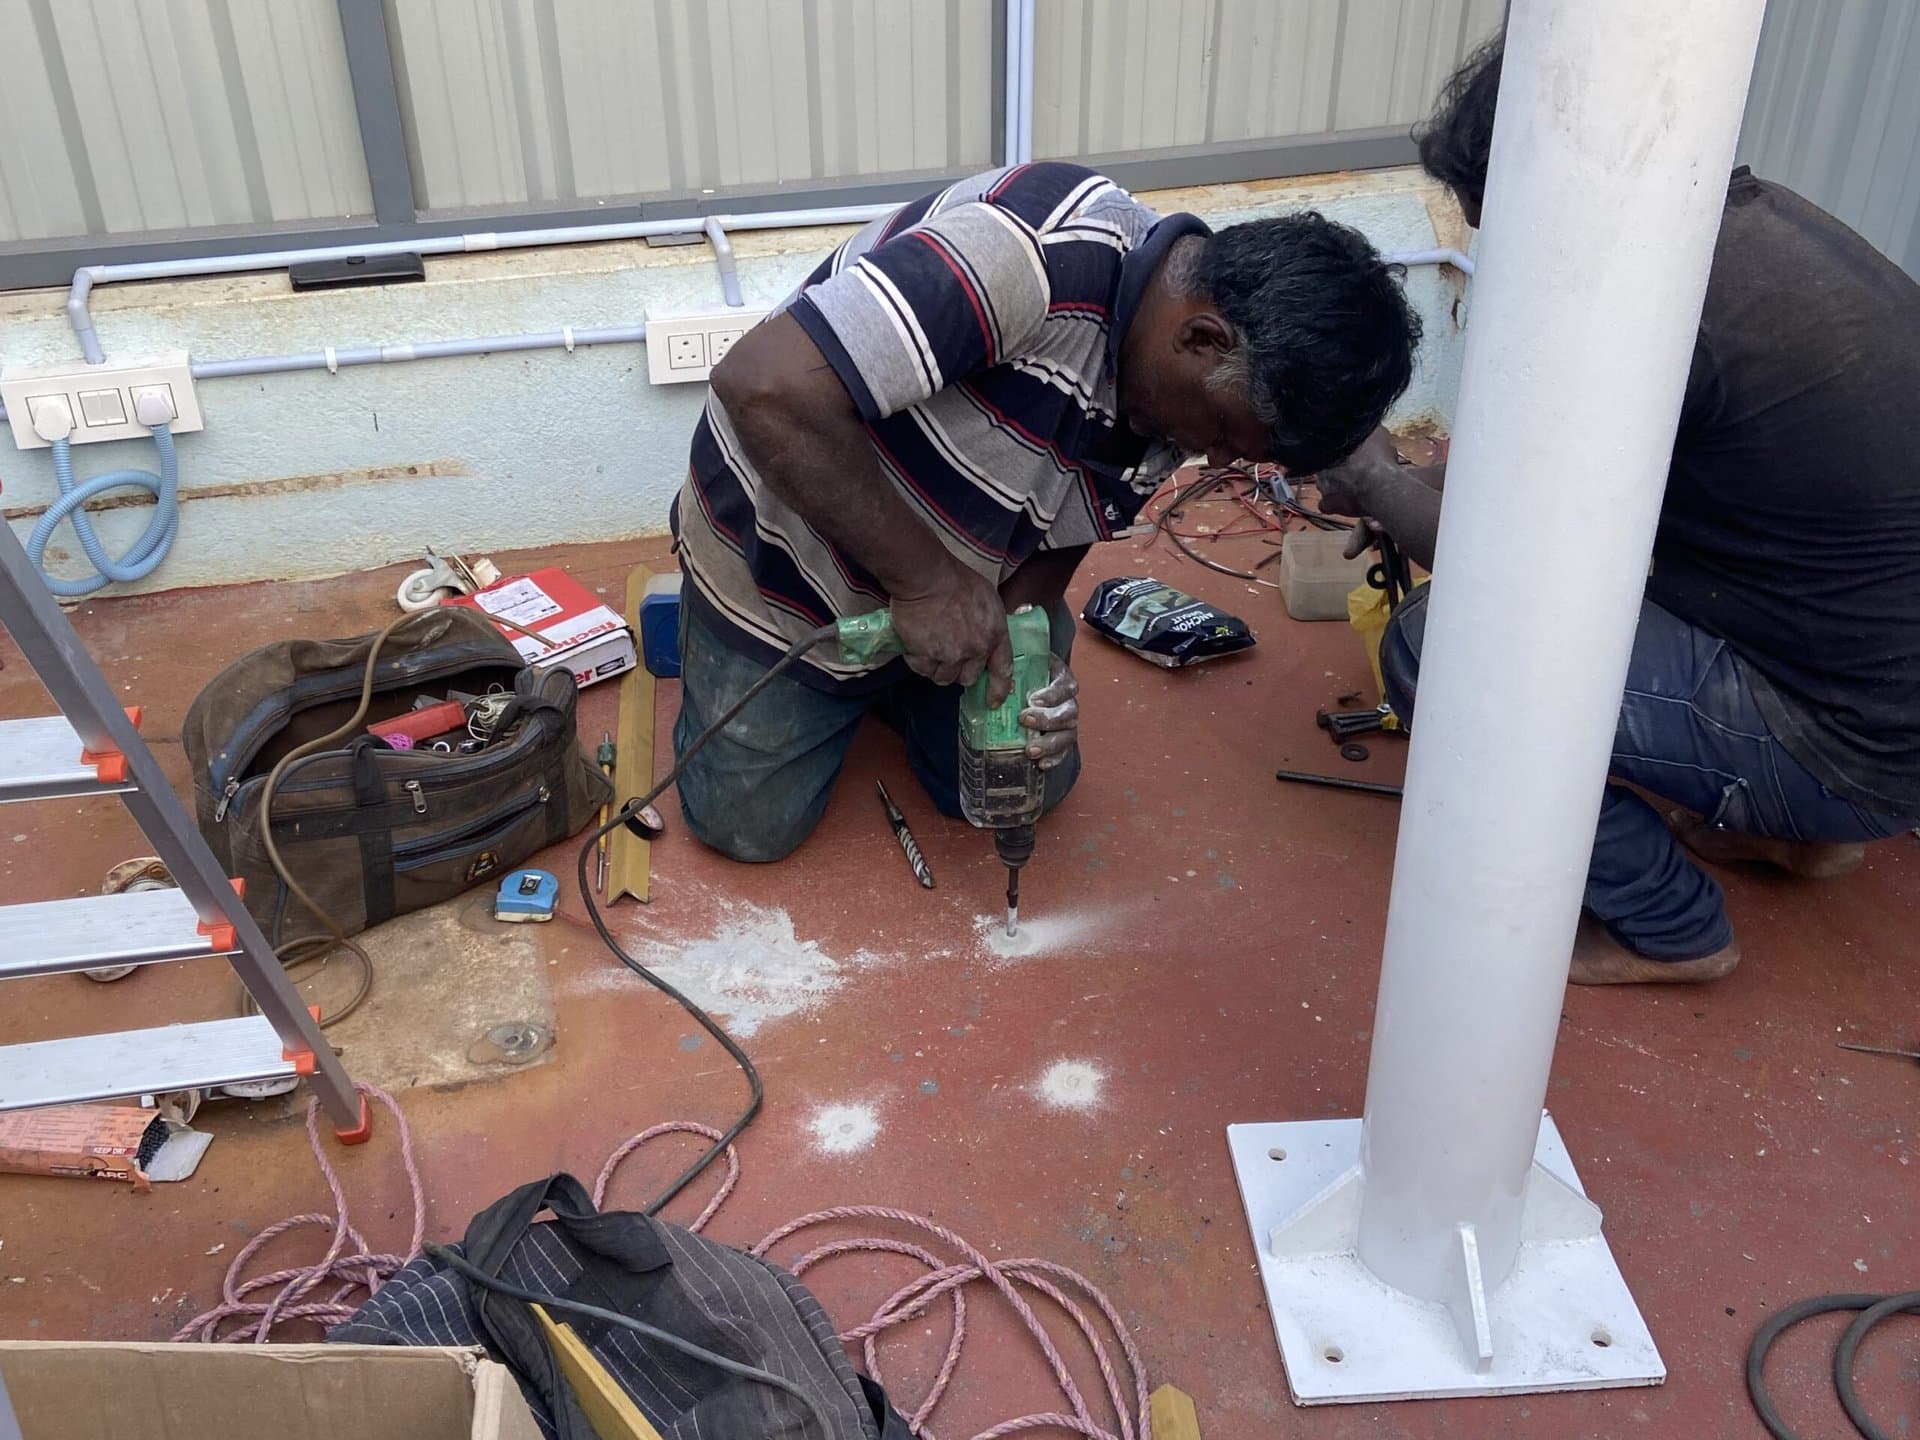
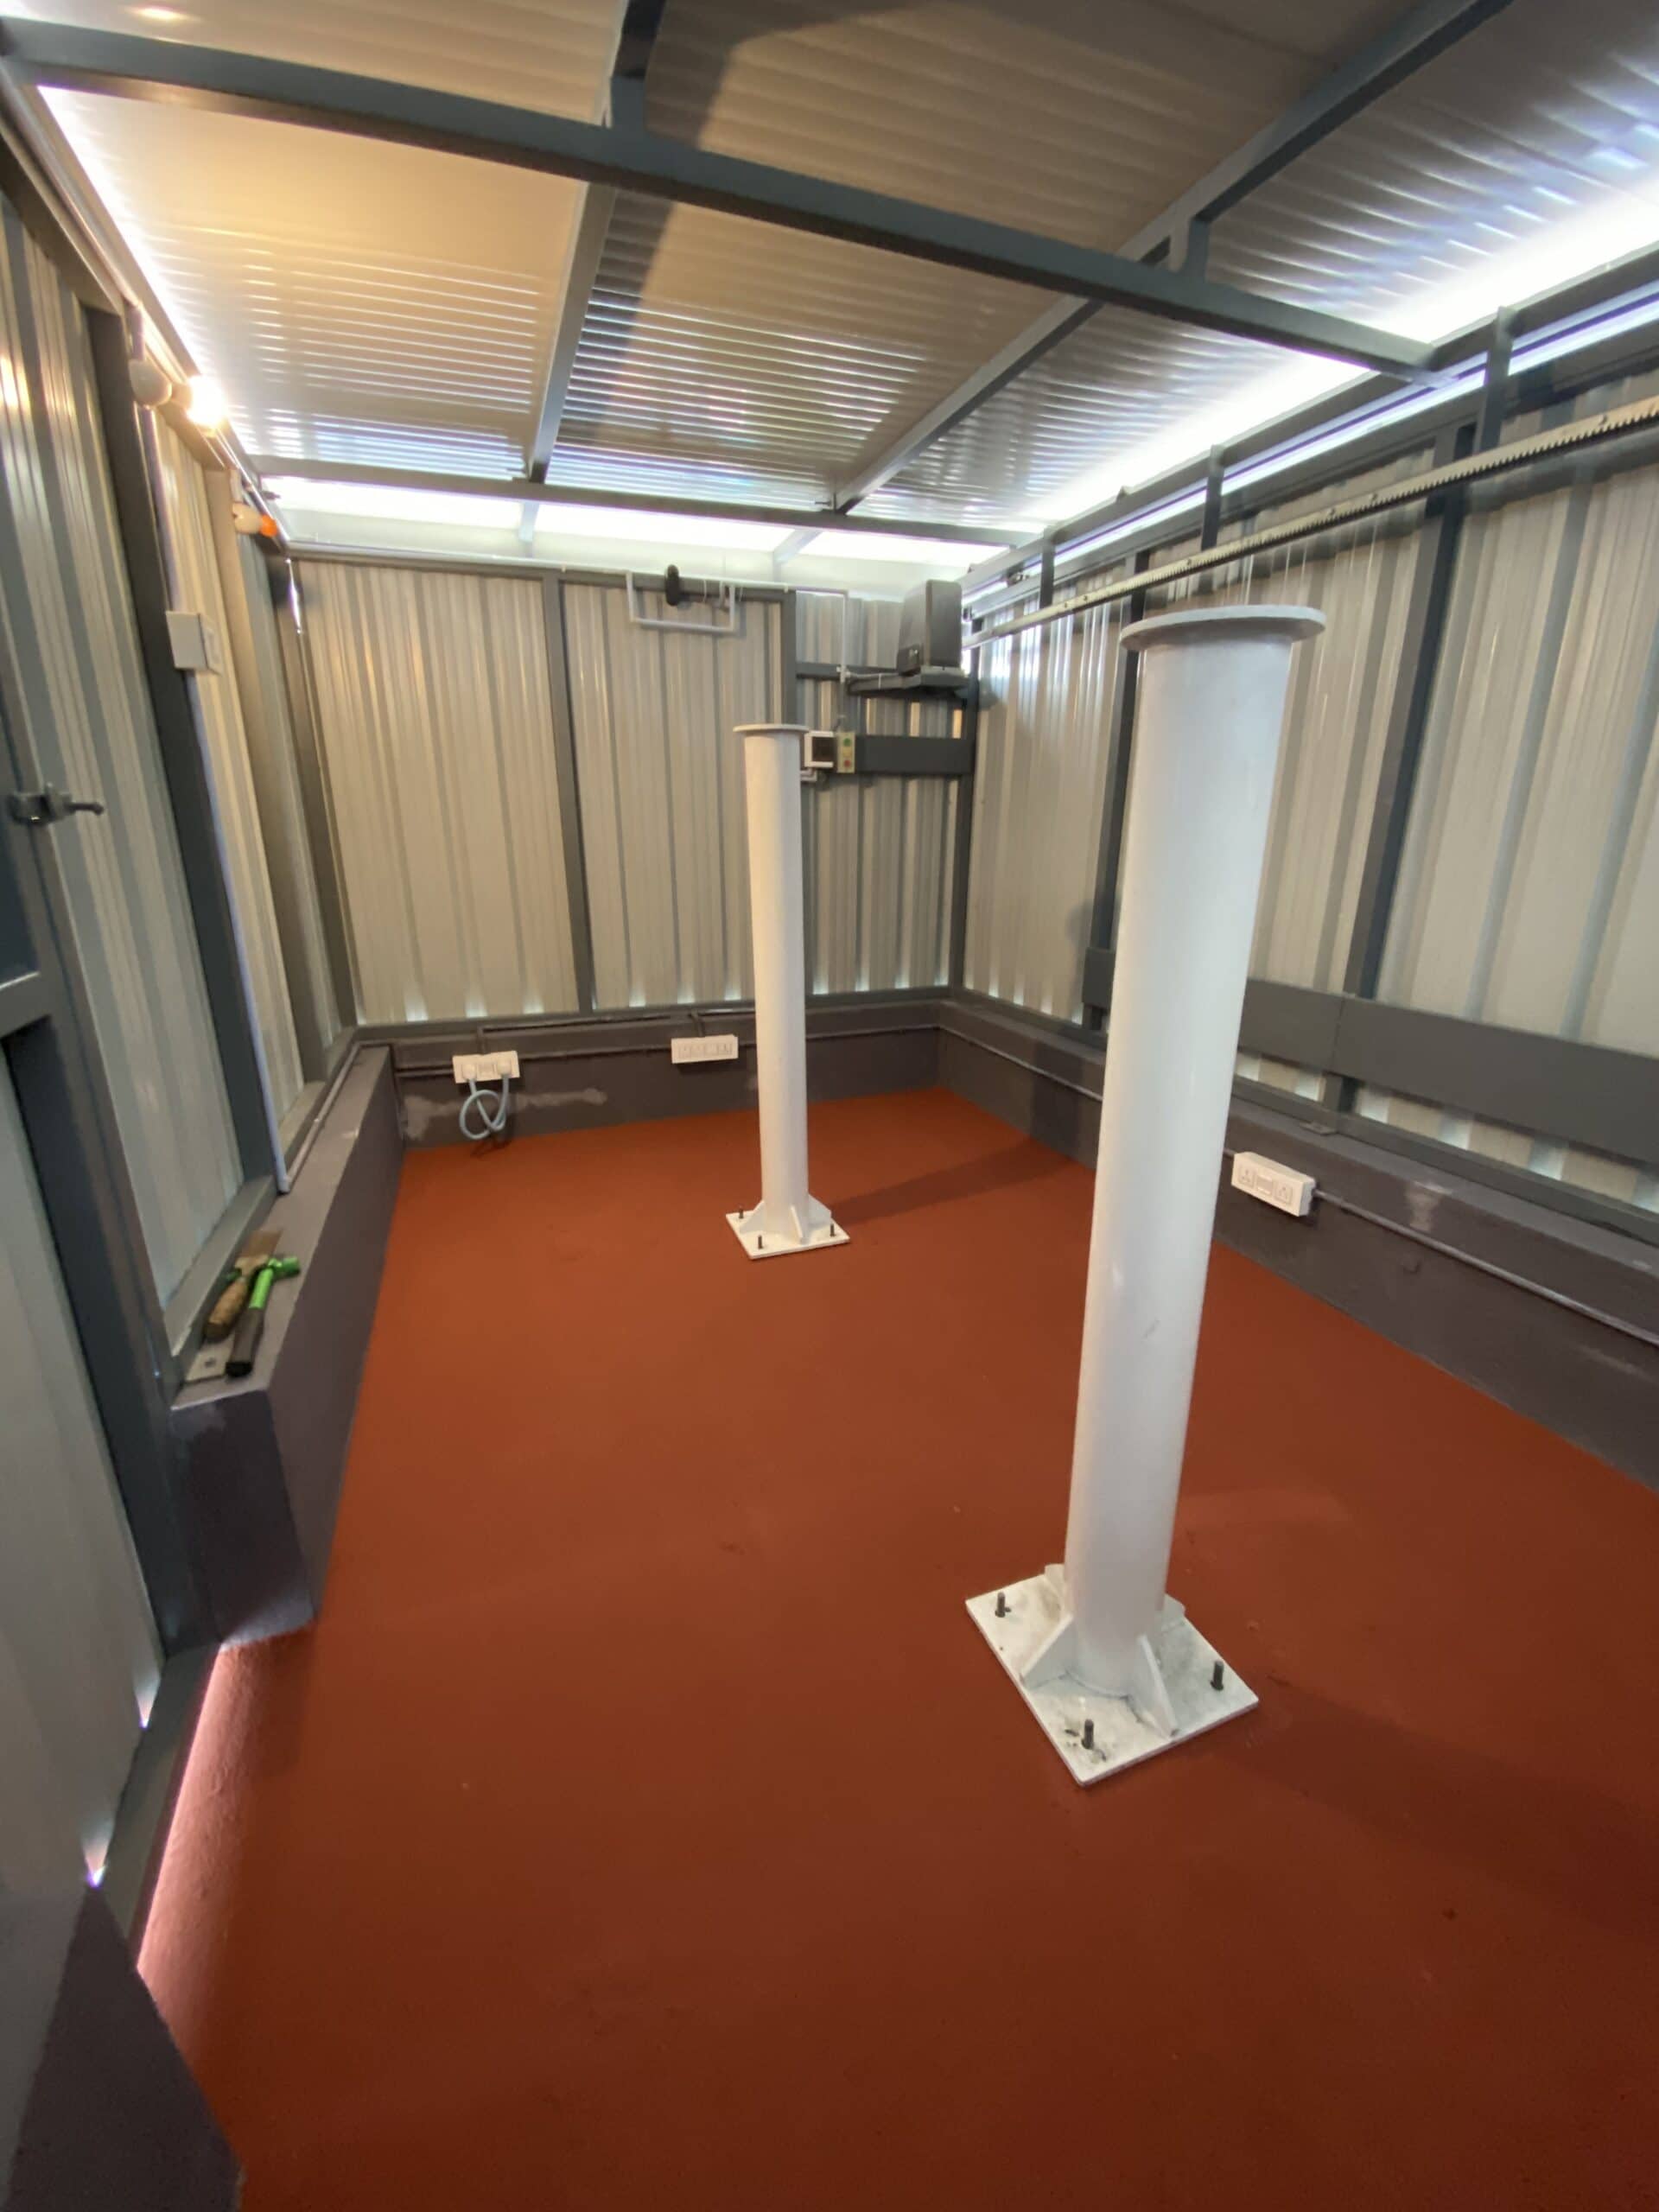
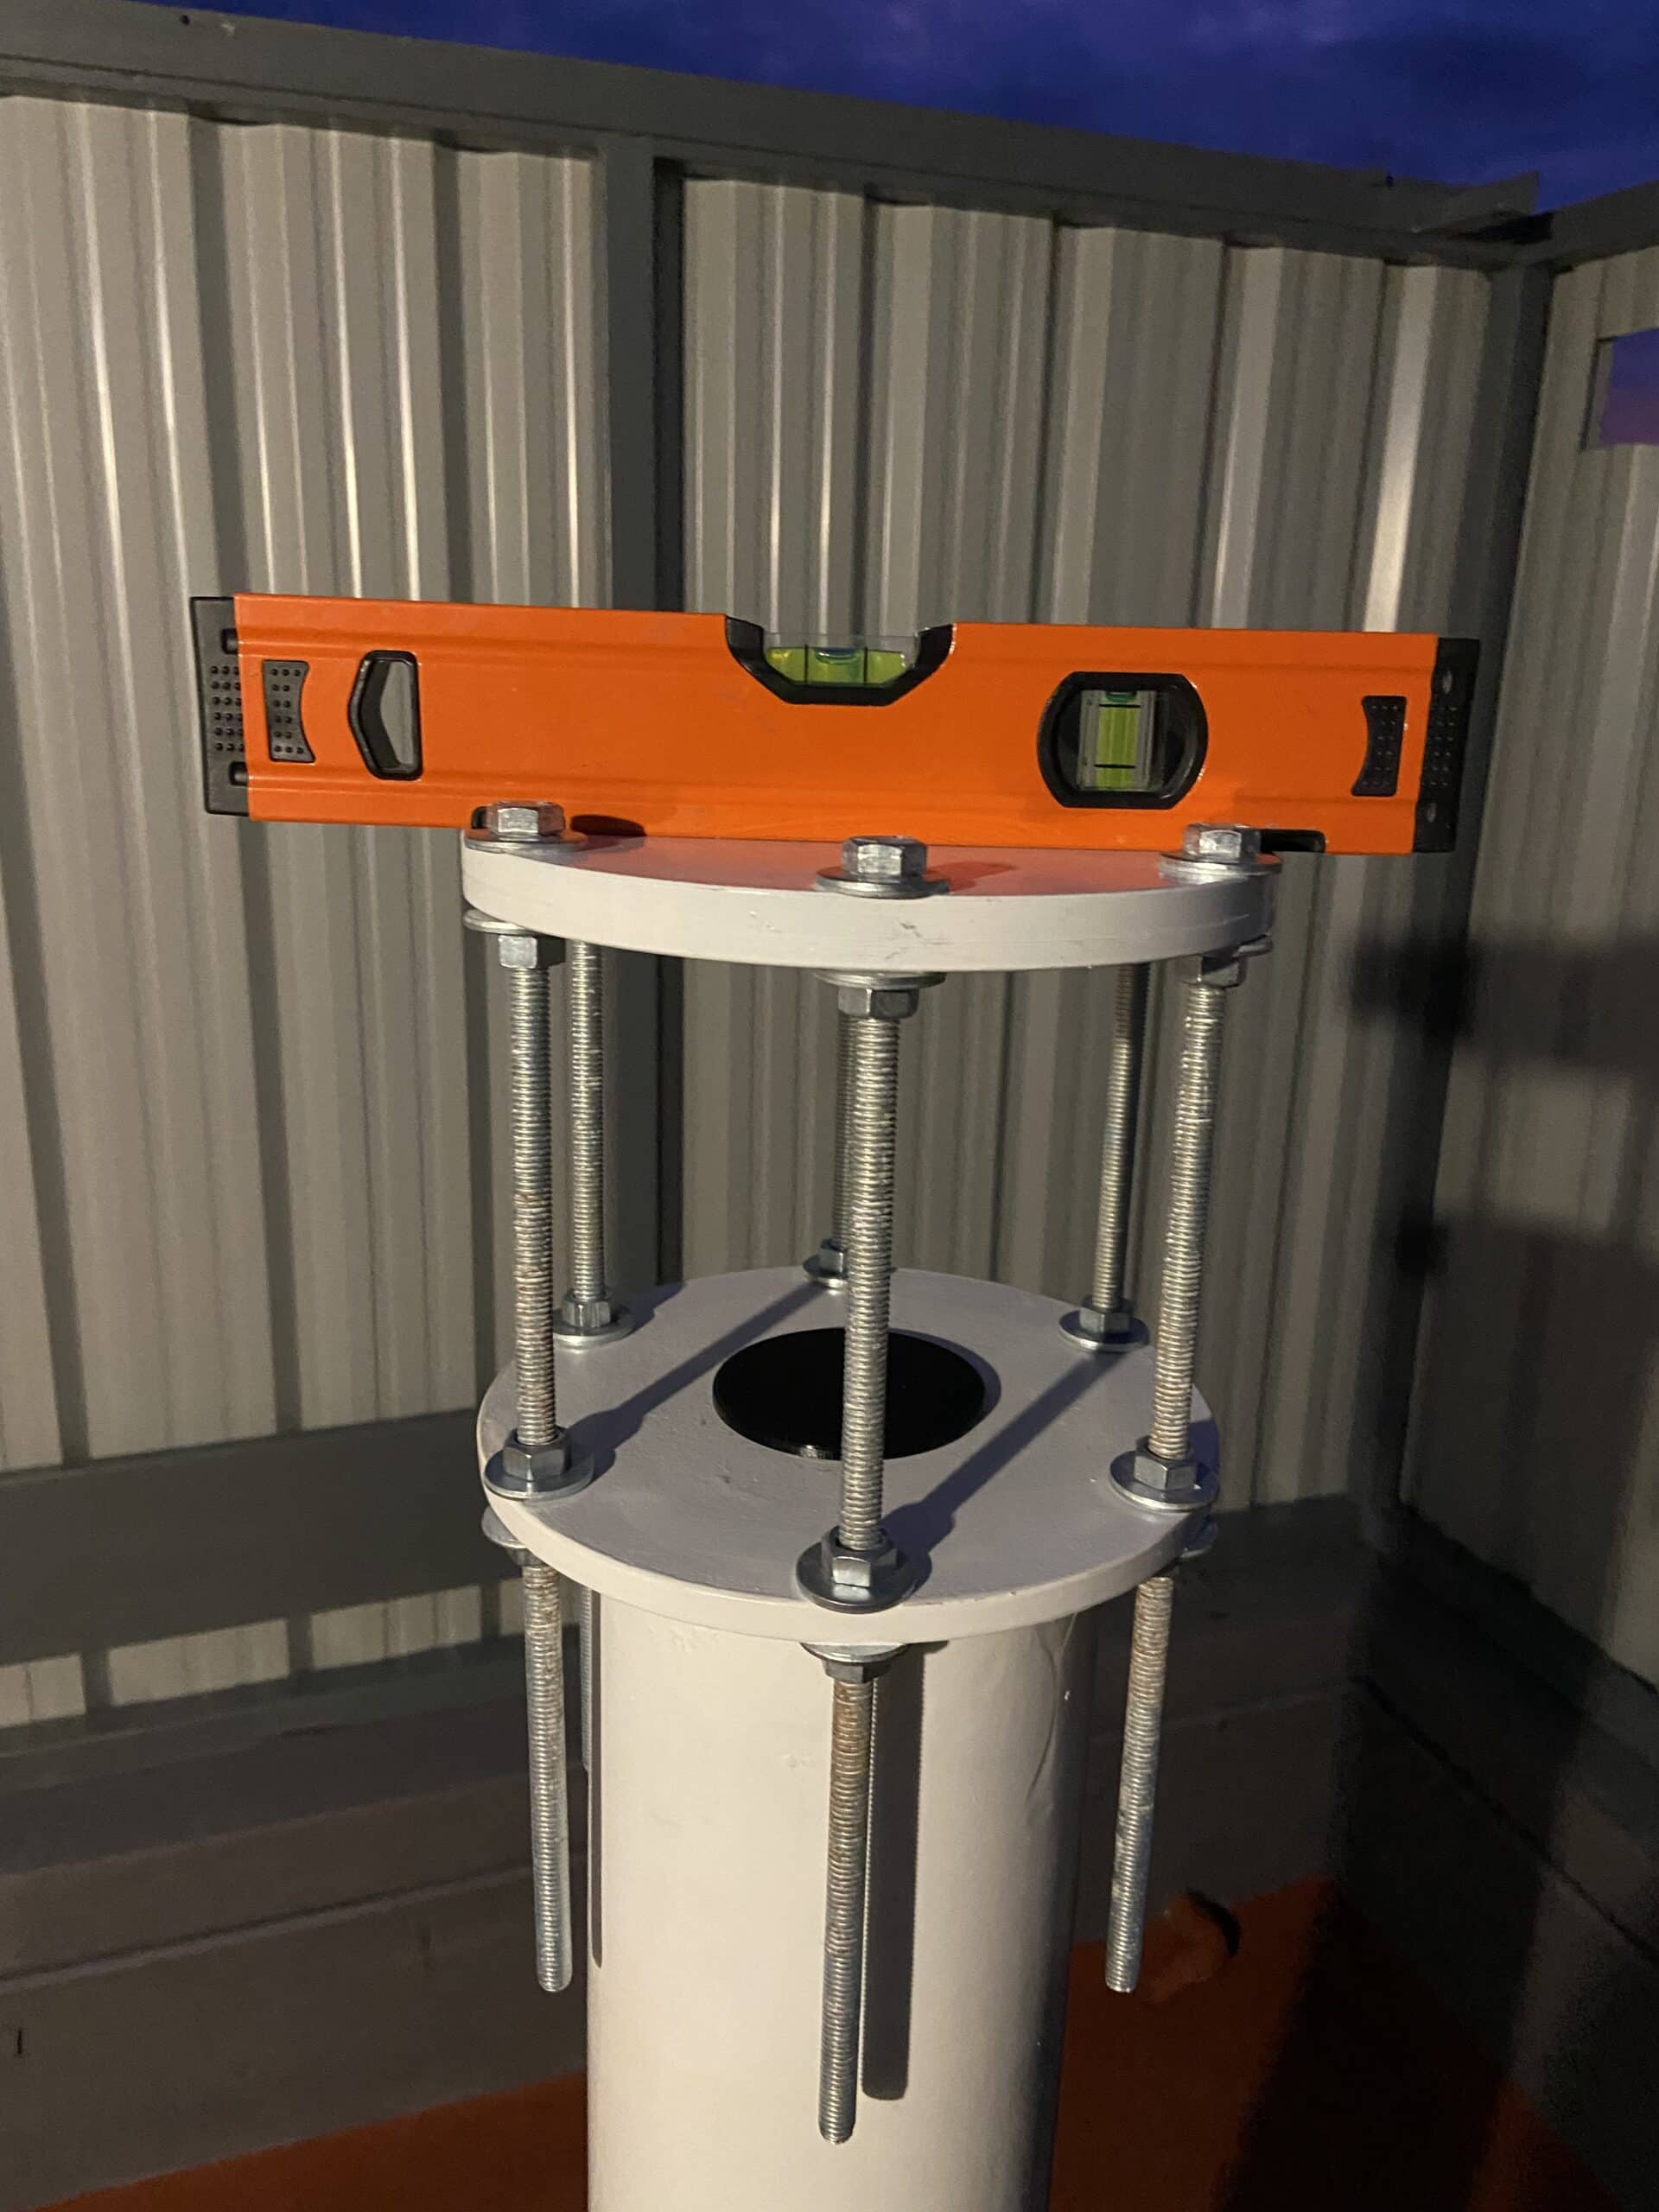
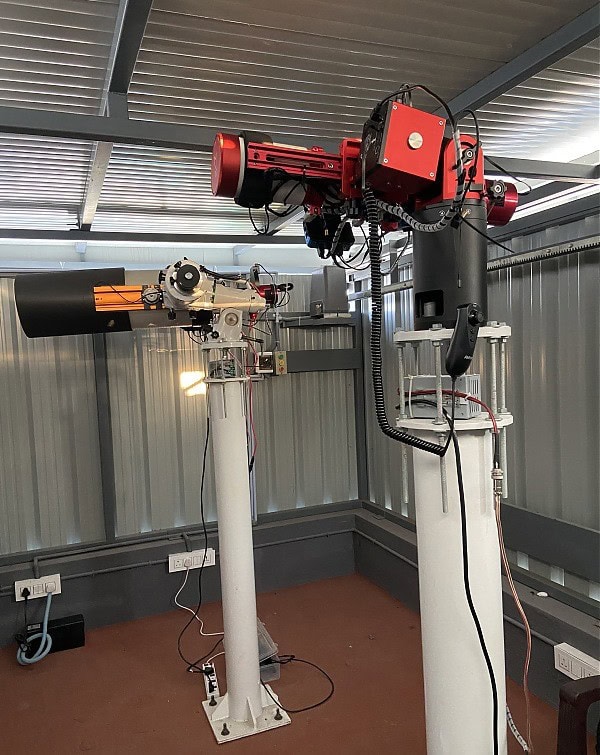
Installing the Piers, and Telescopes
The next step was to install the piers that will hold the mounts and telescopes. With my earlier rolling enclosure setup, I had a short pier which was about 2.5 feet in height. As the walls of the observatory are 6.5′ in height, I needed taller piers that will raise the telescopes above the walls when deployed. So, I got two new piers fabricated. These piers are bolted to the floor using 4 bolts using anchor grout. Below are a few pictures of the pier installation.

Final Result
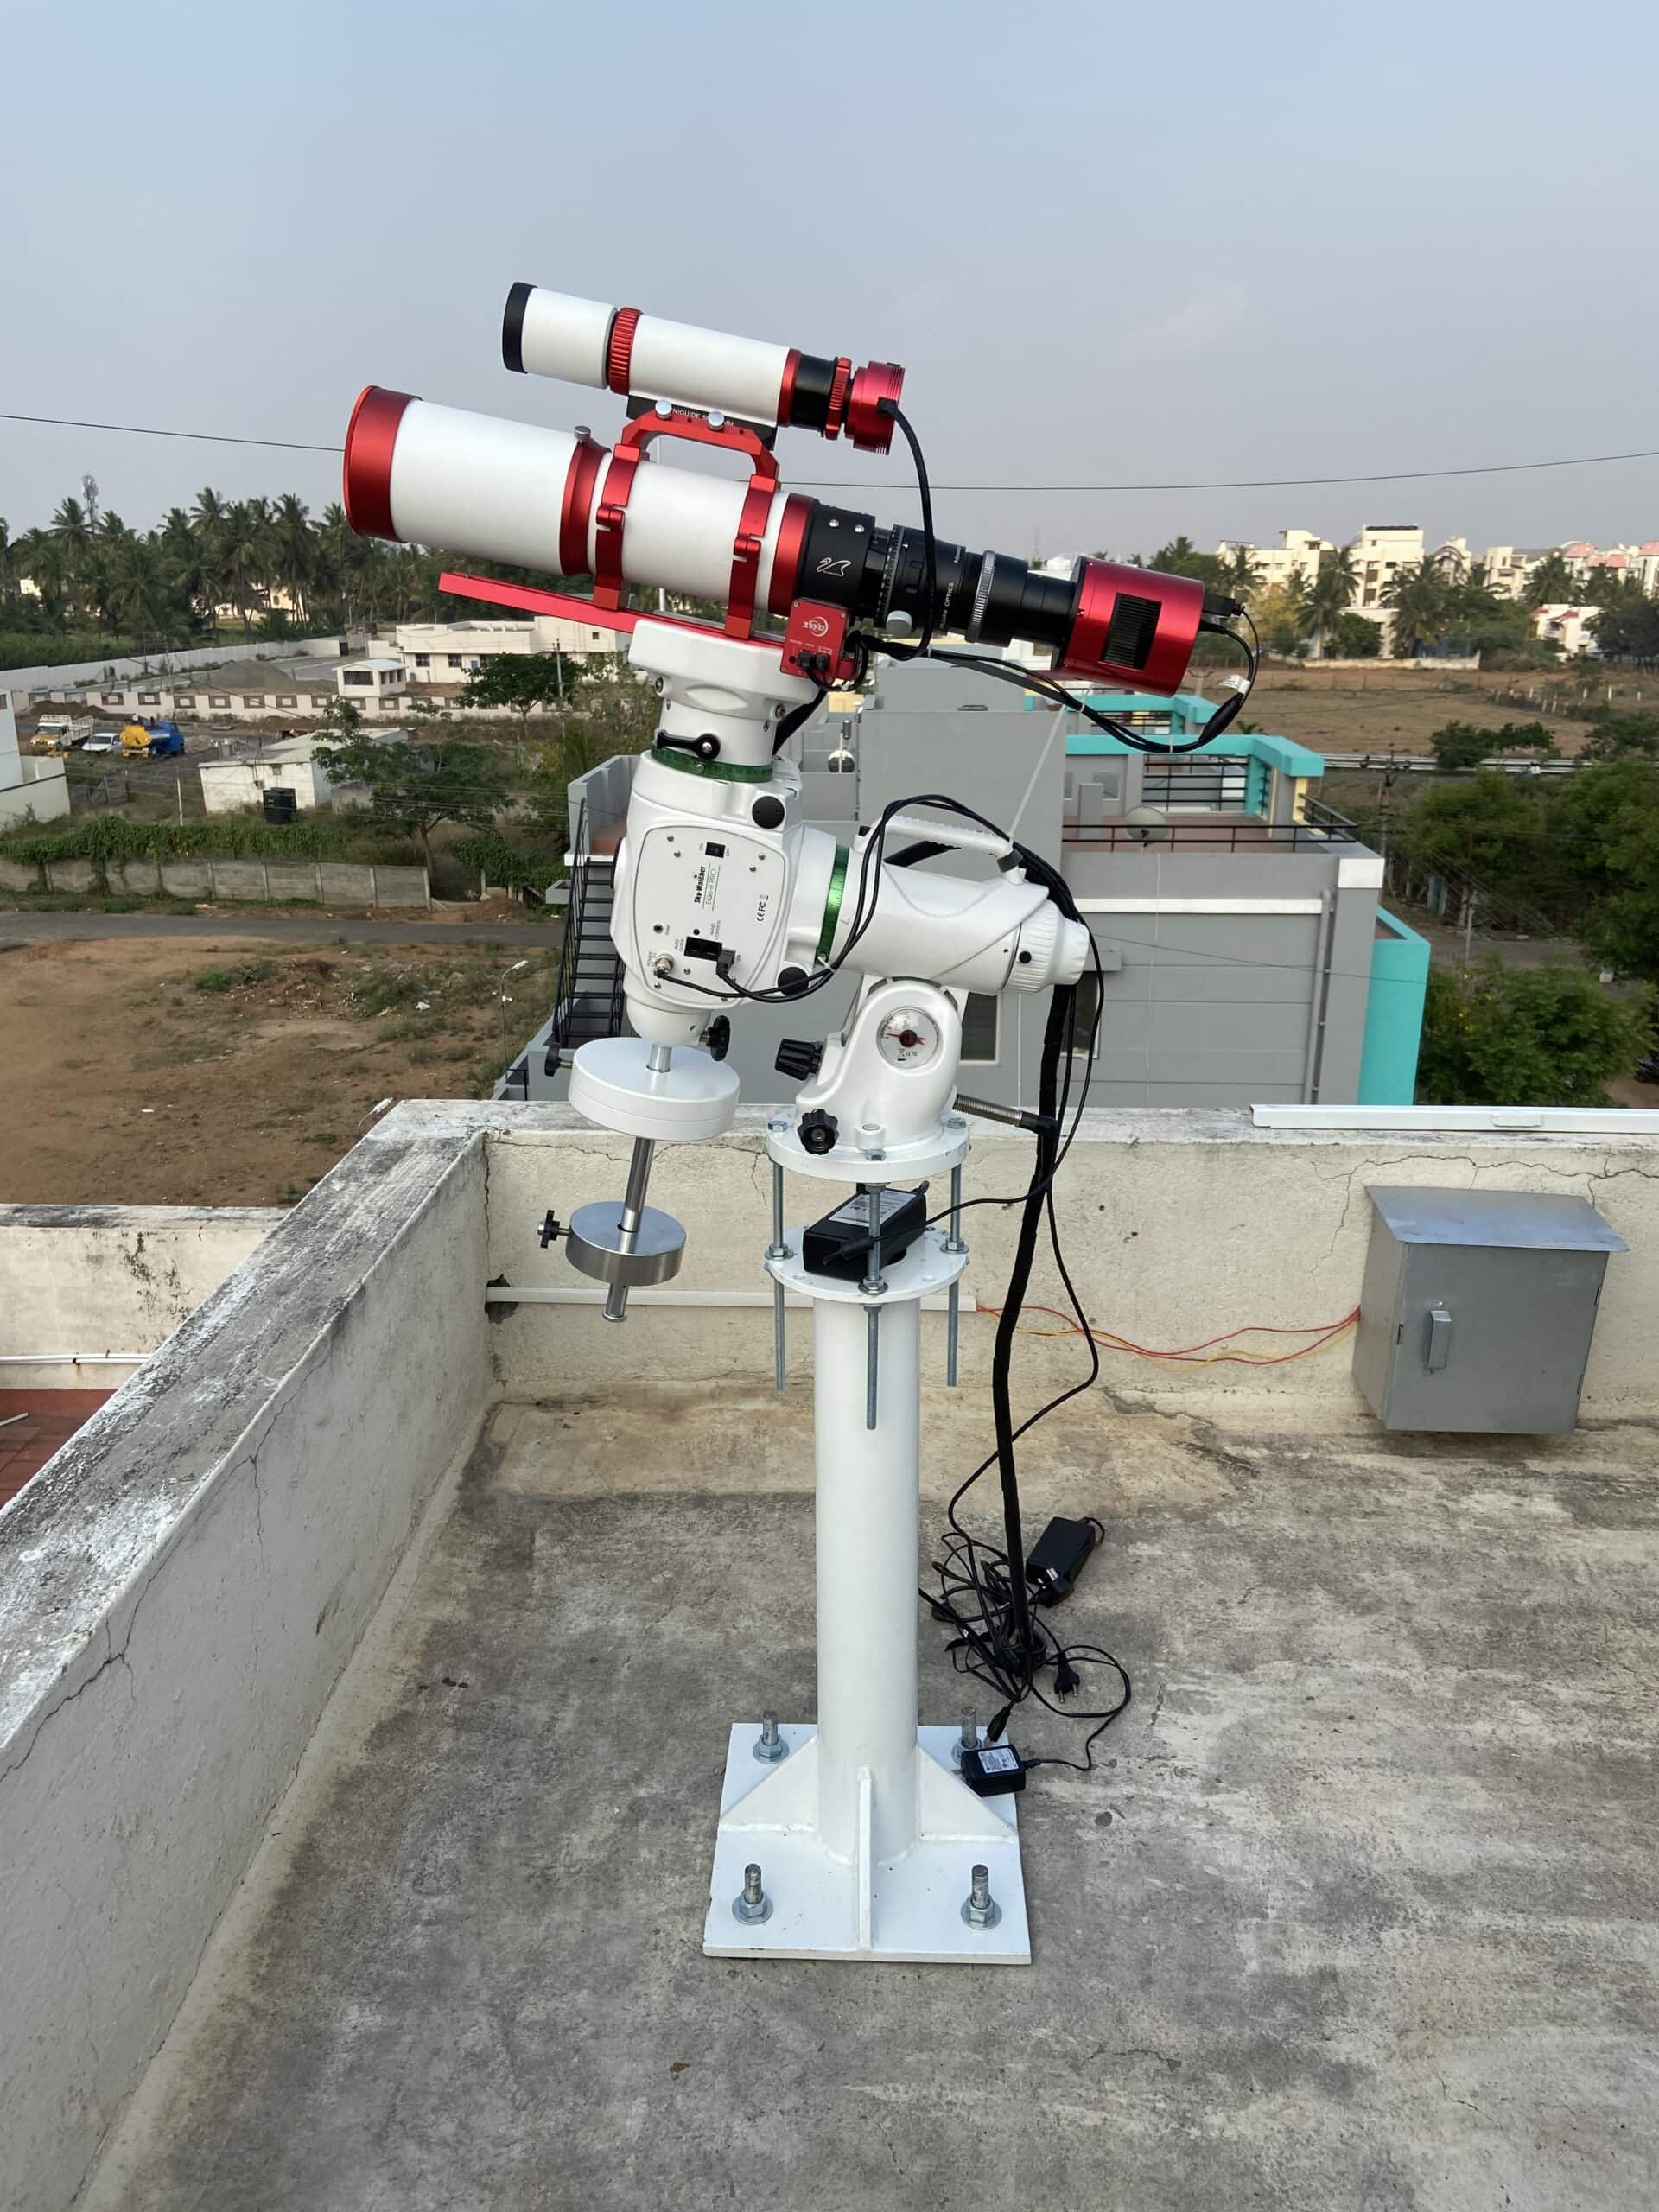
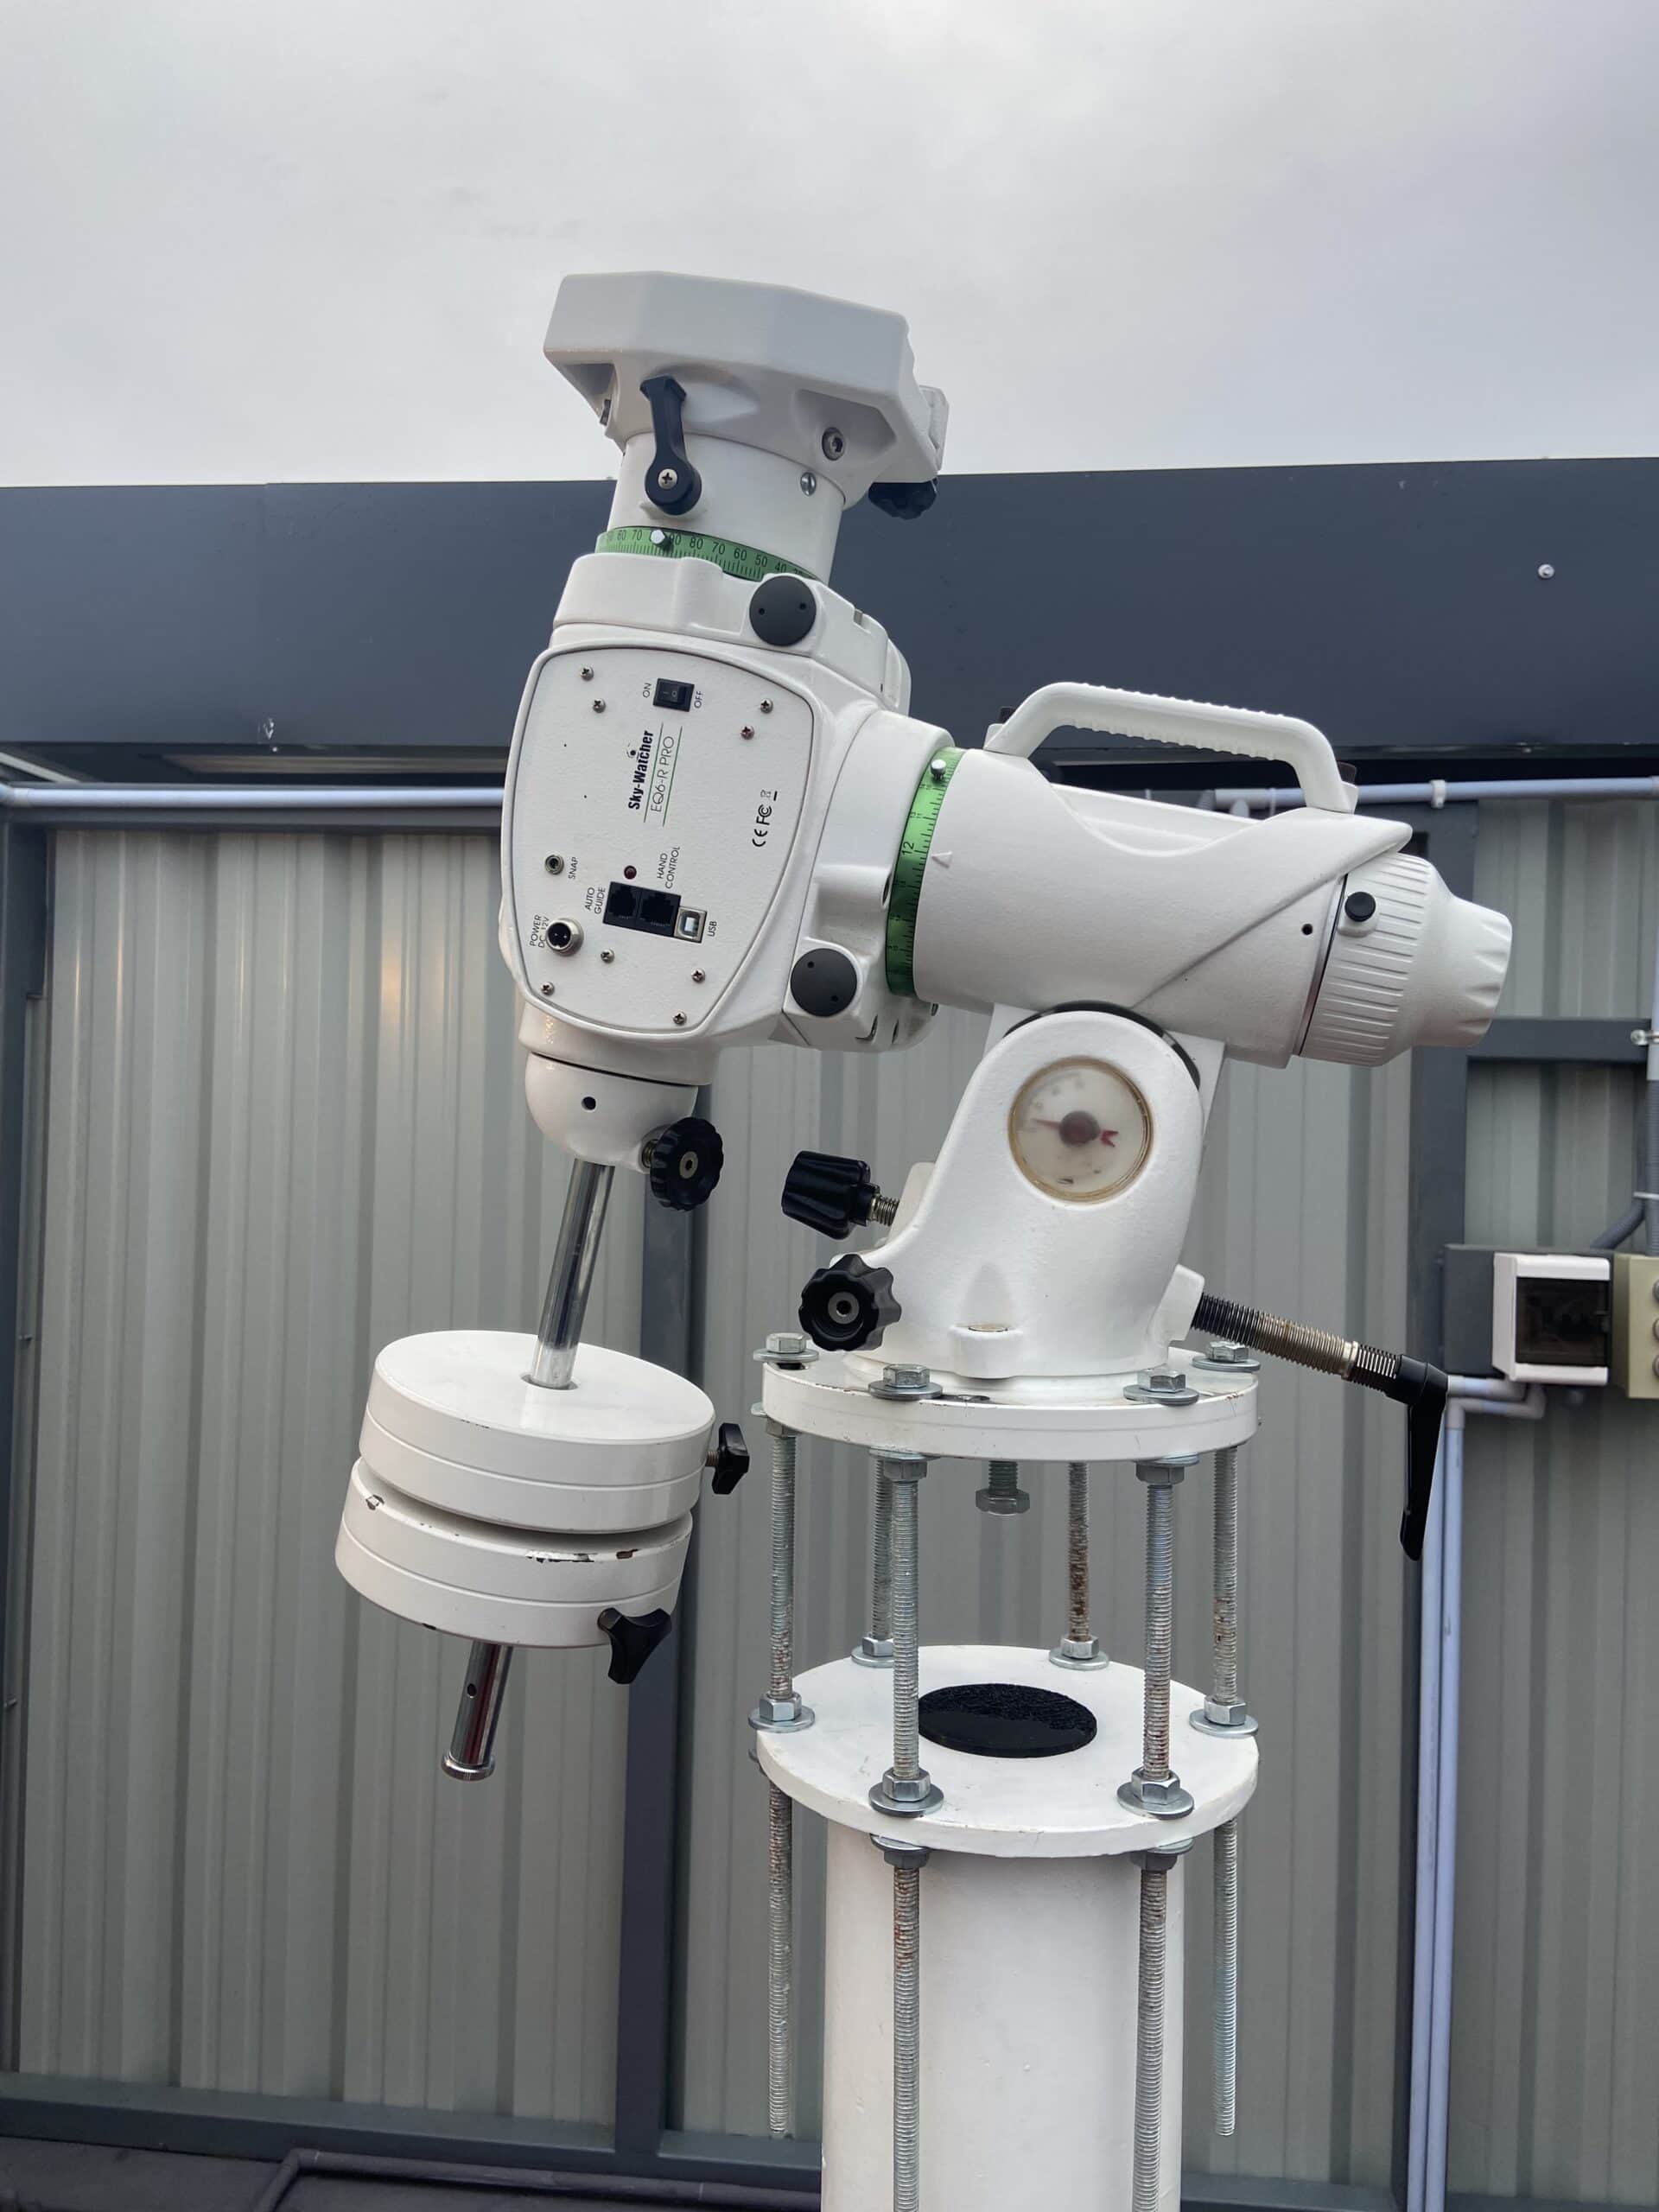
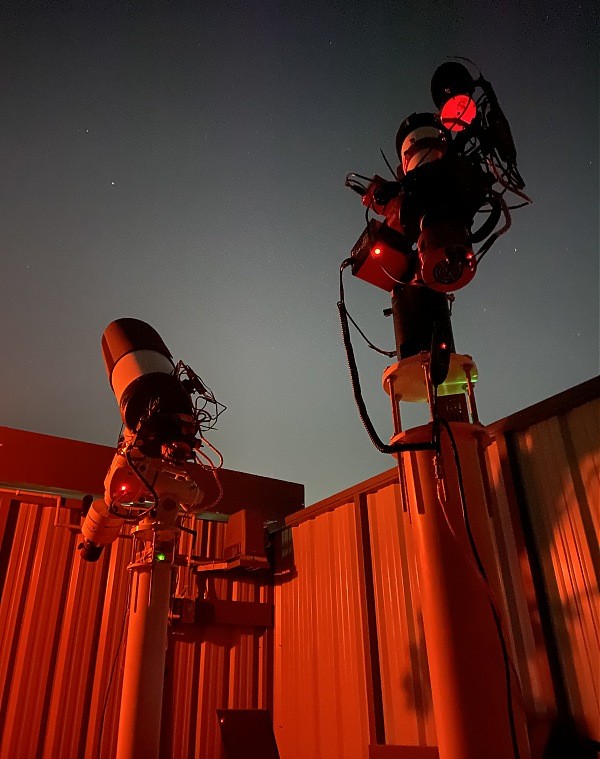
Once the piers were installed and the mounts installed on the pier, I fixed the telescopes and completed the wiring, and the setups were ready for action. In the below pictures, an EdgeHD 9.25 with monochrome camera setup is mounted on the EQ-6 R Pro mount, and a William Optics GT-81 refractor telescope with a color camera setup is mounted on the ZWO AM5 harmonic mount.
Closing this article with the video below that shows various stages of the construction of the roll-off roof observatory. I will write about various targets that I capture from the observatory in future articles.
Discover more from graaja.blog
Subscribe to get the latest posts sent to your email.
Great!
Top damn good. Way out of my league.Cheers and God Bless???